As part of this summer’s quest for a swim top/bra I agreed to test the re-release of the Agility by 5 out of 4. I am pleased they are including more sizes in their pattern options.

This is advertised as a tank and dress, and it makes a great racer back bra too. Loving the Taylor dress that calls for a racer back bra for those of us who prefer to keep our straps under wraps. There is a strapped version and a T-back version. I made the strapped version.
I had a small piece of this mystery knit that worked nicely with some Nylon Spandex I bought to make swim tops to serve double duty as a comfortable bra. Wicking fabric is really lovely to wear when the mercury rises.
To make this reversible was a super simple process. I added 1/2 inch to the bottom of front and back pieces. Then layered the pieces in this order to sew the side seams:
- print back right side up
- print front right side down
- solid front right side up
- solid back right side down.
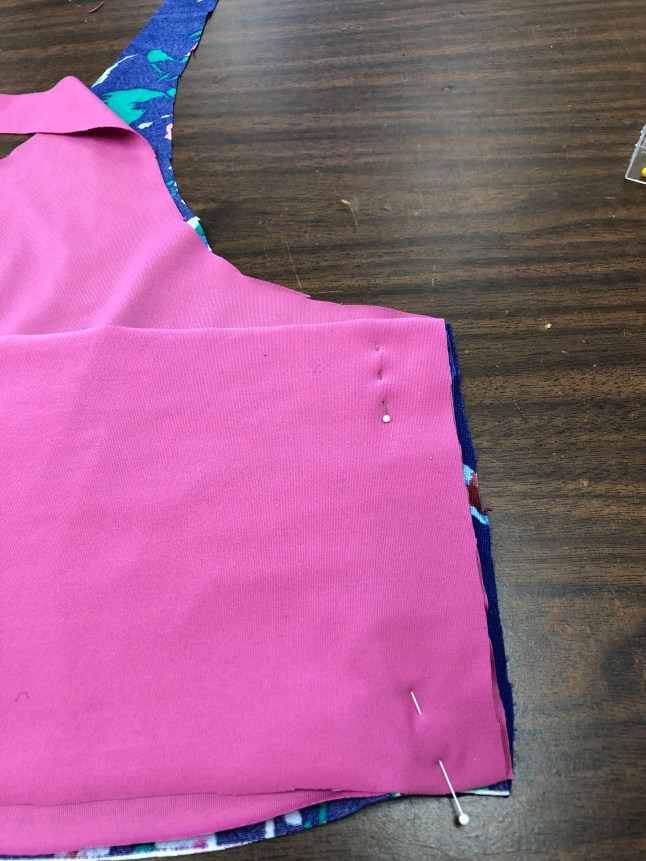
This was a great way to enclose those side seams, but created a little extra bulk when stitching the elastic in a later step. Next time, I will sew them separately then press open before stay stitching the edges.
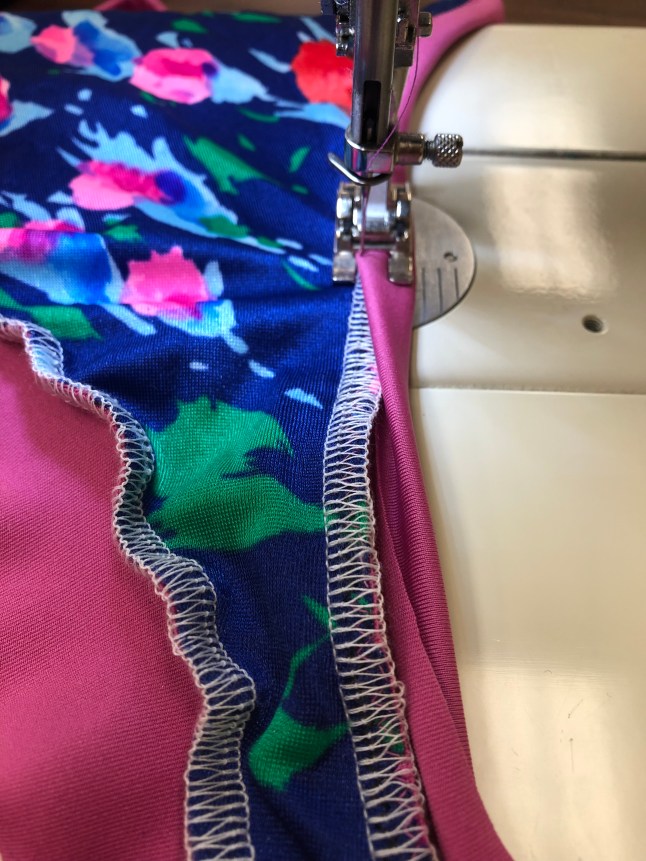
Zig zag basting on the edge makes for a great stay stitching that stretches, and saves time ripping later. The open toed embroidery foot, or #20 on a Bernina works wonders here. I zigged and zagged my way all around the edges.


I sewed my straps to one side of the top, then wrapped them around like this. Tip – attach the same fabric on the first sew, so that when you wrap around, you can see where the binding needs to be sewn on the contrast side. If your bobbin threads are a little wonky, be sure they match the other side. I left the back of the binding un stitched from side seam to side seam, so I could attach the straps later.
I pinned my straps in place – safety pins are best here, as getting this off is an interesting challenge with straight pins. Once I had the fit just right, I stitched the straps down like this.
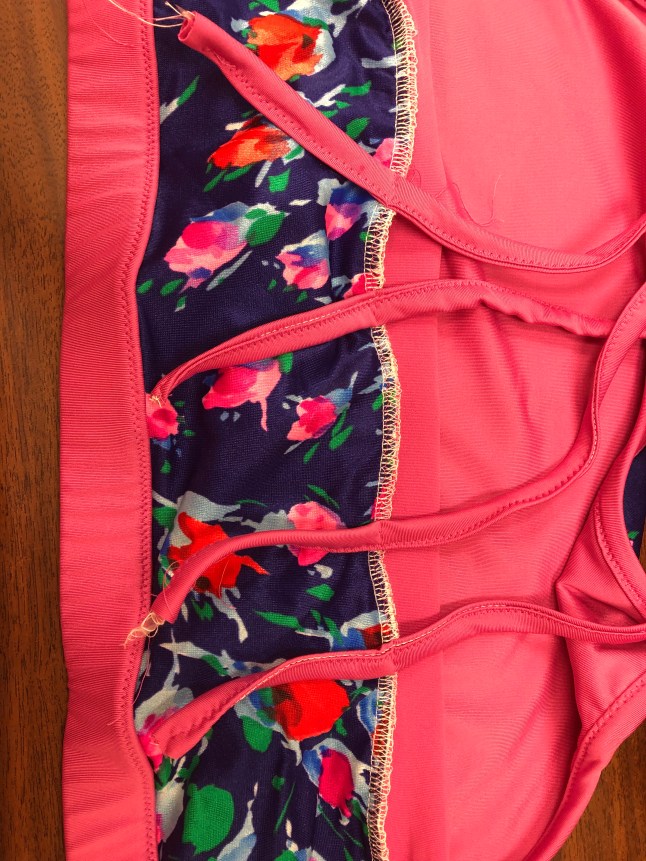
Then I clipped off the ends close to stitching, folded them down and wrapped the binding where it needed to go to match the rest of the bands, and top stitched. Brought the straps back up and stitched across the upper edge of the binding from side seam to side seam just across the back. 
Otherwise, I followed Jessica’s excellent tutorial, then when it came time to flip the elastic to the back side and top stitch, I added a twist.
I serged the ring of elastic to the raw edge of the pink side. Instead of flipping this to the wrong side and top stitching like this,
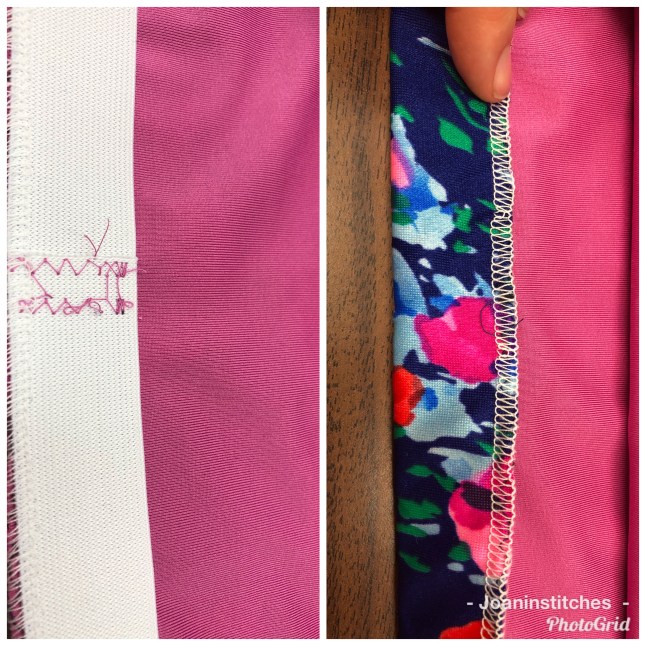
I turned it the other direction, then again to look like this, and top stitched. This is best for lighter weight fabrics, as there is an extra 1/2 inch double folded at the upper edge of the elastic. Working on another way to encase the elastic at the bottom edge with less bulk. more on that in another post!


As long as your strap top stitching passes muster, this could be worn either way!
The blue print is likely to show through when it gets wet, so that will be my swim side. I might line the next one with power mesh or techsheen.
This post contains affiliate links, they cost you no more to use them, and help me on my sewing journey.
Happy Sewing! Joan

2 thoughts on “Easy reversible bra/swim top hack”