Zipless Pullover modification

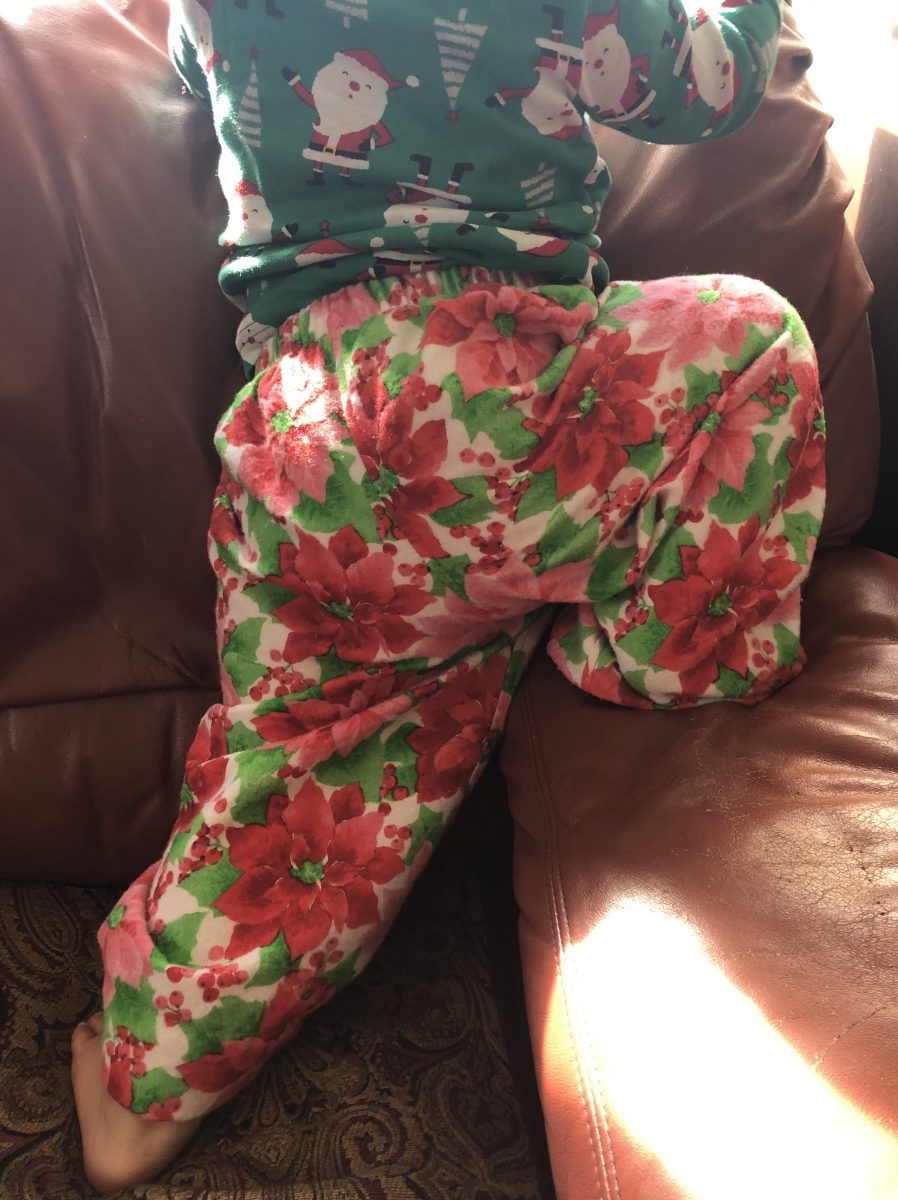
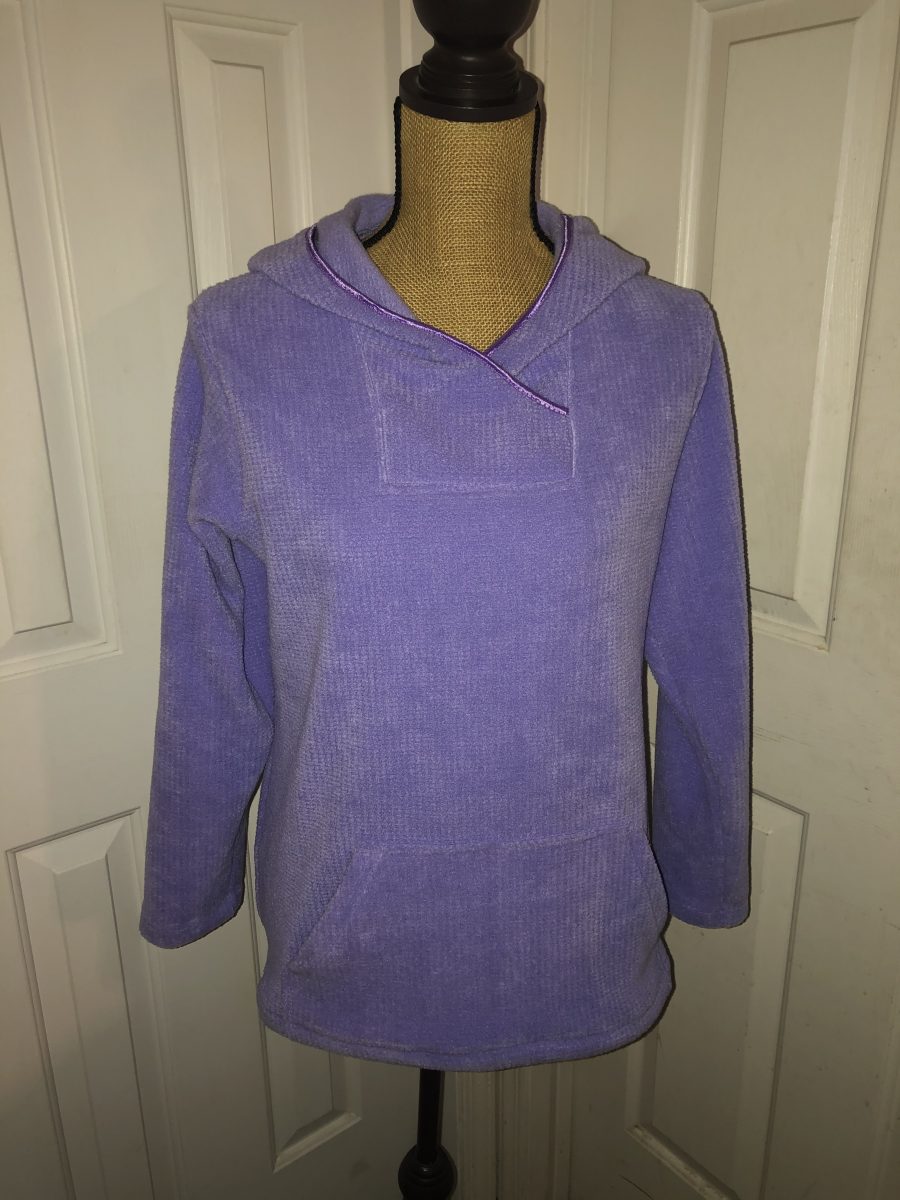
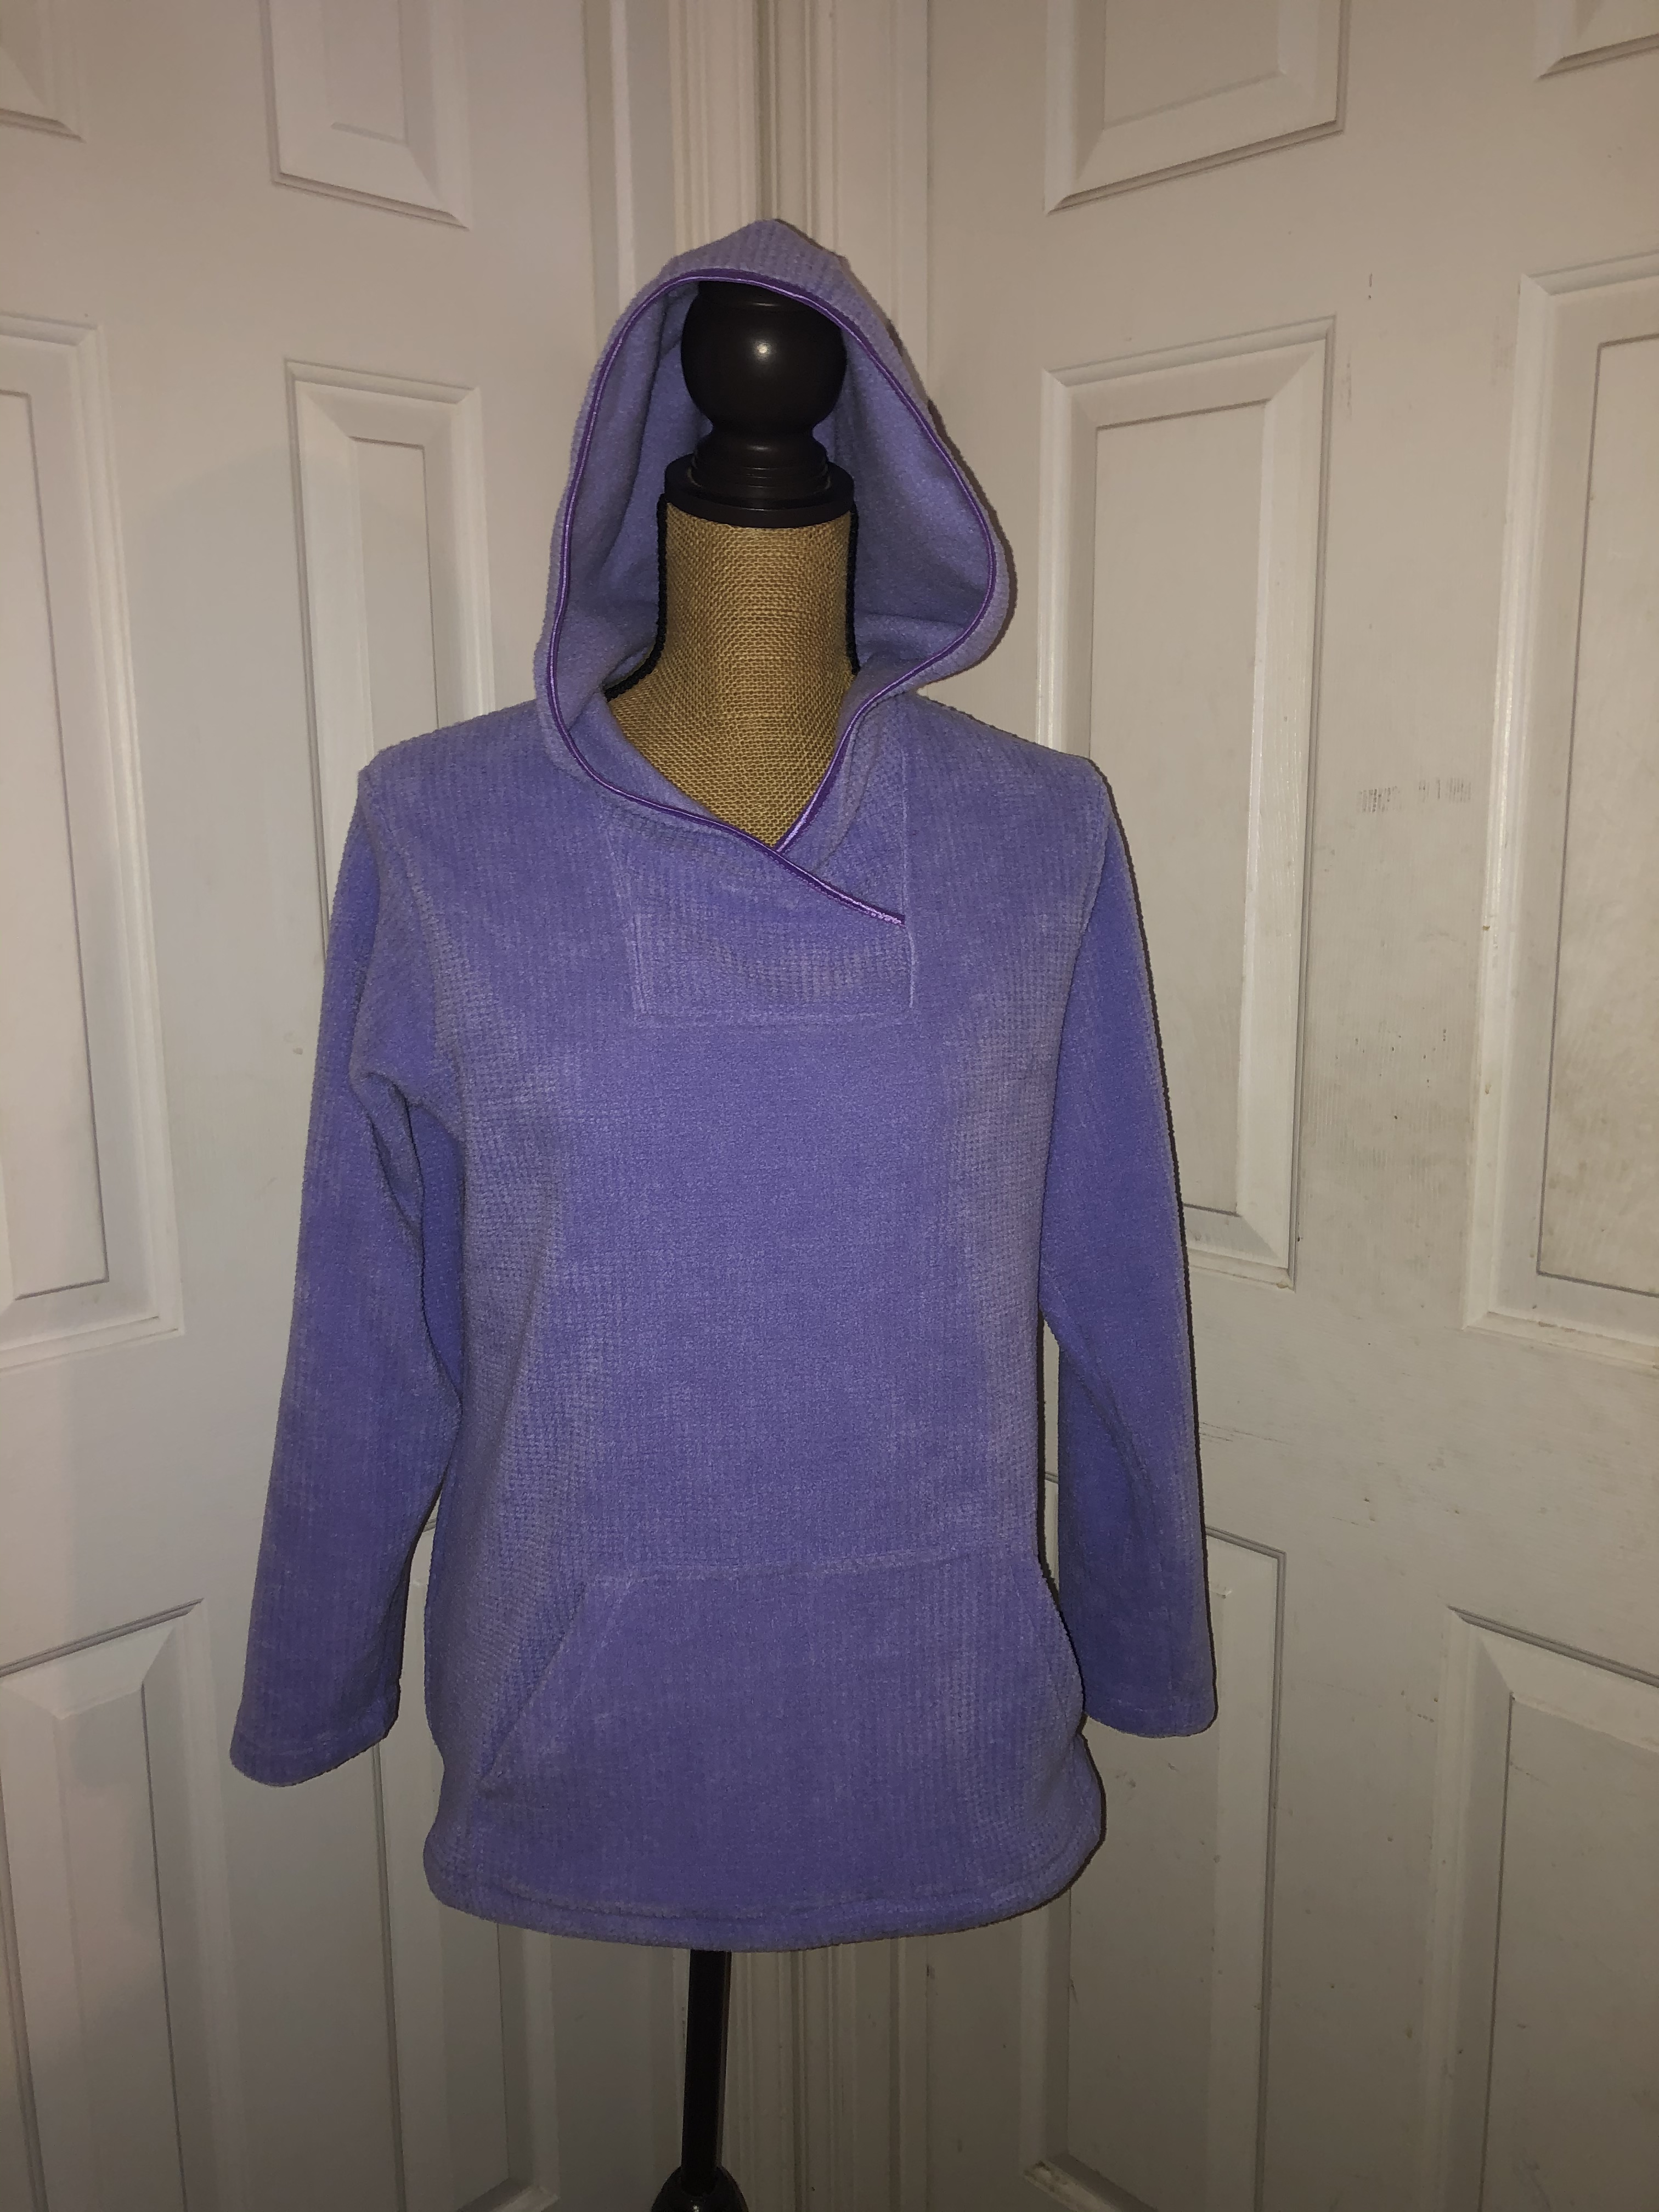
At a request for zoom friendly tops that feel like sweatshirts, and have pockets, I experimented with the Leslie from 5 out of 4 patterns. The pattern is fabulous as is. My husband found this textured fleece in my stash and suggested our daughter would love it. A lighter weight fleece is a great way to start with this pattern due to the square neckline, corners and lots of layers. I skipped the zip for two reasons. 1. She is a fiddler. The last thing she needs to be doing is fiddling with the zipper on her collar during a work meeting, and 2. Despite the massive amount of zippers I have in my stash, there were none this color. Turns out that made things even more simple to put together. This is a great way to try out the pattern for fit and style before attempting a zipper. A confidence builder.

  1. Print and cut your size. Read through the tutorial that comes with the pattern. There are some really nice videos that are super helpful.

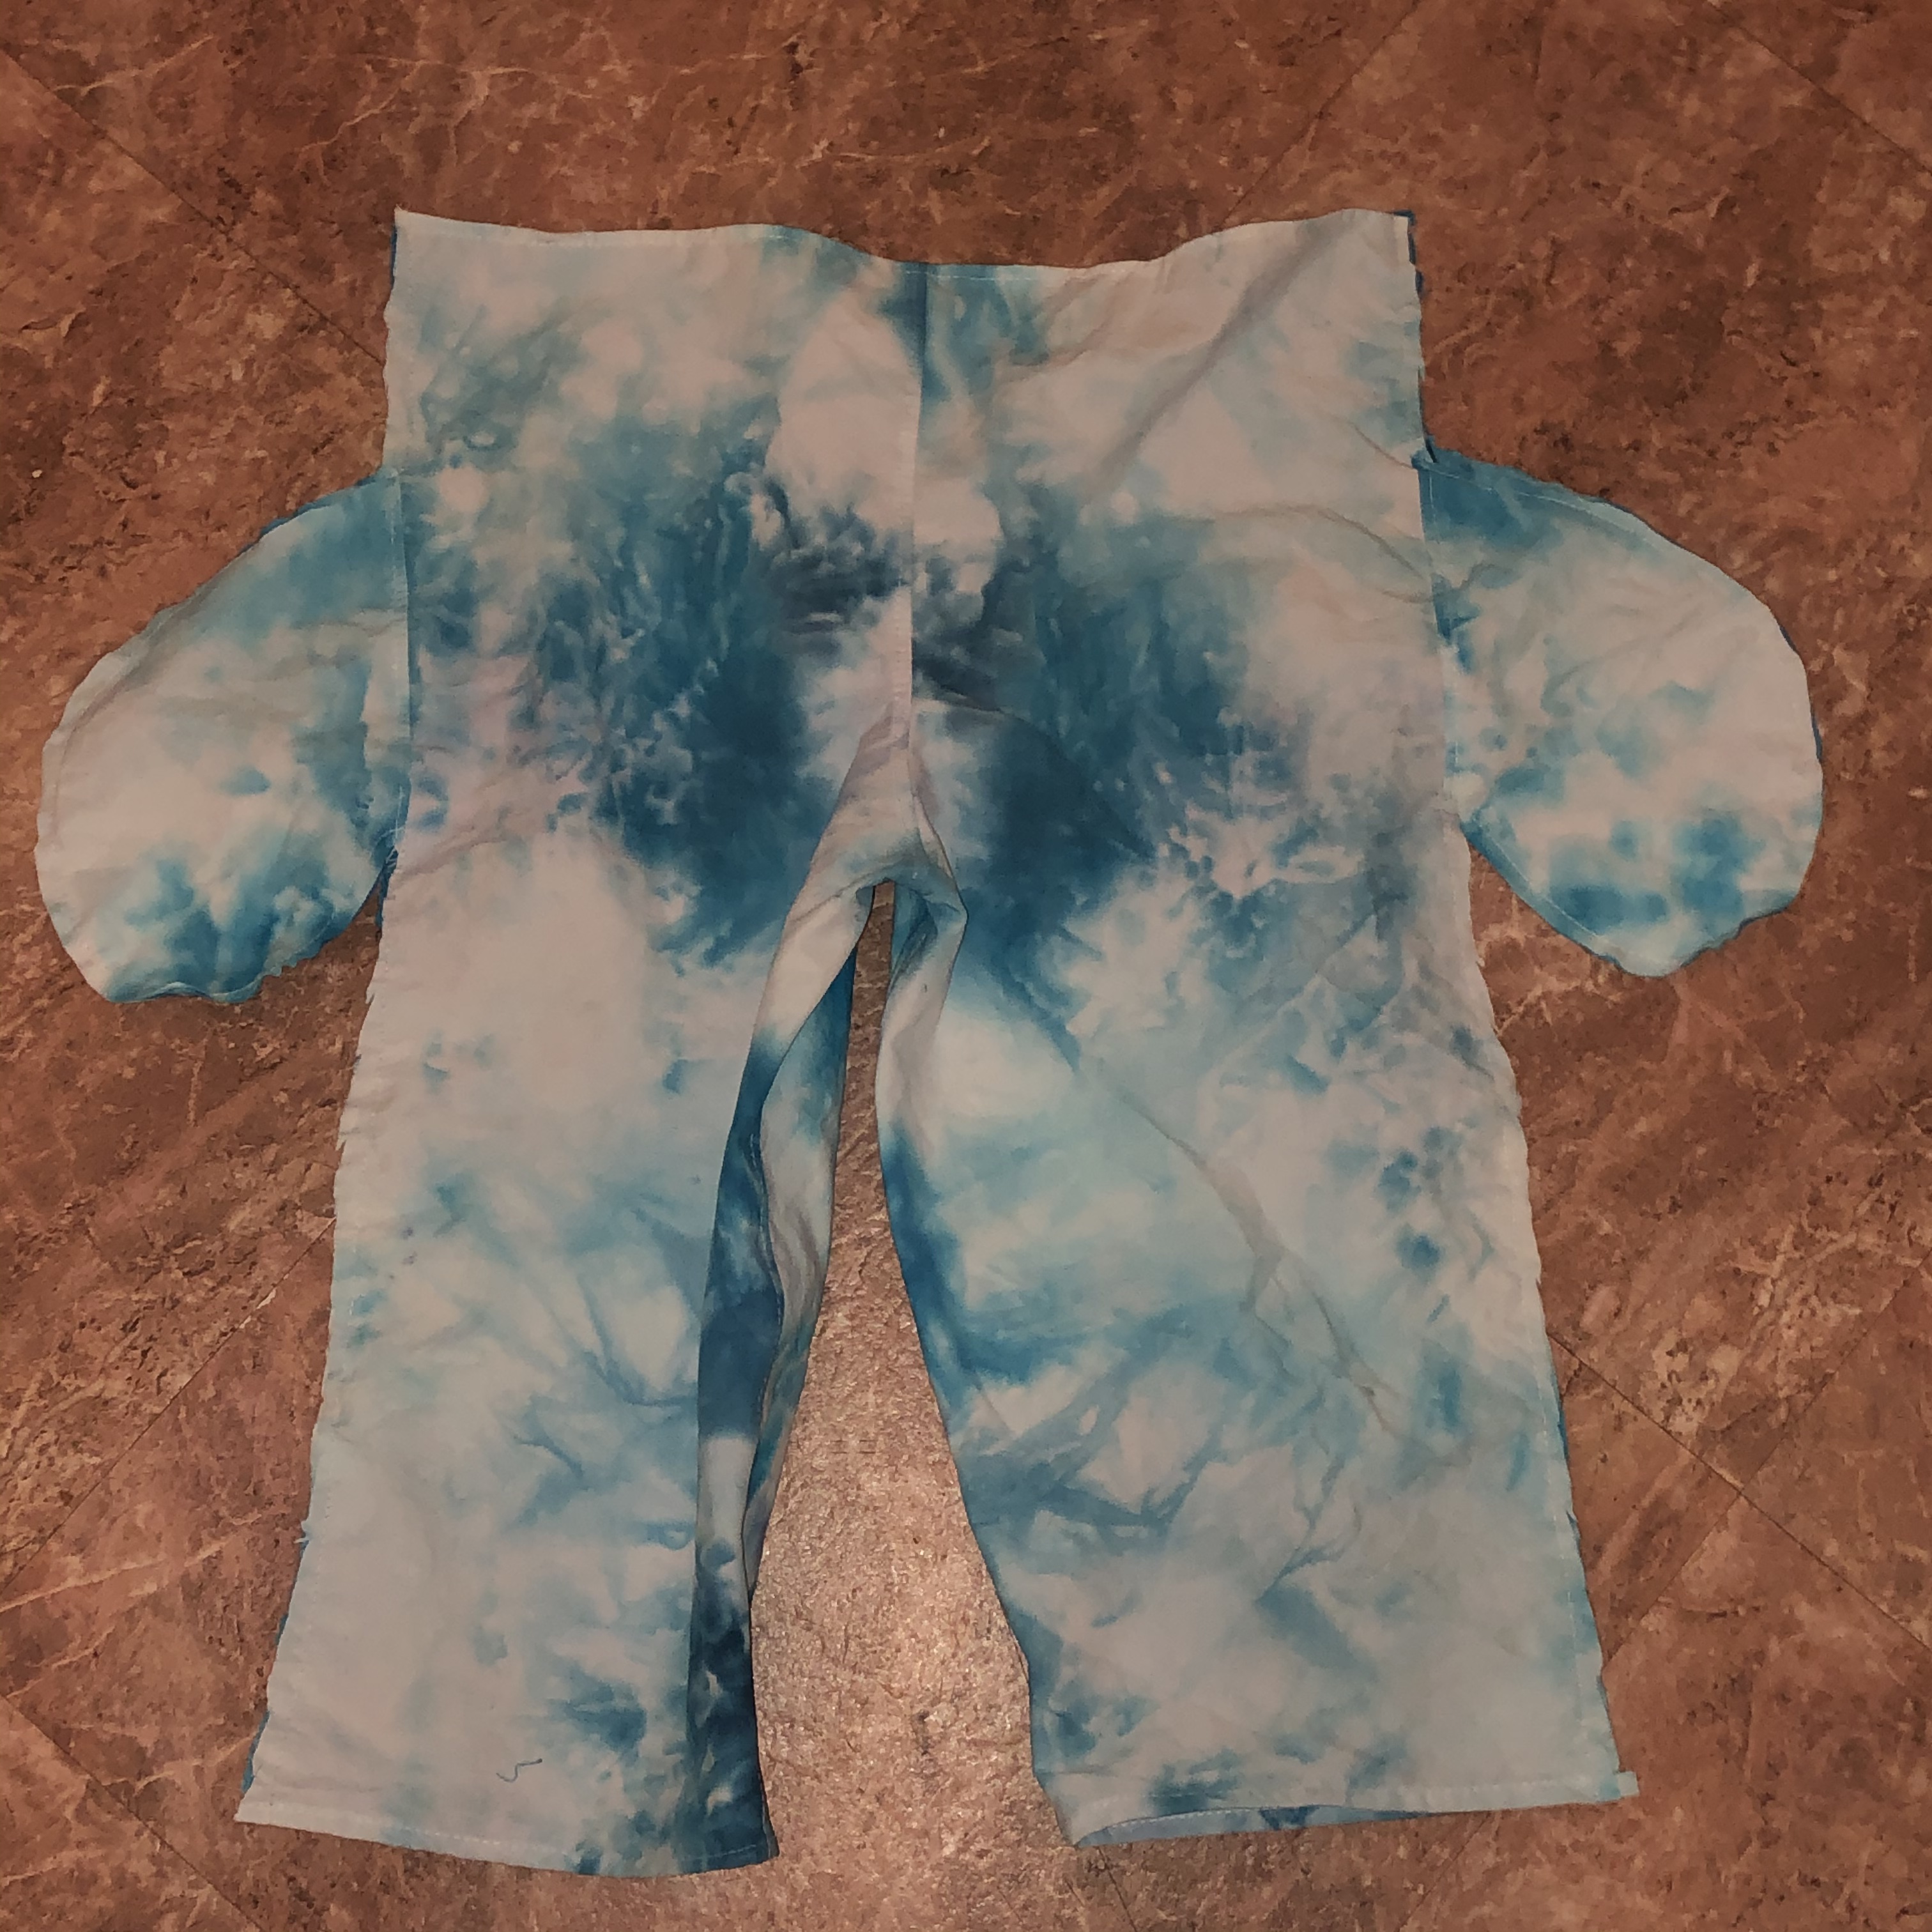
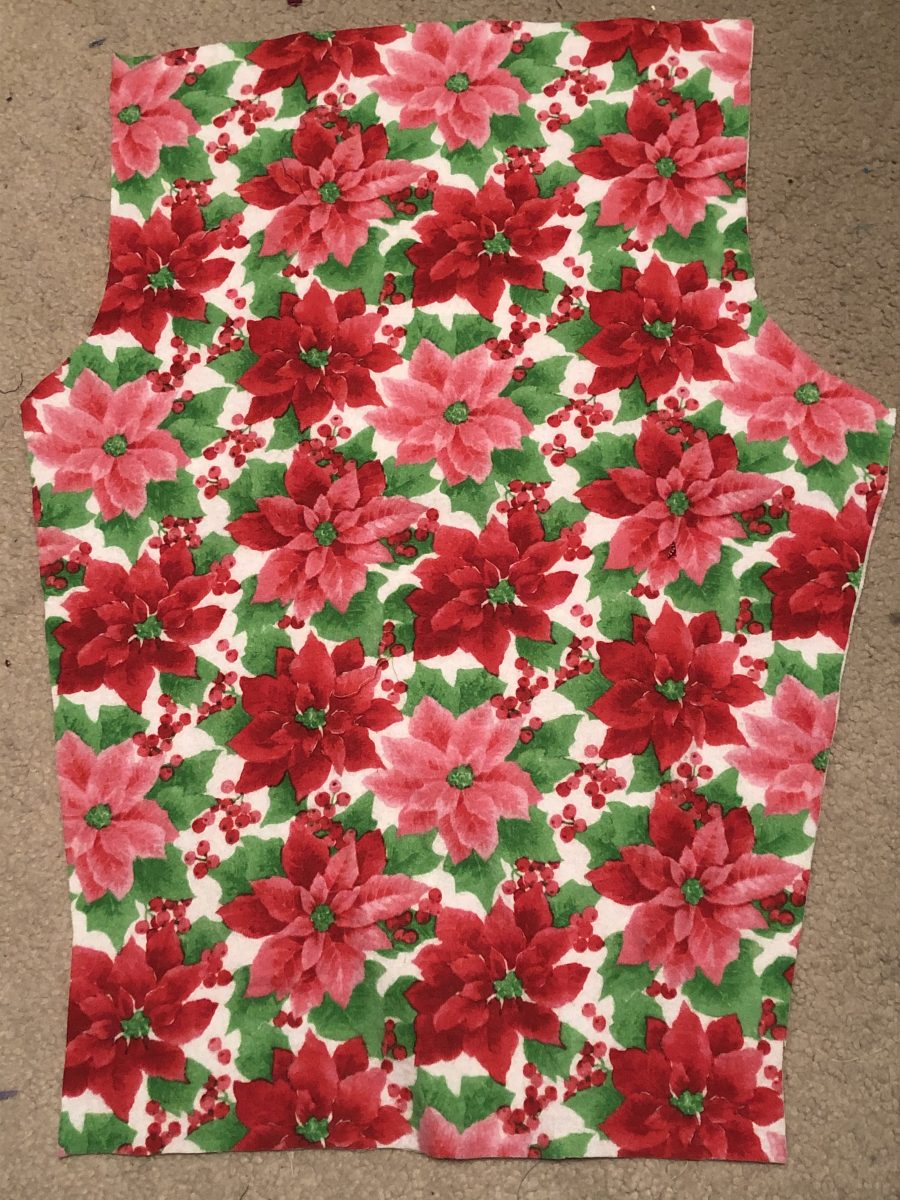
Cut out the following:

Front, back, sleeves, pocket, hood center back, and most critically, two mirror image side A hood pieces. The side B was designed to use the additional width that the zipper supplies to fit within the neckline. Don’t use that one for this project. Mark the center back neckline, and center back of the hood piece to help align them when sewing.

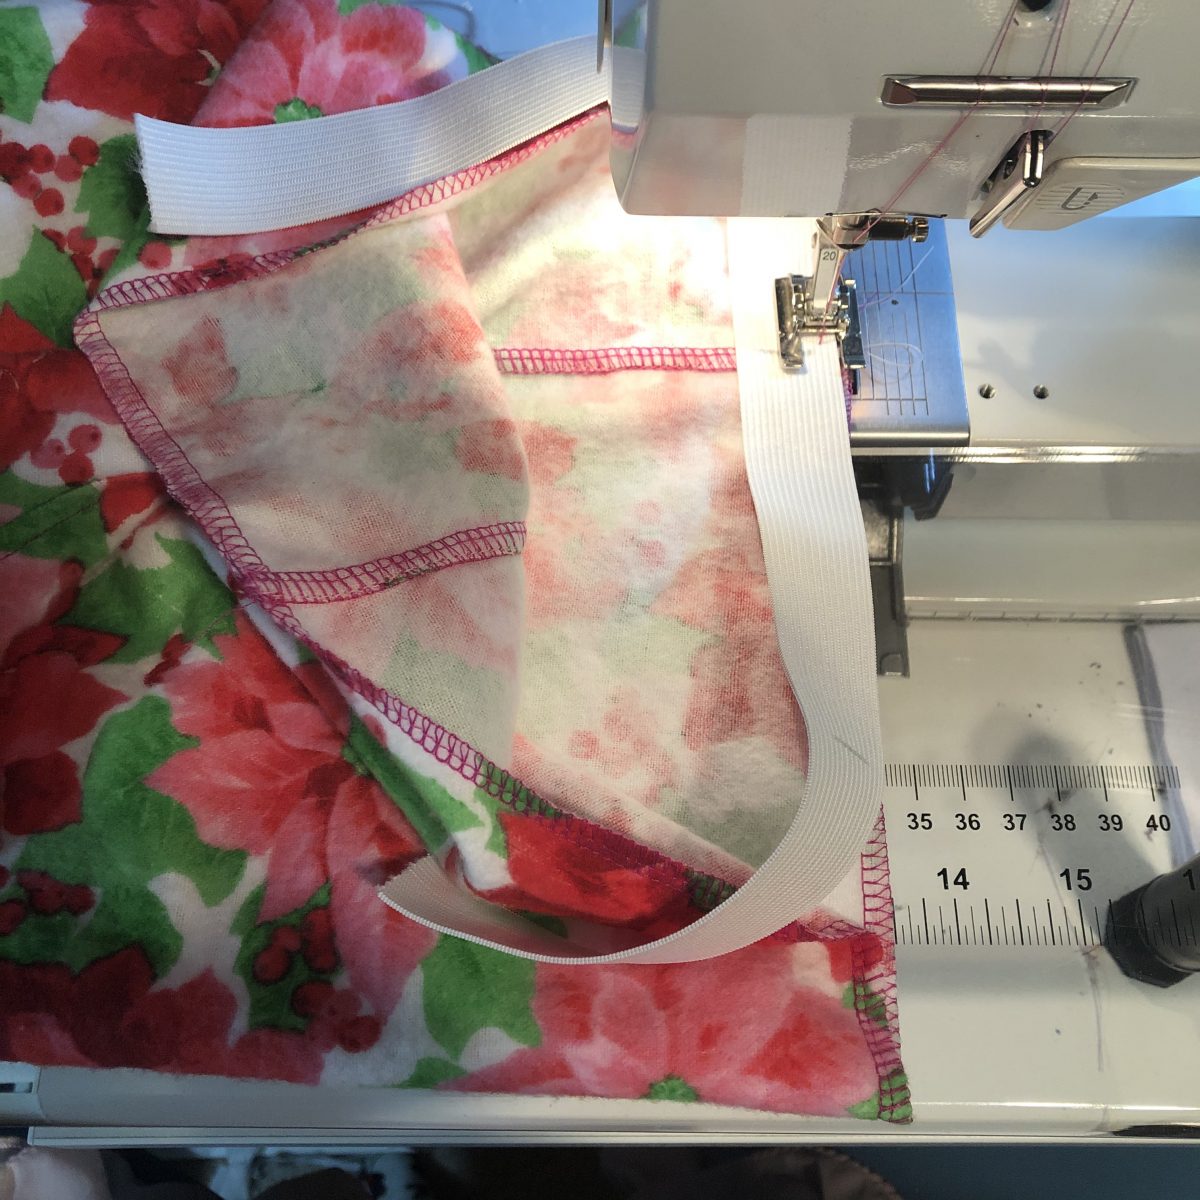
2. Sew the three piece hood together. Topstitch if you like, makes the inside a bit cleaner. Finish the edge with binding. I used fold over elastic.

3. Sew shoulder seams.

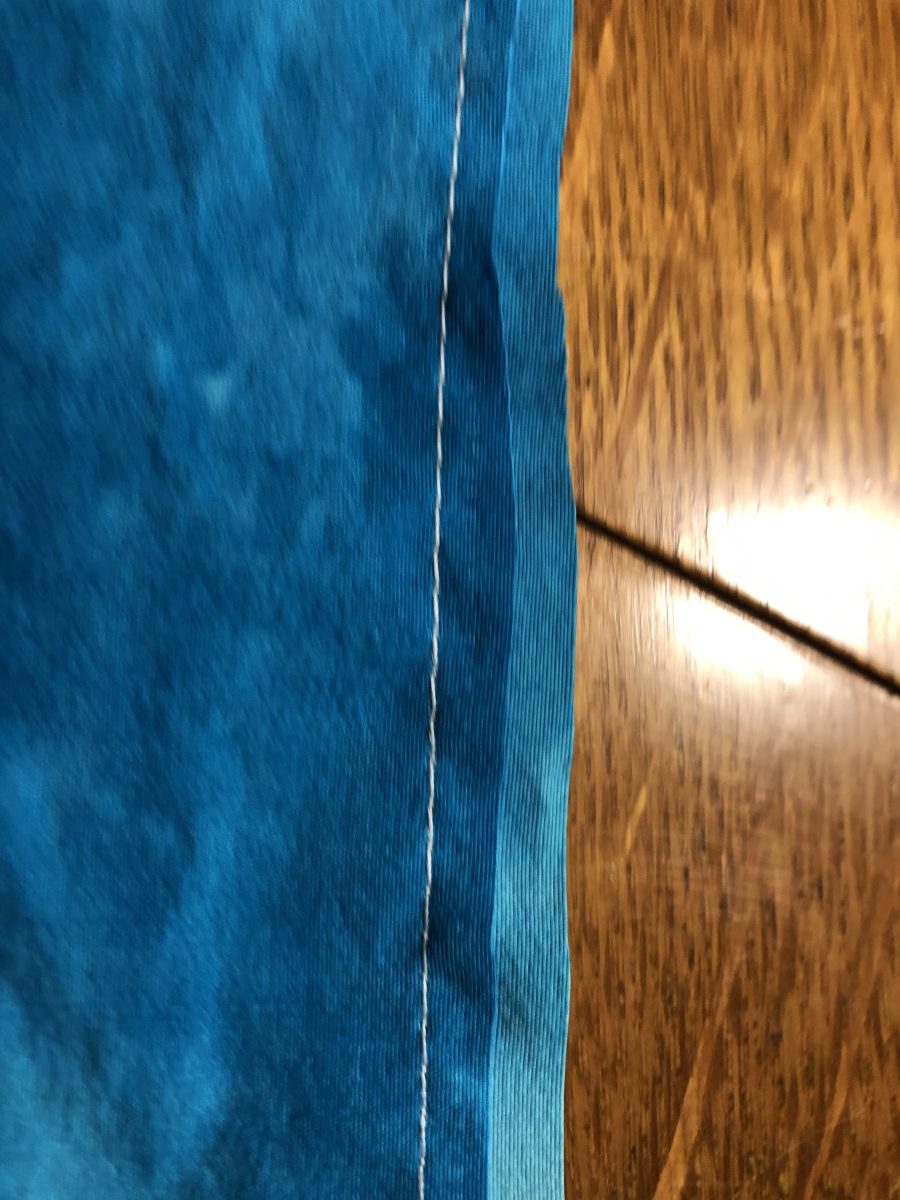
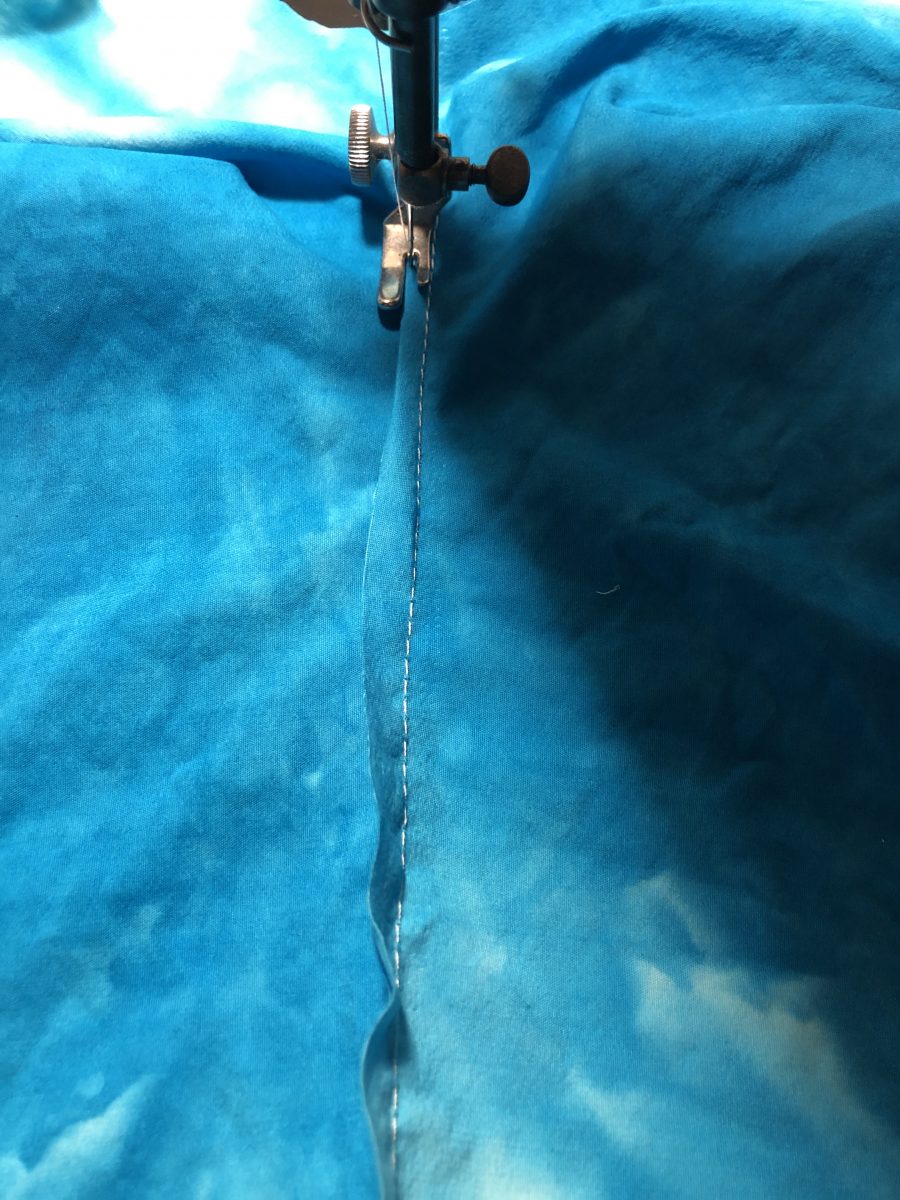
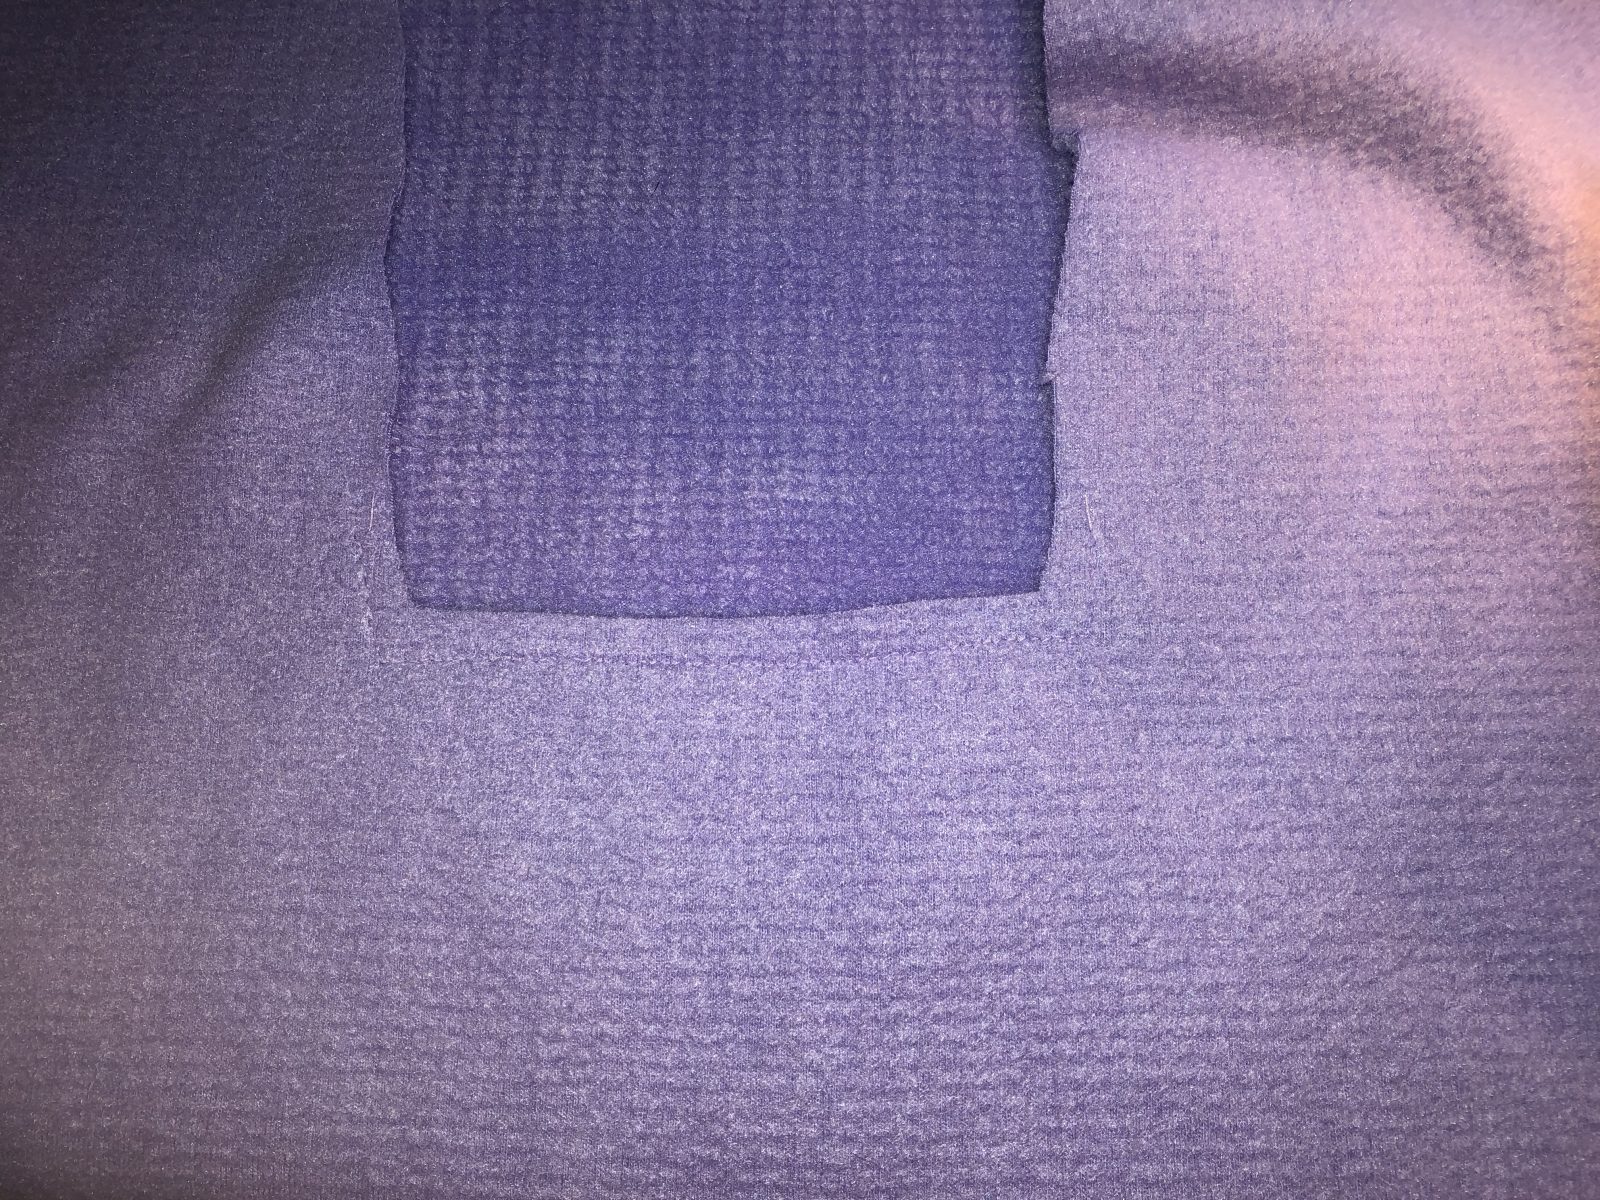
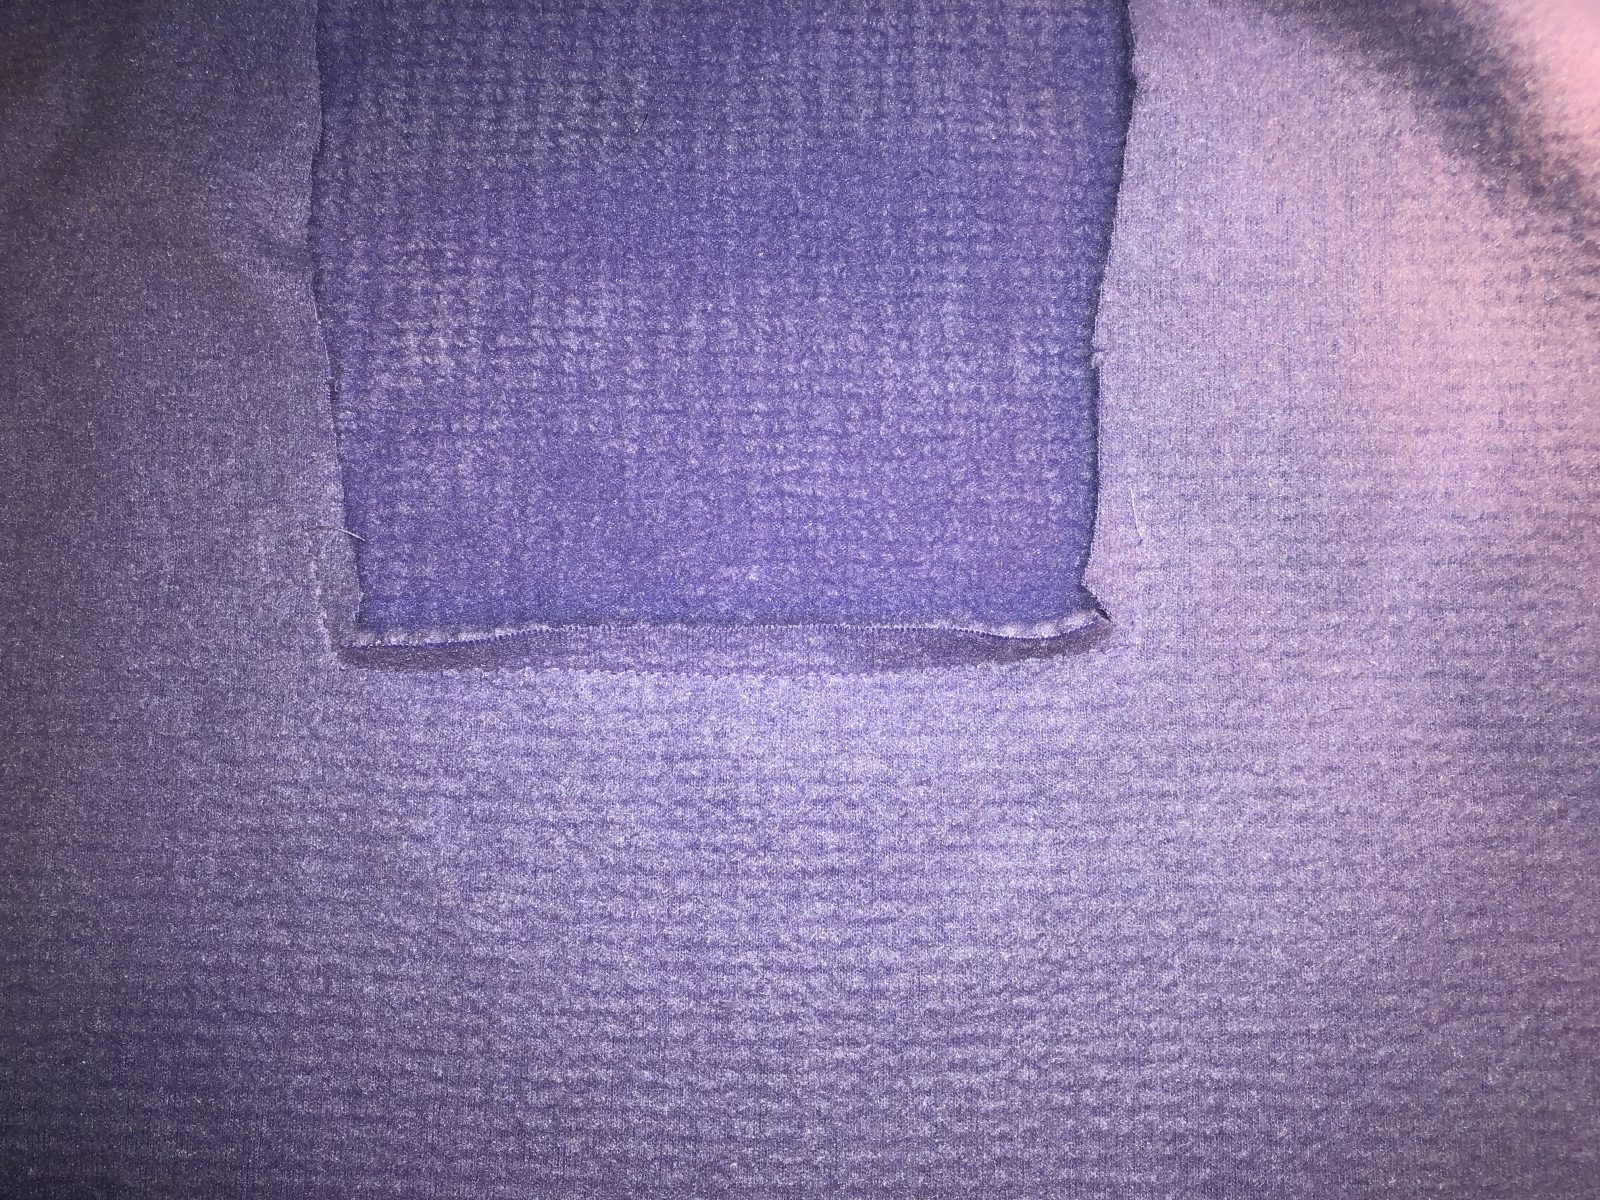
4. Prep the neckline. Staystitch the lower square neckline of the front piece. Use matching thread and with a shorter stitch length of 2, stitch from an inch above the inside corner of the neckline across the bottom and back up an inch. If you look closely, you can see my stay stitching on the wrong side of the front. It is sewn at a scant 1/4 inch seam allowance, so I do not have to remove it later.

Front neckline staystitched.

5. Clip corners of the stay stitched neckline. Use your sharpest scissors to clip diagonally into the corners.

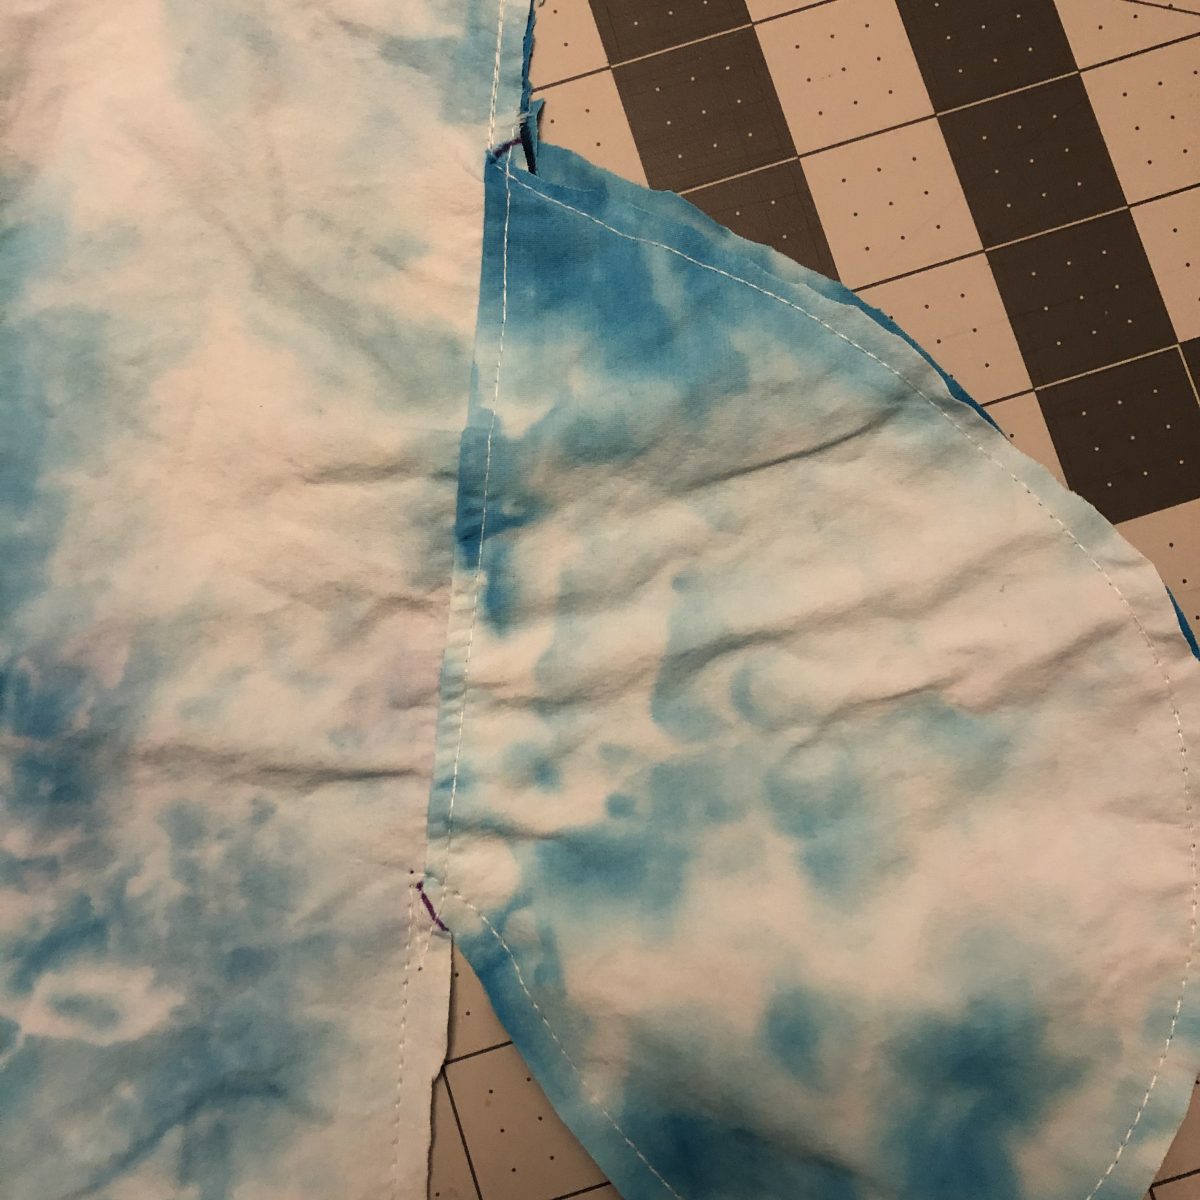
6. Pin the collar overlap. Baste the three lower edges together from pin to pin in the photo below at a scant 1/4 inch seam.

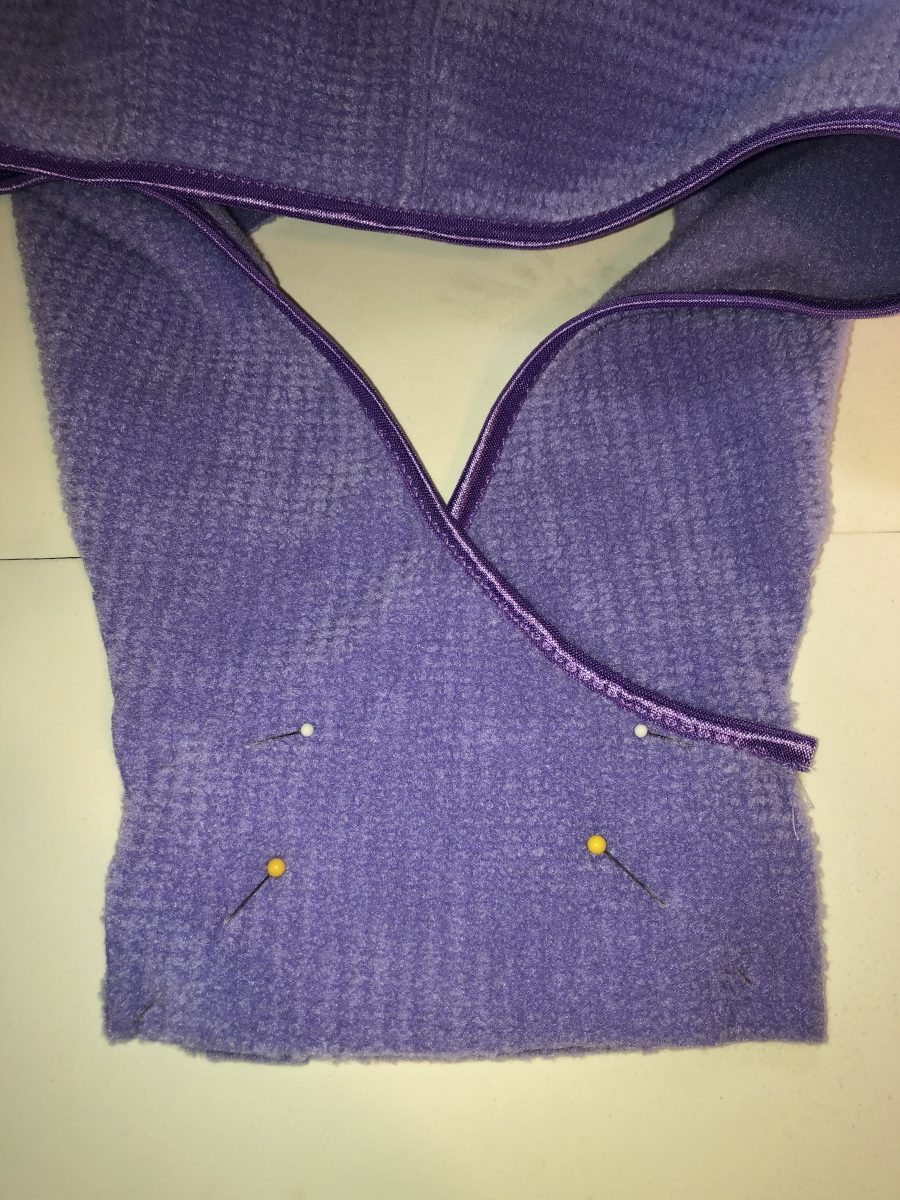
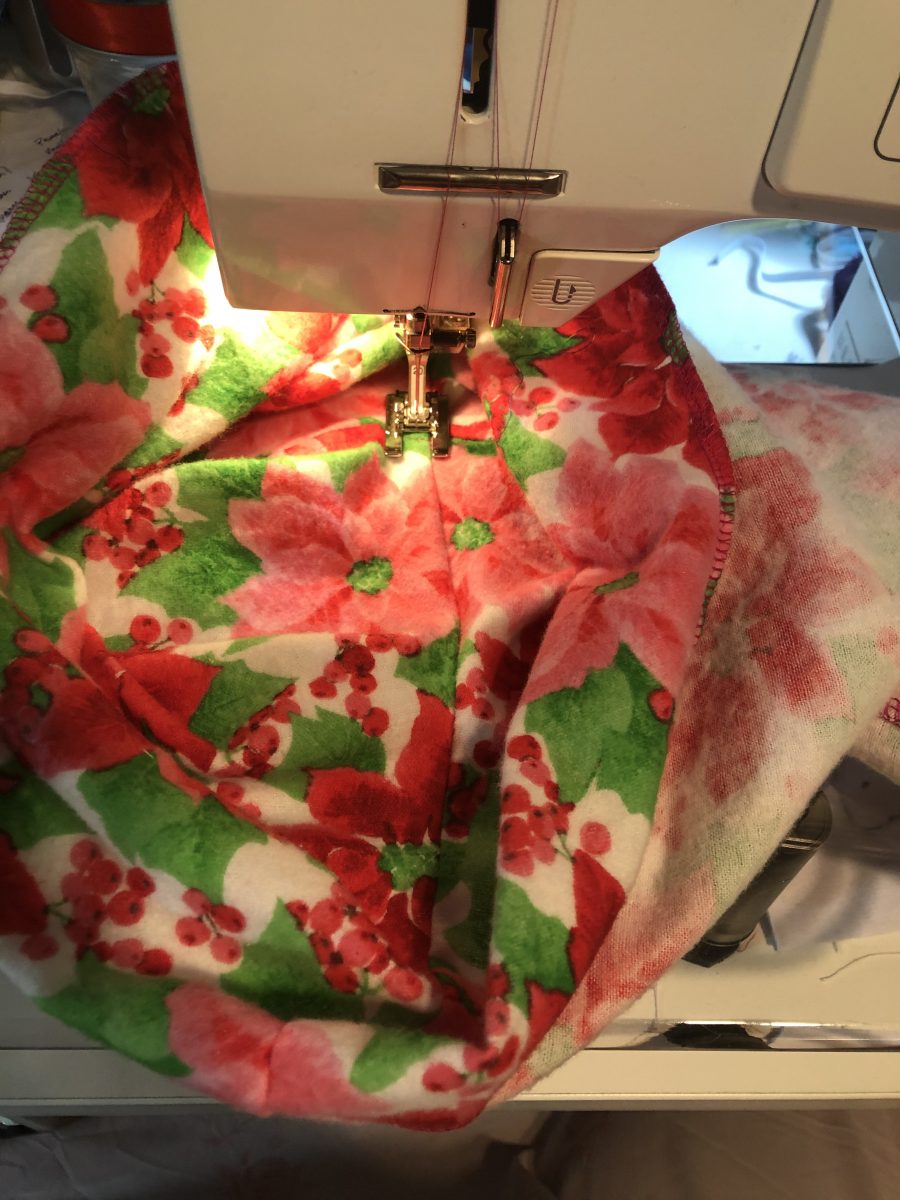
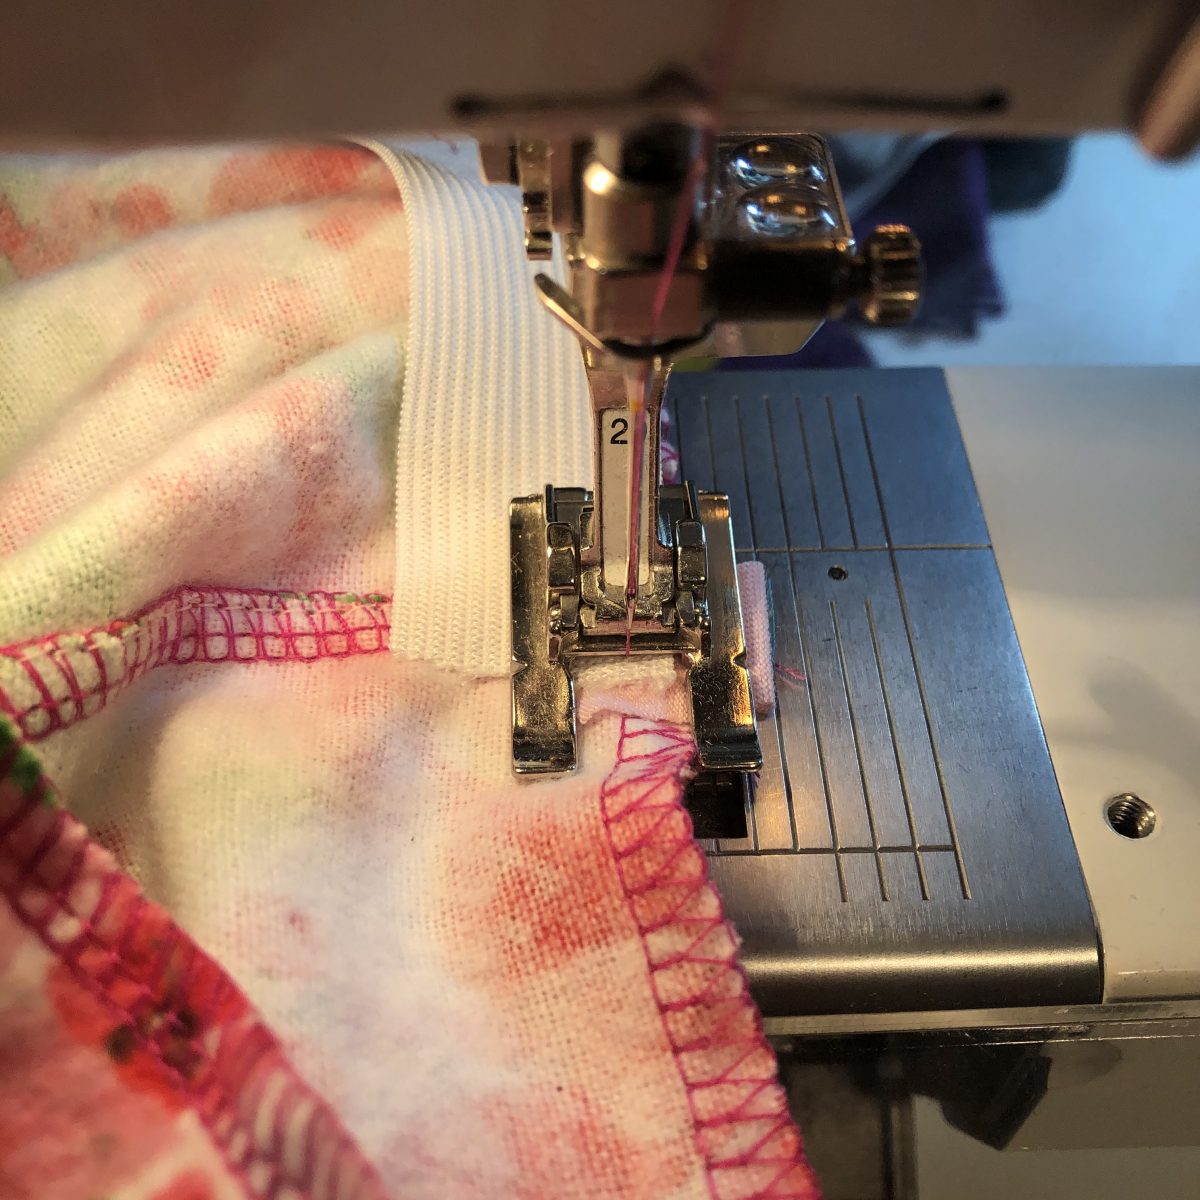
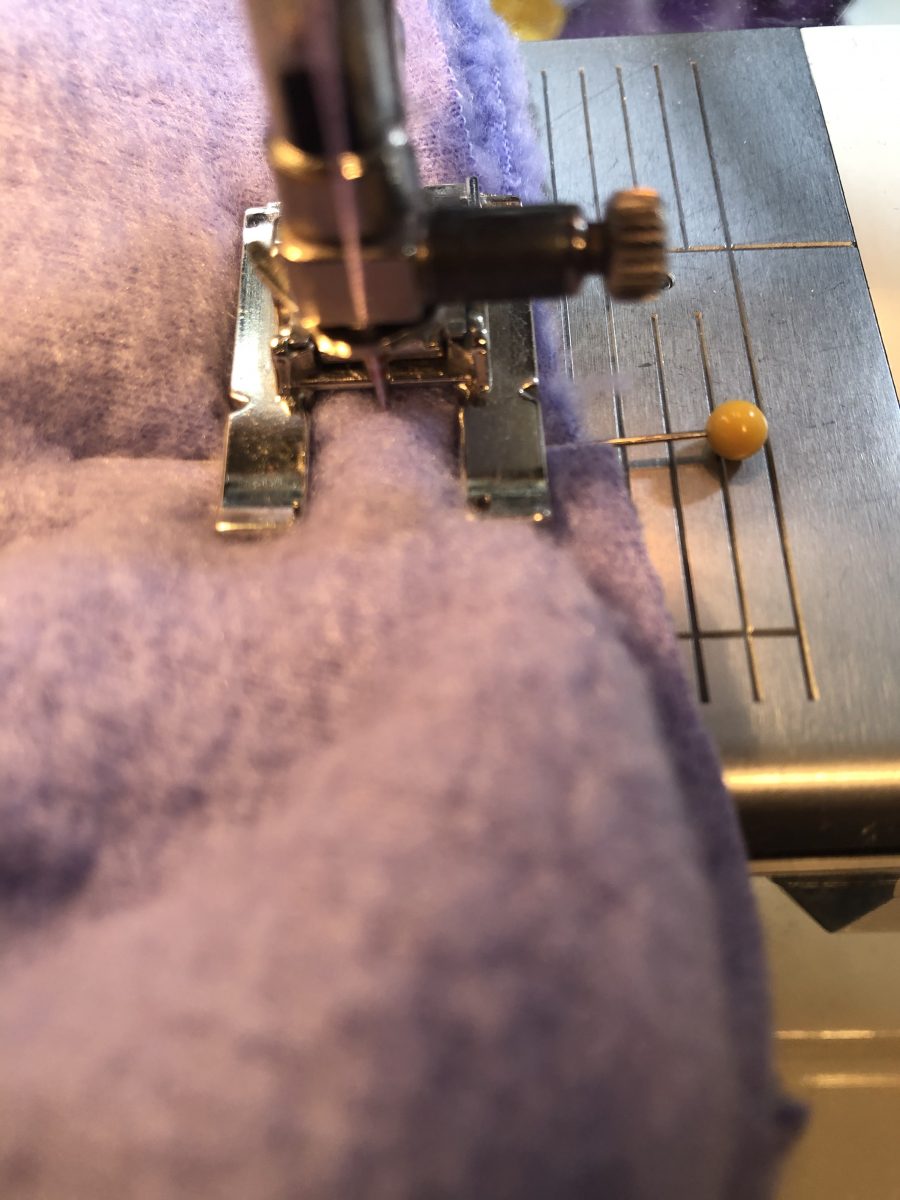
7. Attach the hood/collar to the body. Pin the right side of the lower edge of the hood/collar to the right side of the open neck edge. I pinned just outside the diagonal cuts. Double check to be sure you have the 1/4 inch of the hood/collar free on either edge, outside of the pin. With your work placed so that the hood collar is underneath, and the body is on top, we can begin sewing. the designer recommends basting this in place with a longer stitch. A stitch length of 3 is good, as it can be fairly easily removed, but will still hold and with this much loft you would want a longer stitch. Place the needle down at one corner, just inside the pin, and right on top of your stay stitching or basting stitches. Sew at this precise corner spot with a zero stitch length for a few stitches. Then stitch across the straight portion to the next corner, as pictured below. Stop precisely at the corner and make one or two stitches in place.

Sewing to the second pin across the bottom of the placket.

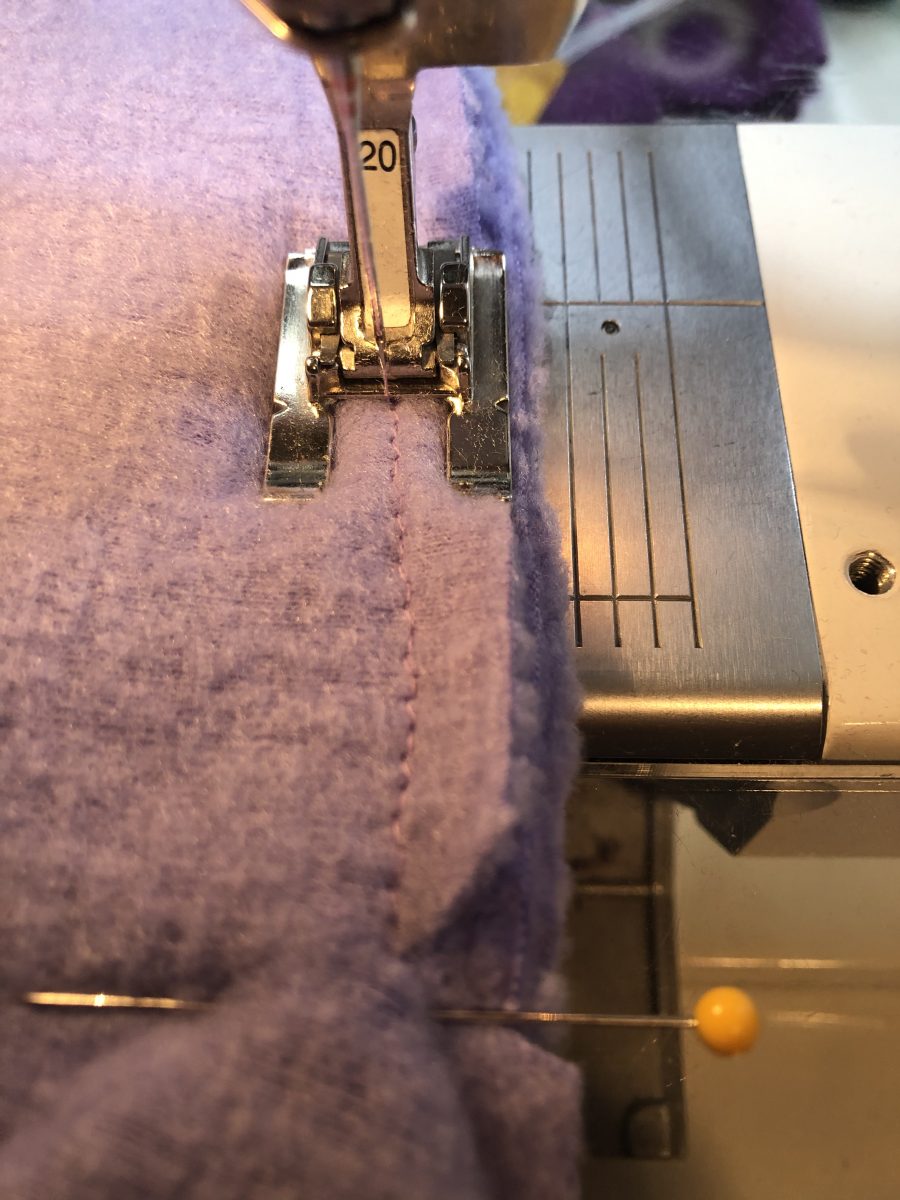
8. Stopped at the corner. Since I pinned just outside the corners. I could sew right up to my pin. Once I had made a few stitches in place, I removed the pin, and with the needle still firmly sunk into my fabric, I lifted the presser foot to pivot. There is a lot of excess fabric in the foreground of the below photo. We will deal with it in the next photos.

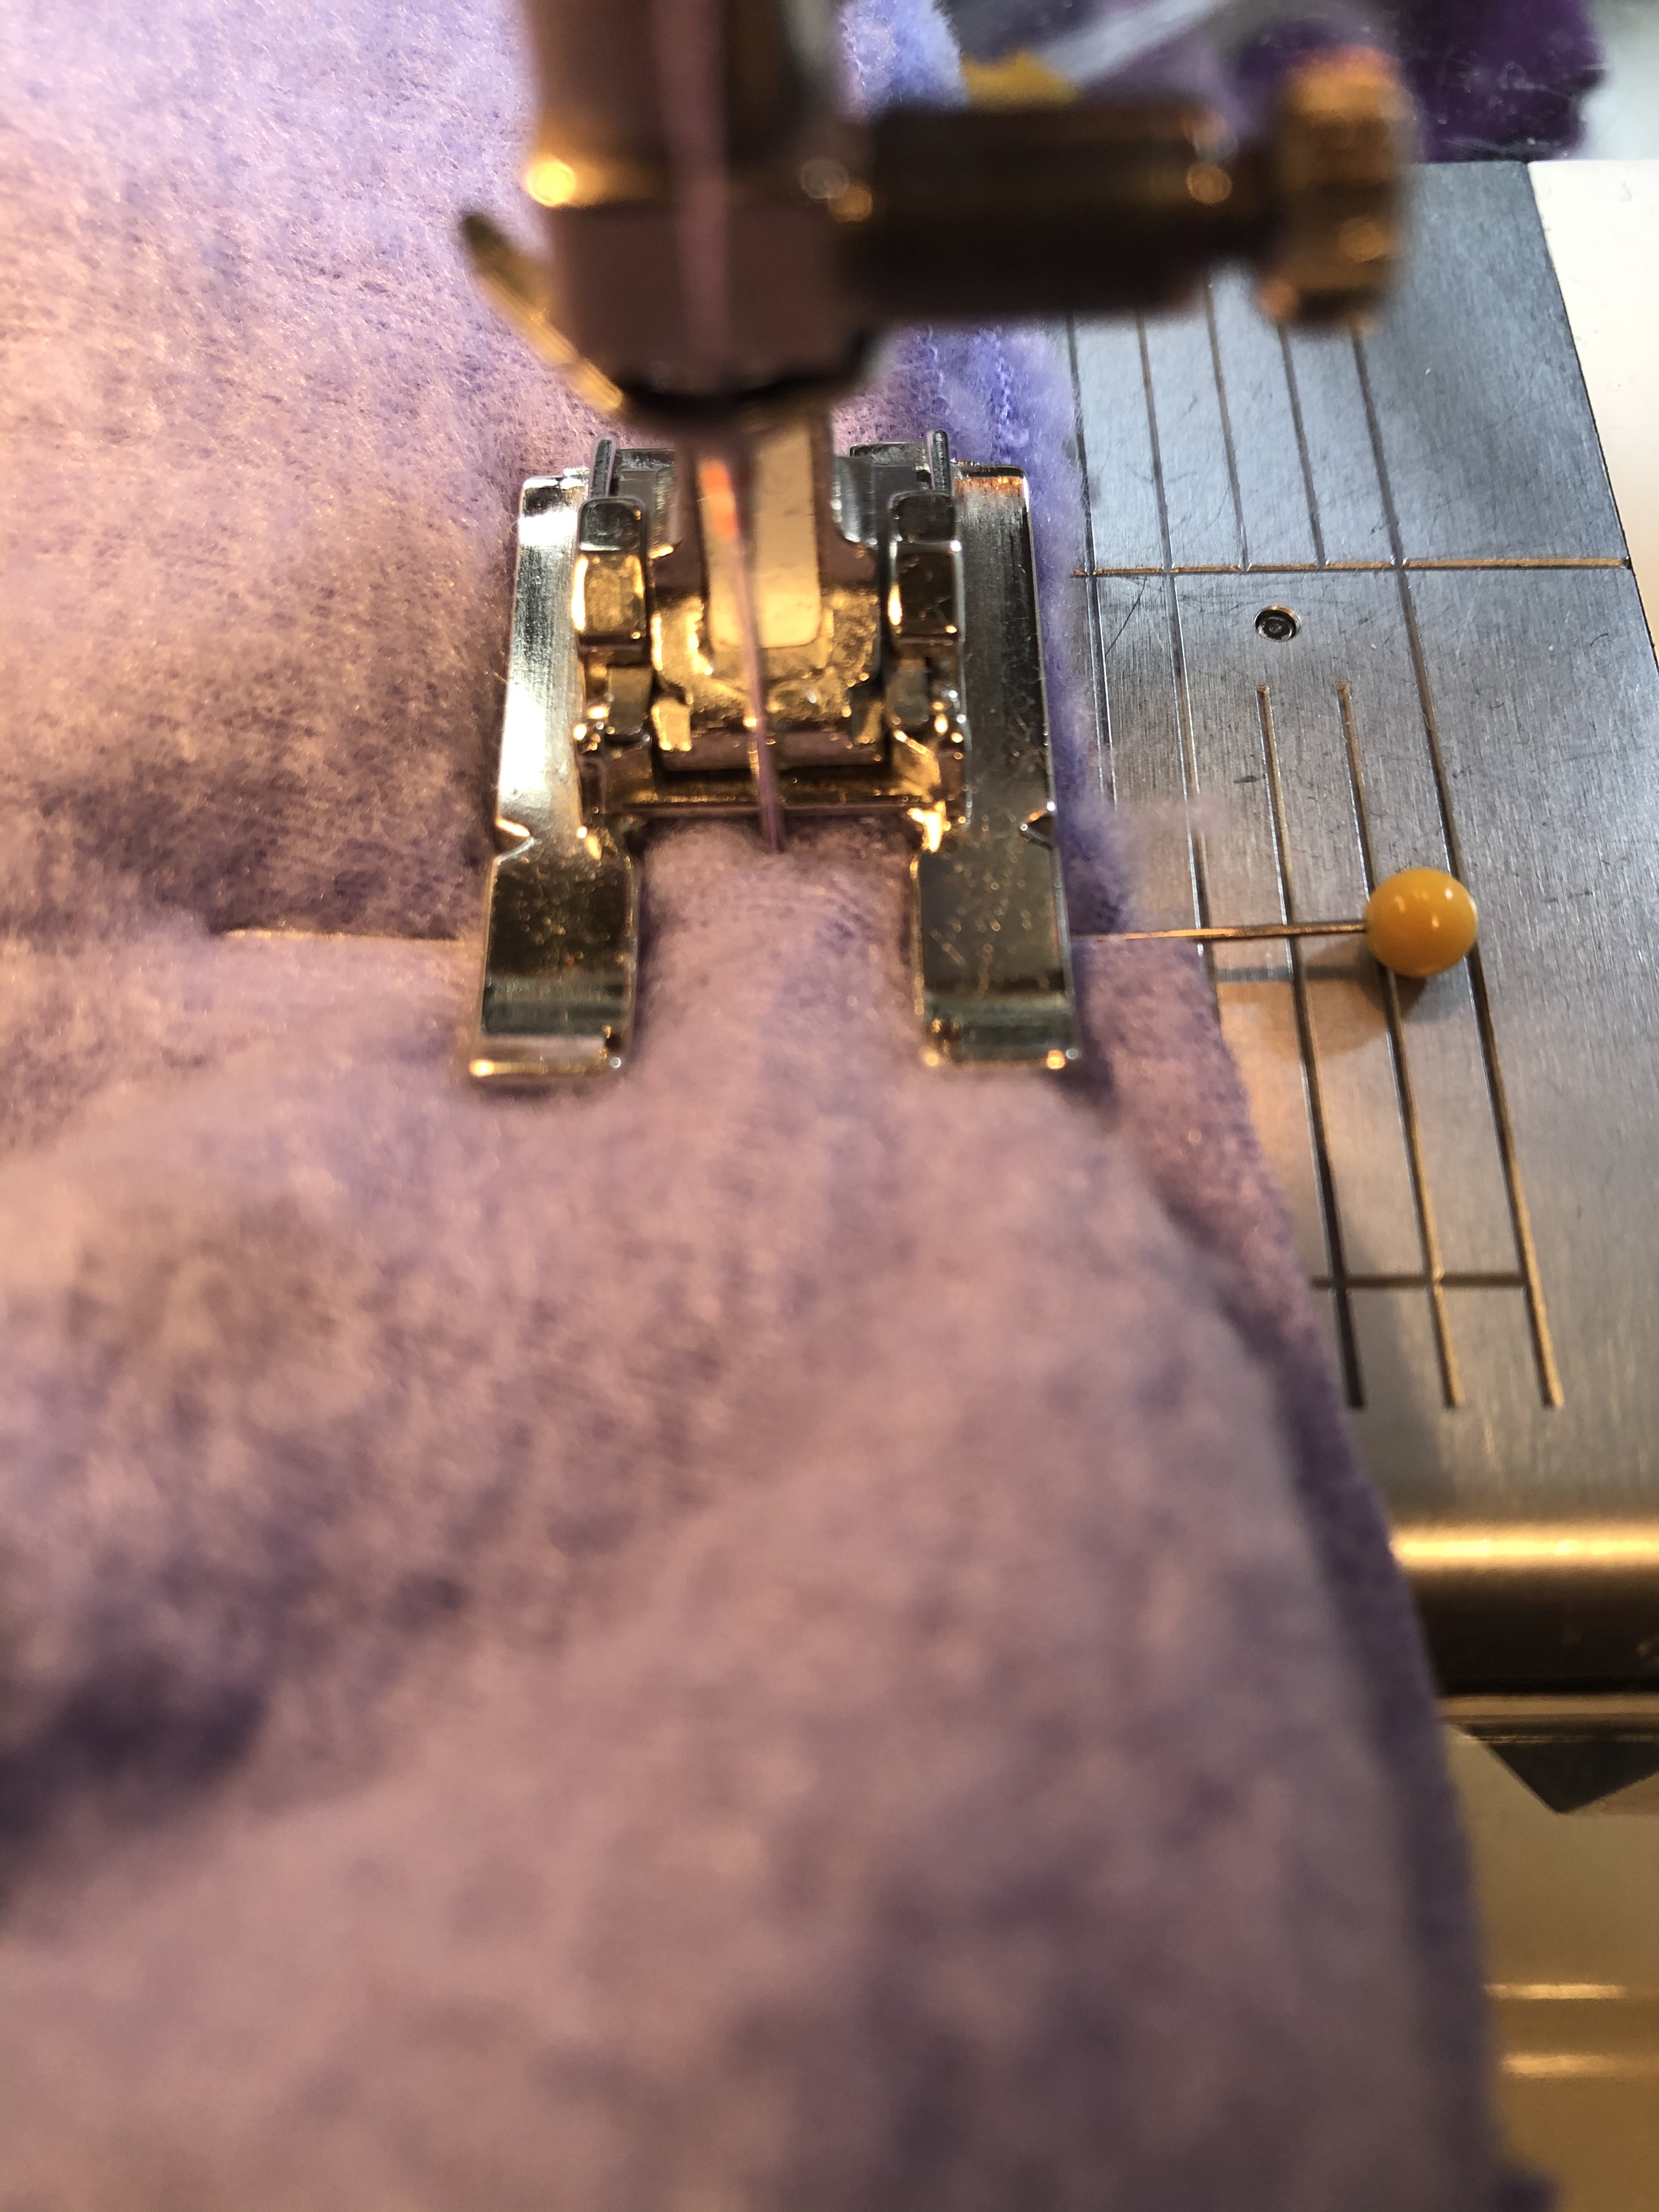
9 Sink that needle. All the way down.

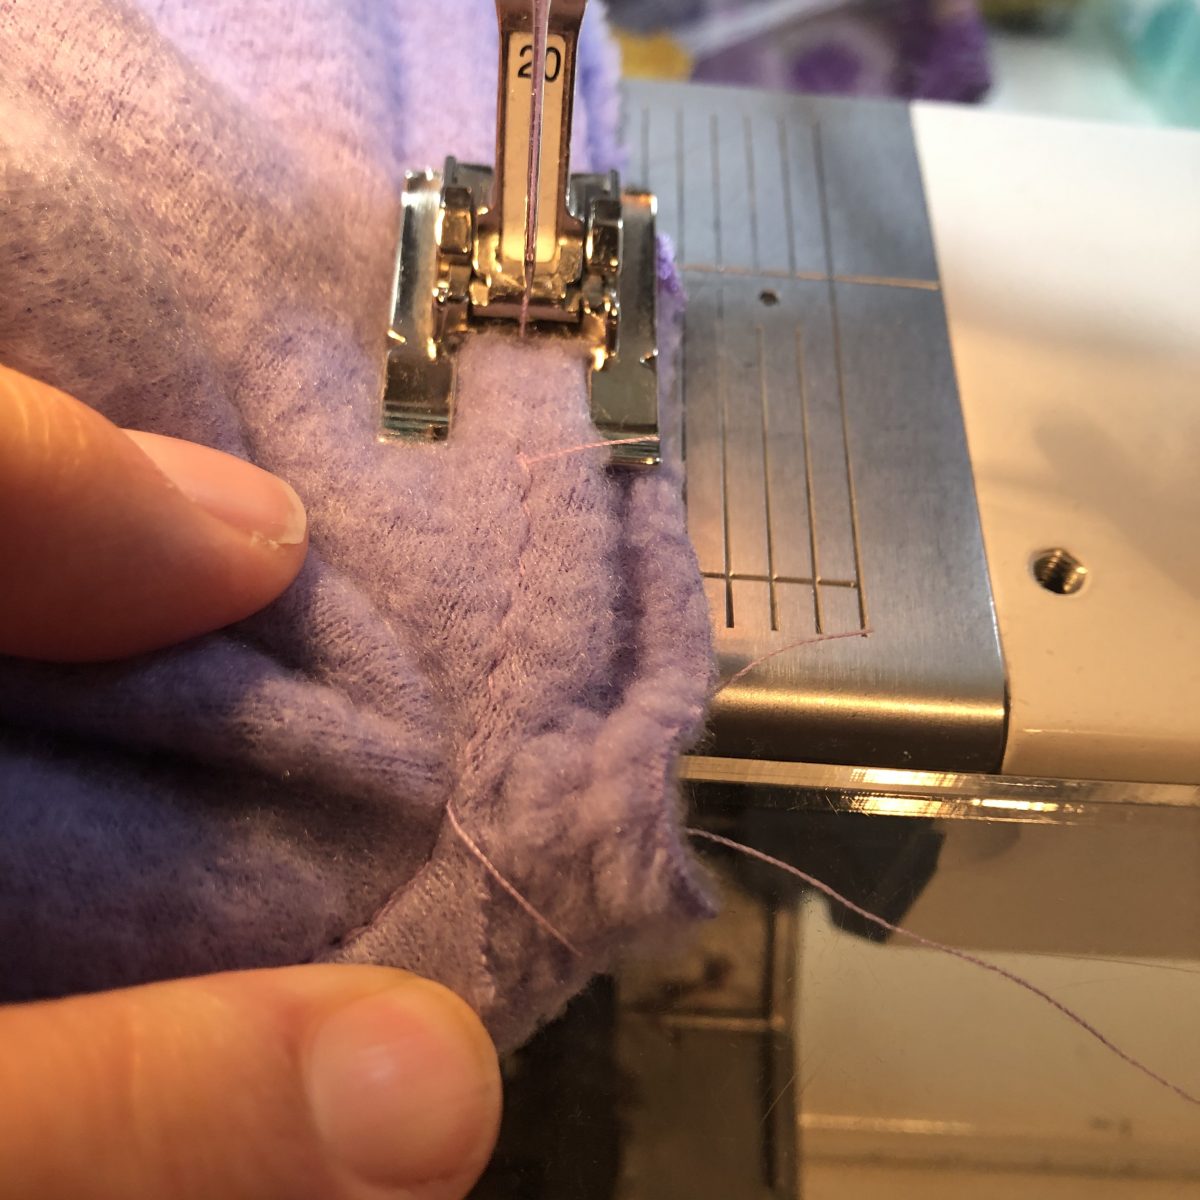
10. Time to Twist and Shout! Needle still firmly sunk, lift your presser foot. Leave the bottom layers of the hood/collar as they are, arrange the top layers of the body of your sweatshirt, so that they are now swung around to the left and behind the presser foot. You can see a tiny bit of the staystitching in the photo below. Align the raw edges here, lower the presser foot, and stitch to the next spot where the notch in the hood/collar meets up with the shoulder seam. Next stop center backs, and after that the other shoulder seam and notch. You may want to switch to a stitch with more stretch to to around the sides and back of the neckline.

11. Almost there! In the photo below, we are getting back to where we started. You can see the initial stay stitches in the photo below. There will be excess fabric here just like there was at the first corner. Just manipulate it out of the way, so that you can minimize any puckering or tucks. When you get to that precise corner spot where you started, you can back tack or make a few stitches in place. Cut your threads and inspect your work! If you see puckers or tucks, now would be the time to correct them.

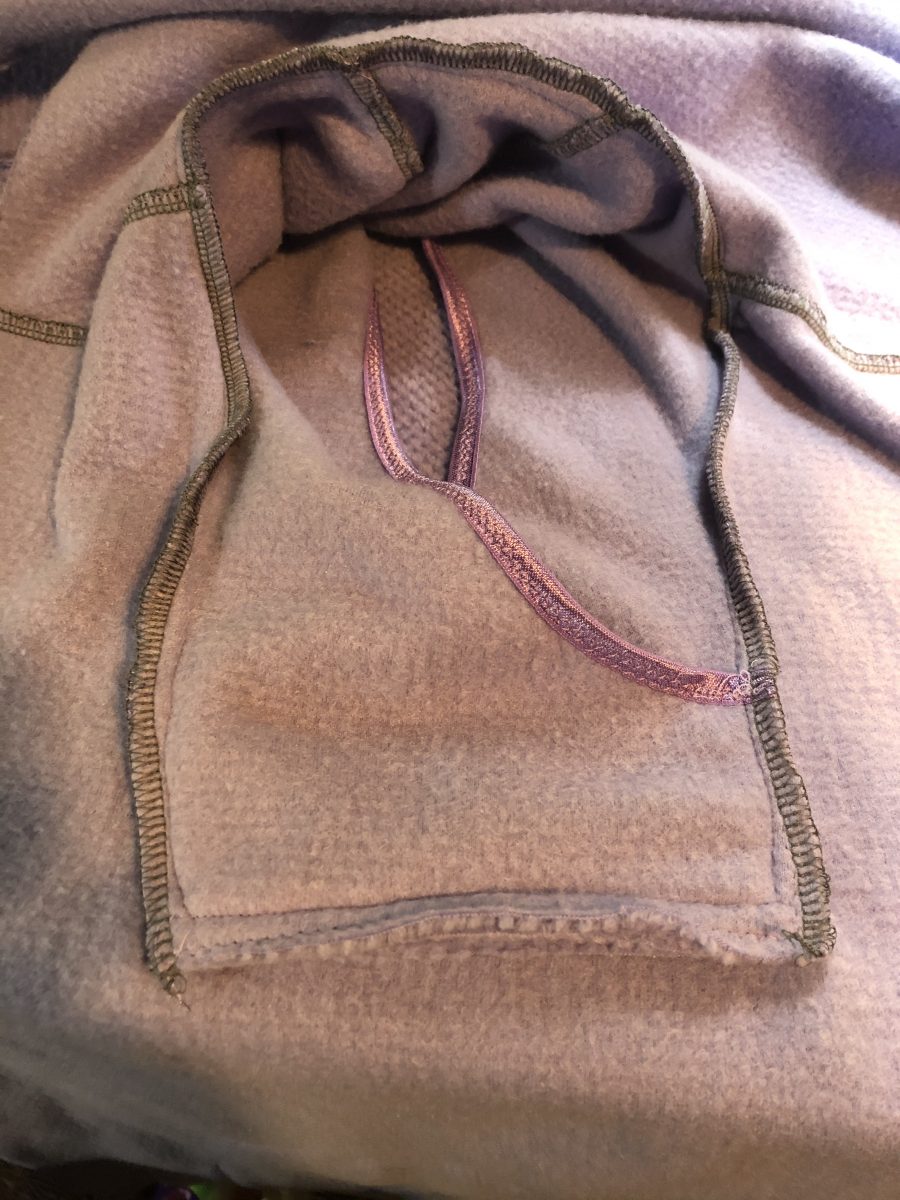
12. Neaten your stitches. The photo below is the inside of the neckline after serging around the sides and back only. It is optional. I left the straight part of the neckline without serging, because it was already pretty bulky with those layers. To tame the layers, you could stitch across that straight edge a second time.

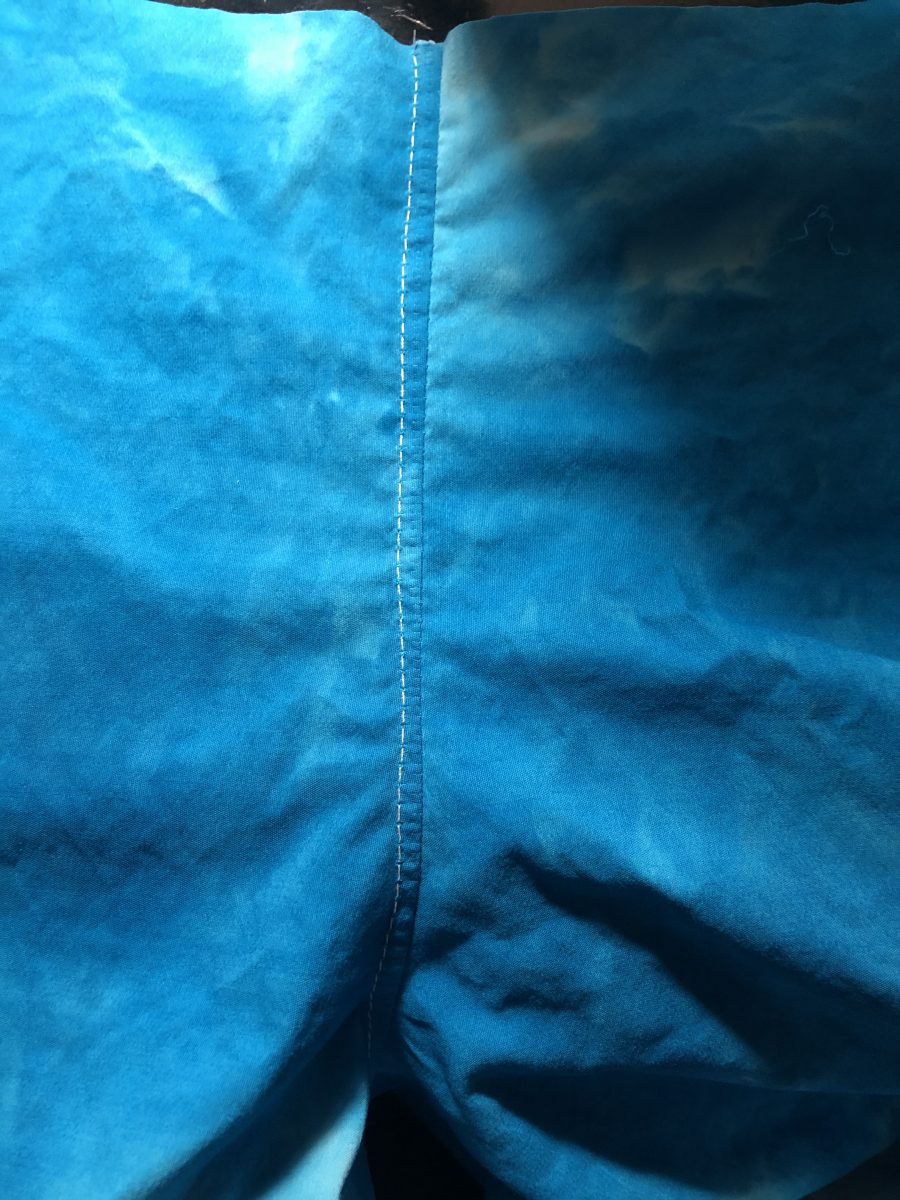
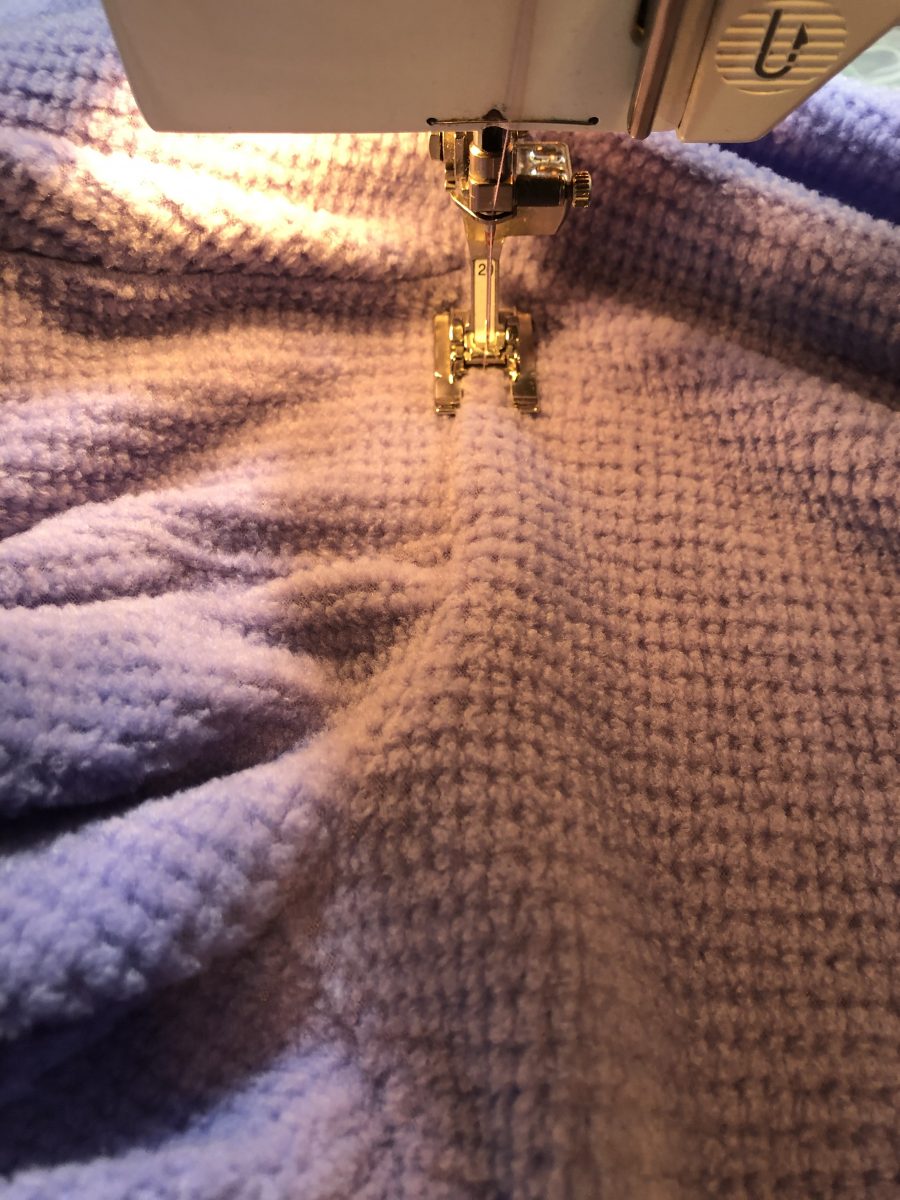
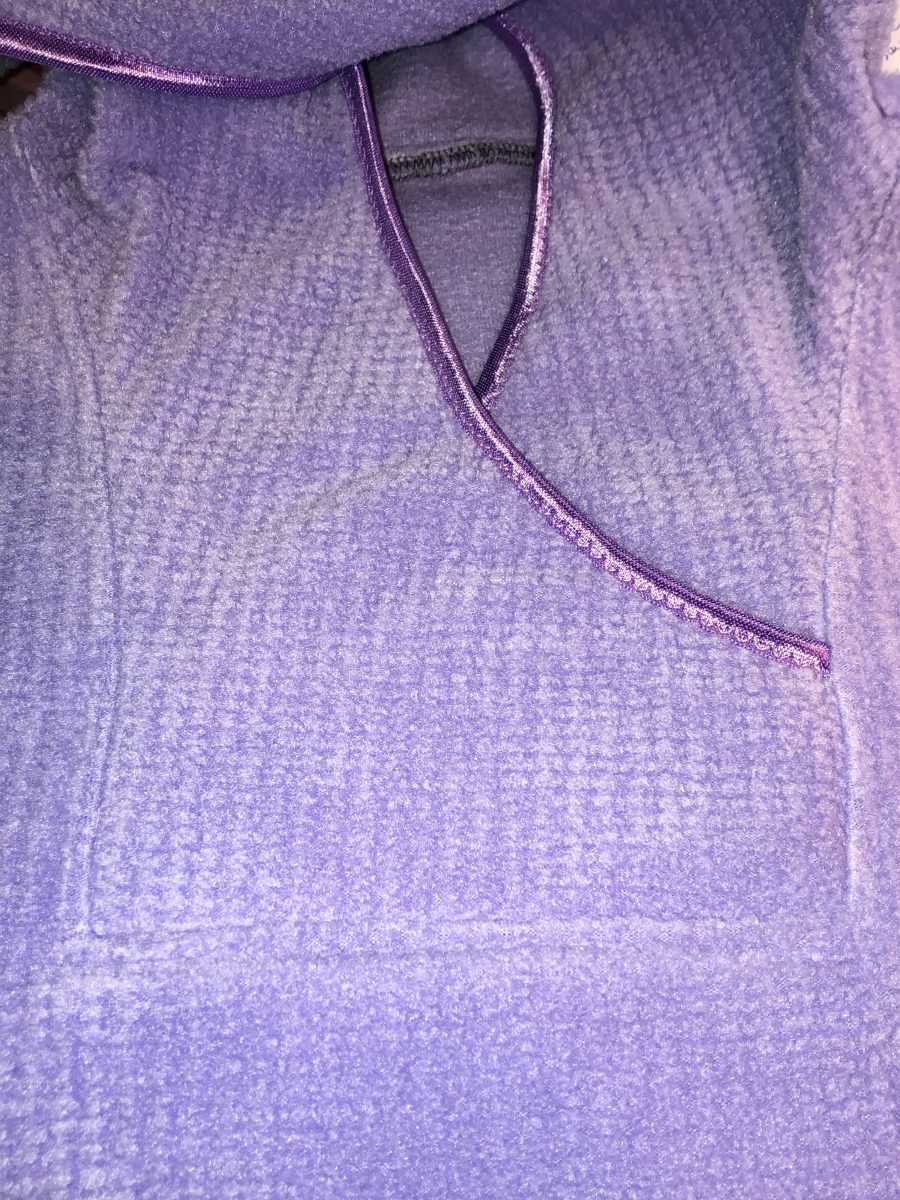
13. Topstitch the neckline. This is optional. From the right side of the garment, I started at the back of the neck in the photo below. You can see the seams of my center hood on the left side of the photo, and a shoulder seam in the foreground. The seam is pressed towards the body and I am sewing just to the right of my seam, using the inside of my foot as a guide to keep my stitches even.

Close up of neckline finished and top stitched. I am happy with the outcome!

Add the pocket, sleeves, and finish the rest the sweatshirt. Now that you have conquered the zipless version, go forth and be the boss of the zipper! And then maybe the welt pockets.

This post contains affiliate links, which means I may receive a small commission from the pattern designer if you choose to purchase the pattern with this link. I certainly appreciate it if you do.

Here is my affiliate link. https://5outof4.com/product/leslie-top-tunic-and-dress/?affiliates=162

Wishing you happy sewing! Joan

PJ pants – a slow and sustainable process

Eternally grateful for the opportunity to teach sewing. One of the interesting parts of that is how much I learn from my students. A year ago, I met a woman who was instrumental in getting the ban on plastic bags in our city. That has all taken a big back seat since the pandemic, but it really made me think about what is truly important. And what kind of a footprint I want to leave behind. I love to sew, truly, I do, but how many garments do I really need? Luckily, I have a grand child, who is growing and actually needs clothing, so I am having fun with sewing kids clothing. Another student, introduced me to dyeing fabric. She is a proficient seamstress, and really wanted to learn better finishing techniques. We were able to (pre pandemic) meet for sewing get togethers, which was great therapy for all who attended. Everyone worked on their own project and were inspired by each other to learn more and become better, both as people and as sewists. So this is some of the reasoning behind why I spent a lot of time stitching up a pair of PJ pants from a cotton LLBean sheet that I rescued from my parents linen closet. Plus, I have a newly refurbished treadle and wanted to practice.

If you have left this to the 11th hour,are making a bunch in a hurry, are impatient to get this done, or ended up using a scrap that does not leave room for pockets, skip to this method.

The sheet – wow, they still make them, and they are nice with a high thread count and pretty pricey. This one had lived a long and happy life. The center parts were tissue thin, but the edges, were still solid, with more wear to give. I washed it and set it in the bottom of this tub, where I ice dyed some rescued rayon gauze that I recently found. She sheet, old, and torn in a spot, just caught the drippings of the dye intended for the newer focus fabric in this ice dye experiment. Double left overs happening here.

Ice dyeing. Fabric is treated with soda ash and water solution, then covered with ice. Powdered dyes are sprinkled over the ice and as it melts, the fiber reactive dyes, meld with the chemically treated fabric to make permanent color. A seriously fun rabbit hole. #pandemicproject

You can see below the rack, said sheet, which surprisingly picked up mostly the blue, maybe turquoise. This is my second try at ice dyeing. Fun to experiment. I purchased a small amount from my local fabric shop, then went on to Dharma to purchase larger quantities. I have had the dye materials since summer, and was worried about doing it “correctly” so put it off. Then I remembered a lesson I learned in learning to teach art. Sometimes it is more about the “process than the project”. A valuable lesson that enabled me to experiment with things that may “fail” but are worthwhile in doing for the learning opportunity. A recent snow inspired me to give it a try. This is what it looks like after the ice melts.

The pattern calls for a 3/8 inch seam on woven, quilting cotton or flannel. After serging around a garment my daughter made in flannel, in which the edges frayed so badly, she was going to pitch it, I decided that this one was going to get a clean finish. Here is an extreme close up of the beginning of a flat felled seam. Normally, one would stitch at 1/2 inch seam allowance, then trim off 1/4 inch of one side. I offset the two pieces by 1/4 inch. and sewed a seam 1/2 inch on the back piece, and 1/4 inch away from the edge of the front piece. The 1/2 and 1/4 total the same amount of fabric in the seam allowance as both pieces being 3/8. If you are more about cutting quickly than perfectly smooth, you can cut a generous 1/8 inch bigger and trim later.

Stitch both front and back crotch curves.

Fell that seam. What I love about a flat felled seam is that it is finished on either side. One side will have the double rows of stitching, the other will have a single row. On fabric that is a looser weave, and may stretch more on the bias, like crotch curves for me, I will not sew with a straight stitch but a very slight zig zag, .5 wide. Not noticeably zig zag, but with enough give that your seams do not pop. See more about seam finishing here. If you want to go for really slow sewing, you can press that larger seam allowance first. These pants were sewn in the wee hours of a December morning, so I was trying to sew quietly – on the treadle. The crisp sheeting finger pressed really nicely.

Finished flat felled back crotch curve. It is not completely perfect, so I decided that this could go on the inside. Perfection takes loads of practice, and I am really enjoying re-learning to sew on the treadle.

The other side will do nicely, thank you! Since there is no right or wrong side to this hand dyed sheeting, it will work either way.

Pockets. I firmly believe they are worth the effort. You can see that I traced out the pocket a tad bigger than the pattern. I had plans for that little #extra. Matched up the notches and stitched the pockets right sides together. One thing. Since this machine, a 1920 Singer Red Eye has no reverse stitch, I have been playing around with how to nicely end my stitching so that it stays put. While sewing on what was once a sheet that my mother slept on, I could hear her stories about how they would leave tails and pull the threads to one side to tie square knots to finish each seam. Well, I was slow sewing, but maybe not that slow.

This is Betty, a 1920 Singer Red Eye I found on eBay to fit into the treadle table that came from our neighbor Betty’s estate sale. I always enjoyed visiting with Betty, and wish we would have chatted about sewing while she was still with us. I am having a lot of fun refurbishing and bringing Betty and her table back to life, as well as listening to all the lessons my mother taught me when I was first learning on a Singer Spartan. Learning a new skill is really good for brain elasticity. I have been sewing for many decades, so it is fun to relearn it from a new vantage point. #pandemicproject

Under stitch the pocket. So after I under stitched a pocket or two. I realized something.

You don’t have to cut every thread. Sewing a single layer made this bunch up a tad – on the dark blue piece. It smoothed out easily, since the threads were not secured. If you look closely, you can see the initial seam where I attached the pocket bag, continued stitching 2-3 stitches, then turned the work around to go back and under stitch. The extra stitches will remain in the seam allowance, so that works. I realized I could do this on my electric machines too. Slow sewing time saver, yay! I love learning.

French seam the pockets. After I flat felled the inside leg, and created a narrow hem at the bottom of each leg – who wants a smoother inside leg in their pants, right? But did not get photos, I opted to French seam the side seams. With wrong sides together, sew the side legs and around that pocket bag with an 1/8 inch seam. With the pockets cut a little larger, I had more wiggle room to line them up. This may have been sewn with a generous 1/8 inch seam then trimmed.

Clip diagonally into the top and bottom of the pockets, where marked below. Do not clip your seam.

Sew each side. Pants with side seams sewn and ready to trim. Notice that a narrow hem is already done, and the top edge was basted 1/4 inch to the wrong side. I used to shun basting as a waste of my precious sewing time. After teaching new students, I am now a basting fan. I would much prefer to spend 2 minutes basting than 10 ripping. Basting is also faster than waiting for the iron to heat up. And another chance to practice sewing a straight seam.

Flip the pants wrong side out, and sew a slightly deeper seam. If you trimmed to 1/8 inch, then a 1/4 inch seam will do nicely here. I was able to get my hand in the pocket to smooth out the edges before sewing. The clipped tops and bottoms of the pocket bag make it easy to get around those areas, and keep them smooth.

With side seams pressed towards the front, make a casing, and insert your elastic. Try on the pants and hem to the length you need now. For kids being able to let this hem out in 6 months will allow these pants to be worn longer.

Here are my affiliate links to both the kids and adults patterns which are currently free. With an affiliate link, I could get a small commission on the price of the pattern if you choose to purchase with my link. It costs you nothing extra and is much appreciated.

Adult pants.

Kids pants.

Oh, if you are wondering what I plan to to with the rest of that king sized sheet? Reusable gift bags, of course! I hope my kids get as much of a kick out of receiving and reusing these as I did making them. It will allow a “presence” of great grand parents at the celebration too.

Happy sustainable sewing! Joan

PJ pants PDQ

Another round of testing a new pattern at 5oo4.
I love the drafting of the adult version of the free PJ pants. My younger students have loved and learned loads from making the smallest sizes of the adult version. So I jumped onto the test for the kids version. There is always so much interesting insight to be gained in pattern testing if you pay attention. Recently, I found out that I would be keeping my grand daughter an extra day early, and wanted to get photos of her in these, but had limited time. So I made this pair in about 45 minutes. You can make them up quickly too. Here are some tips!

1. Skip the pockets. If you are making these for photos or for small children who have not yet discovered the joy that pockets bring, or are inclined to leave messy things in them, just skip them. Don’t get me wrong. I am 100 percent a pocket fan, but we are in a hurry here. This remnant was only 23 inches long, and there would not have been room for pockets on the fabric.
2. Skip the side seams. The side seams of these pants are fairly straight. Mark the seam lines on the outside leg (the longer side) with a highlighter, crayon, or whatever is at hand. Line them up so that the seamlines are on top of each other, and, with your fabric folded, cut around the perimeter of this new shape.

3. Serge the single layer of the top waist band edge and the bottom hem edge to give them a clean finish. Chain serge to save thread.

4. Sew the inseams. Fold each individual leg right sides together and serge the inside leg seam. In the photo below, I serged and top stitched the inside leg…. And also hemmed. I was in a hurry and forgot to take shots of that.

5. Hem the pants. I know my models inseam, and found it simple to hem each leg before sewing them together. The inseam before hemming measured at 16 inches. I folded the pant leg up 2 inches and hemmed, then another 2 inches, and this time hemmed with the longest stitch, and just enough back tacking to hold this together. This gave me a 12 inch finished inseam. While hemming twice seems like it takes more time, and seems a little bulky, it will allow us to remove that long stitch hem and give the wearer another year to wear these pants. I like the idea of a more sustainable, grow with me wardrobe. Pants can also be finished, tried on and then hemmed for a more accurate hem.

In the interest of a grow with me option, the same can be done with the waist band. It can be cut one inch taller front and back and elastic applied then folded down once more and basted, so that when the model grows taller, the waist and or hem could be let out to wear for another season. The flip side of this is it will take longer for these to dry with the extra bulk. You choose what works best for you.

6. Sew the crotch curve. Turn one leg inside out and place the right side leg into the inside out leg, so that right sides are facing, then serge the curve, matching up the seams at the inside leg. Below is a photo of me top stitching that seam to one side. Since the crotch curve has some bias and stretch to it, a bit of a stretchy seam will last longer than a plain straight stitch. .5 wide zig zag is sufficient.

7. Add elastic. The fastest way for me to add elastic is to quarter mark my elastic and quarter mark the pants. The seams are half of that, so just mark where the side seams would go. Then starting in the center front, and the center mark of the elastic. Stretch the elastic as you sew from matched up mark to matched up mark. The first one is easy.

8. Overlap ends when you get to the back of the pants, add a tag here if desired, sew to the end of the elastic, then back up half an inch, and without twisting, place the other end of the elastic on top of this, stitch without stretching for 1/2 inch, and keep sewing that elastic from mark to mark.

9. Secure the elastic ends. Go back to where the elastic ends are overlapped and sew down the center of the elastic. For me this is enough to mark the back of the garment. Since a little one or her parents will be helping with this garment, I added a strip of knit fabric just to denote the back.

10. Fold elastic to the wrong side and top stitch. And just like that, you are done. One more gift on the “finished” list!

I sized these according to a hip measurement wearing a cloth diaper. Lots of room for play in these fun and quick pants!

This post contains affiliate links to free patterns which may generate a small commission to me from the pattern designer if you purchase the patterns using those links. Much gratitude from me if you do!

I made a pair of these pants – slow sewing style – with pockets, flat felled and French seams on the treadle. Watch for that post, it may be a while.

Wishing you happy sewing! Joan