I grew up with a swimming pool in the back yard.
My parents signed the offer on the house at the check out counter at Safeway while we were buying candles to put on the cake for my 8th birthday. Funny how these details stay with you.
In the mid 60’s, we were clothing frugal compared to today’s standards. My mother made a two piece for my 9th birthday from a woven red, white and blue large floral. She lined it with the same fabric. It really became interesting when it got wet. Over time, our outgrown swimwear made its way to a box under the bathroom sink, so that when guests came over without suits, there might be something for them to wear.
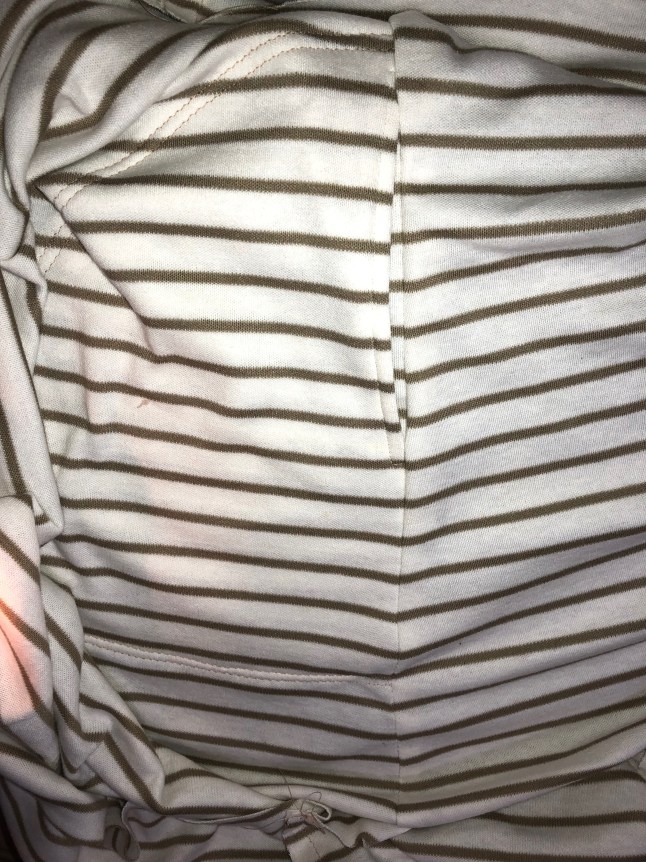
My siblings swam competitive swimming. One year, the team suit was a wide blue and white stripe, an inch or more wide. The white section was not as sun proof as the blue, and my younger sister had a striped suit on, even when she took her suit off.
I am blessed to be raised by parents who sent me several different places to take sewing lessons. One teacher asked me what I wanted to make, and I said “suits”. She showed me men’s suiting fabrics, neither of us really knew what the other was talking about but we figured it out, and I am grateful and still use techniques I learned decades ago.
By the time I was in high school, I designed and stitched my own bikinis from triangles of scraps of my mother’s projects, and bias tape. Ties everywhere. I was on a synchronized swim team called the Cygnets, and our coach asked me to sew the suits for our little group of teens and pre-teens to wear to the Junior Olympics in San Antonio Texas. They were made from an orange double knit swim fabric, and had a band of sequins. At sixteen, I had more swimwear than any of my friends, most all of it me-made, and worn daily in the summer.
I have lovely memories of so much time in the water, and one of my jobs was to clean the pool on Saturdays. There is more here, but I will save it for another time.
So, when Jessica, from 5 out of 4 patterns put out a call for pattern testers for a new swim top, called Escapade, it spoke to me.
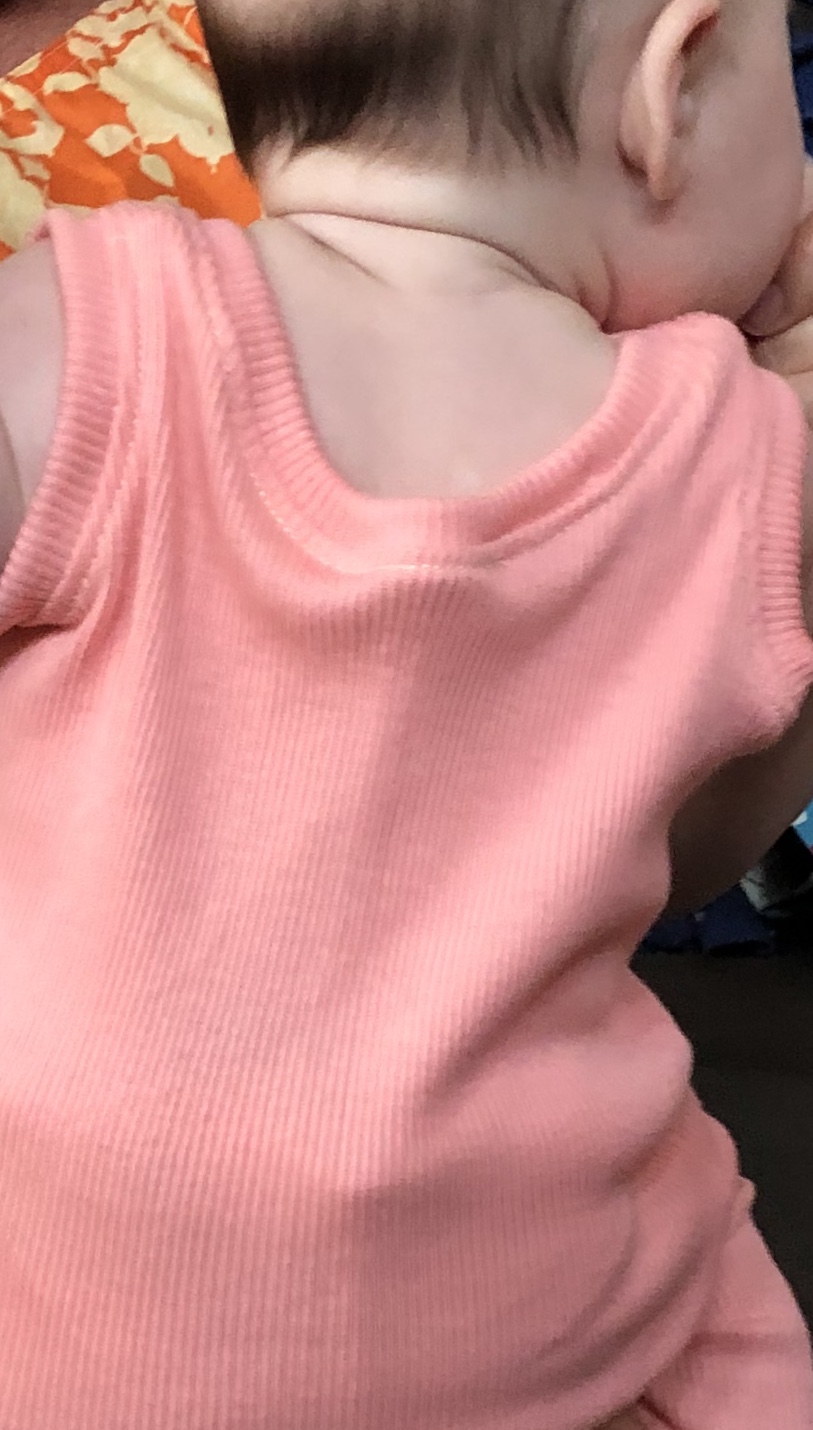
I jumped all over that test. The design is super simple, and very clever. It lifts and flatters my three score bust like nothing else. I have made it many times. After testing, I opted to try my hand at making it reversible.
- *In order to use this method, you will want to cut the bra one inch longer than your normally would cut it.
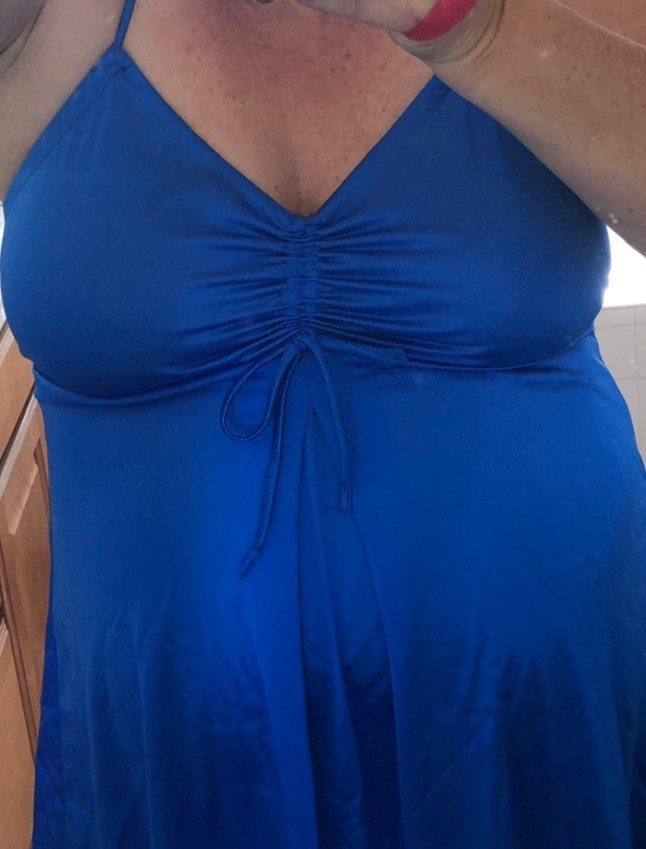
2. As a bra to wear underneath a tee shirt, I opted to skip the ties, and ruche the center with elastic. After the top center seam is sewn with elastic and under stitched, I stitched elastic from one center front (bottom) to the top center, then back again to the bottom of the other side. I left the first and last inch of this not stretched, but stretched the elastic while sewing in between these spots.
I remember the first time directly sewing elastic to a garment. My mother was on the phone in the kitchen watching me try and try again on the kitchen table. It takes practice. She asked me to wait till she was done with her phone call then patiently showed me how to hold both ends, and sew carefully.
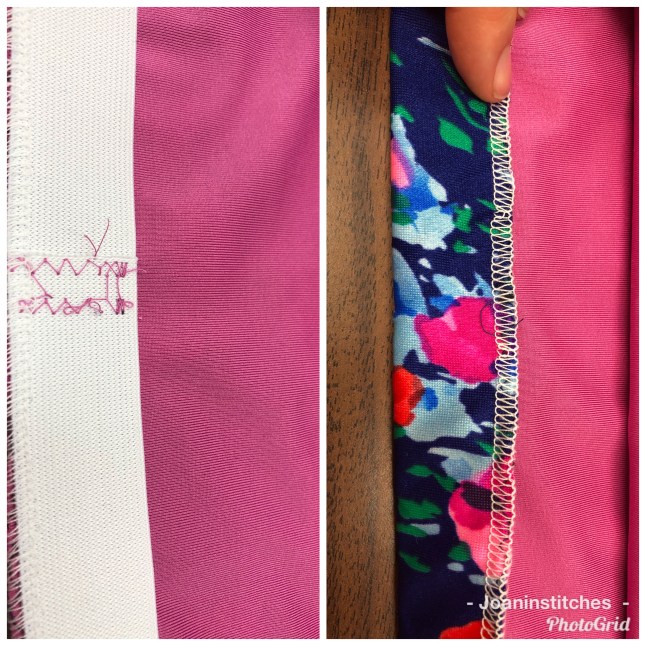
Under stitched with a wobble stitch =.5 wide zig zag.
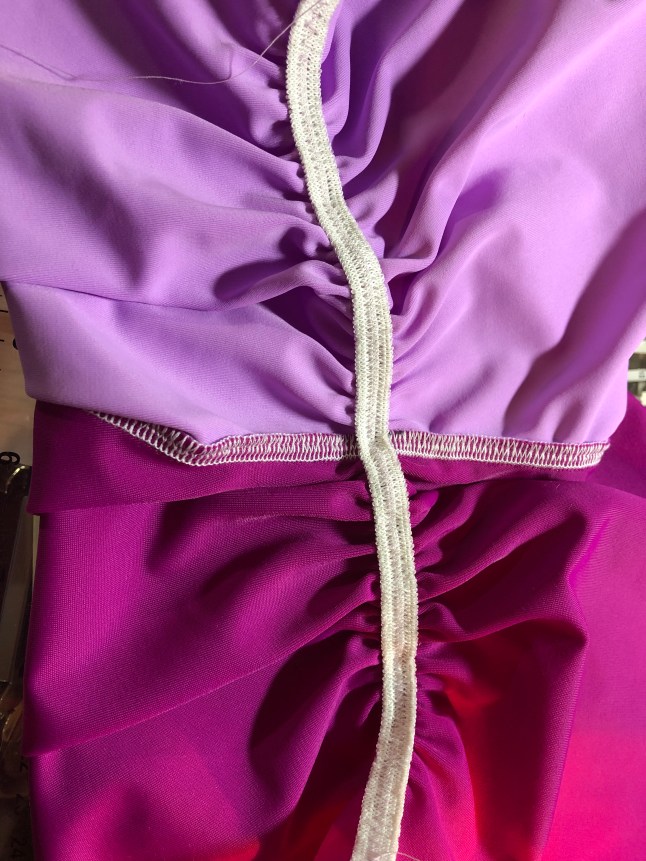
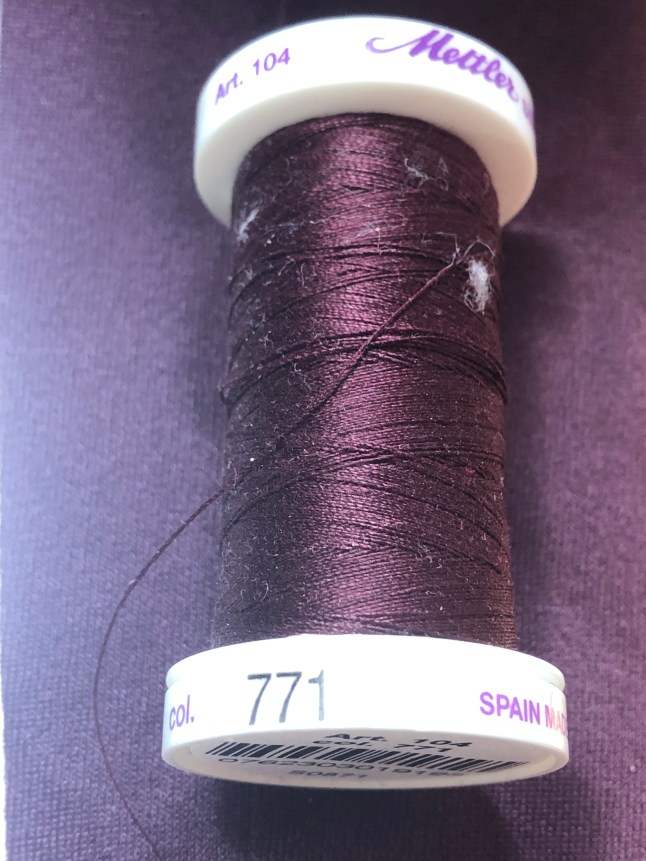
Clear elastic would work well here. I used a scrap that was handy.
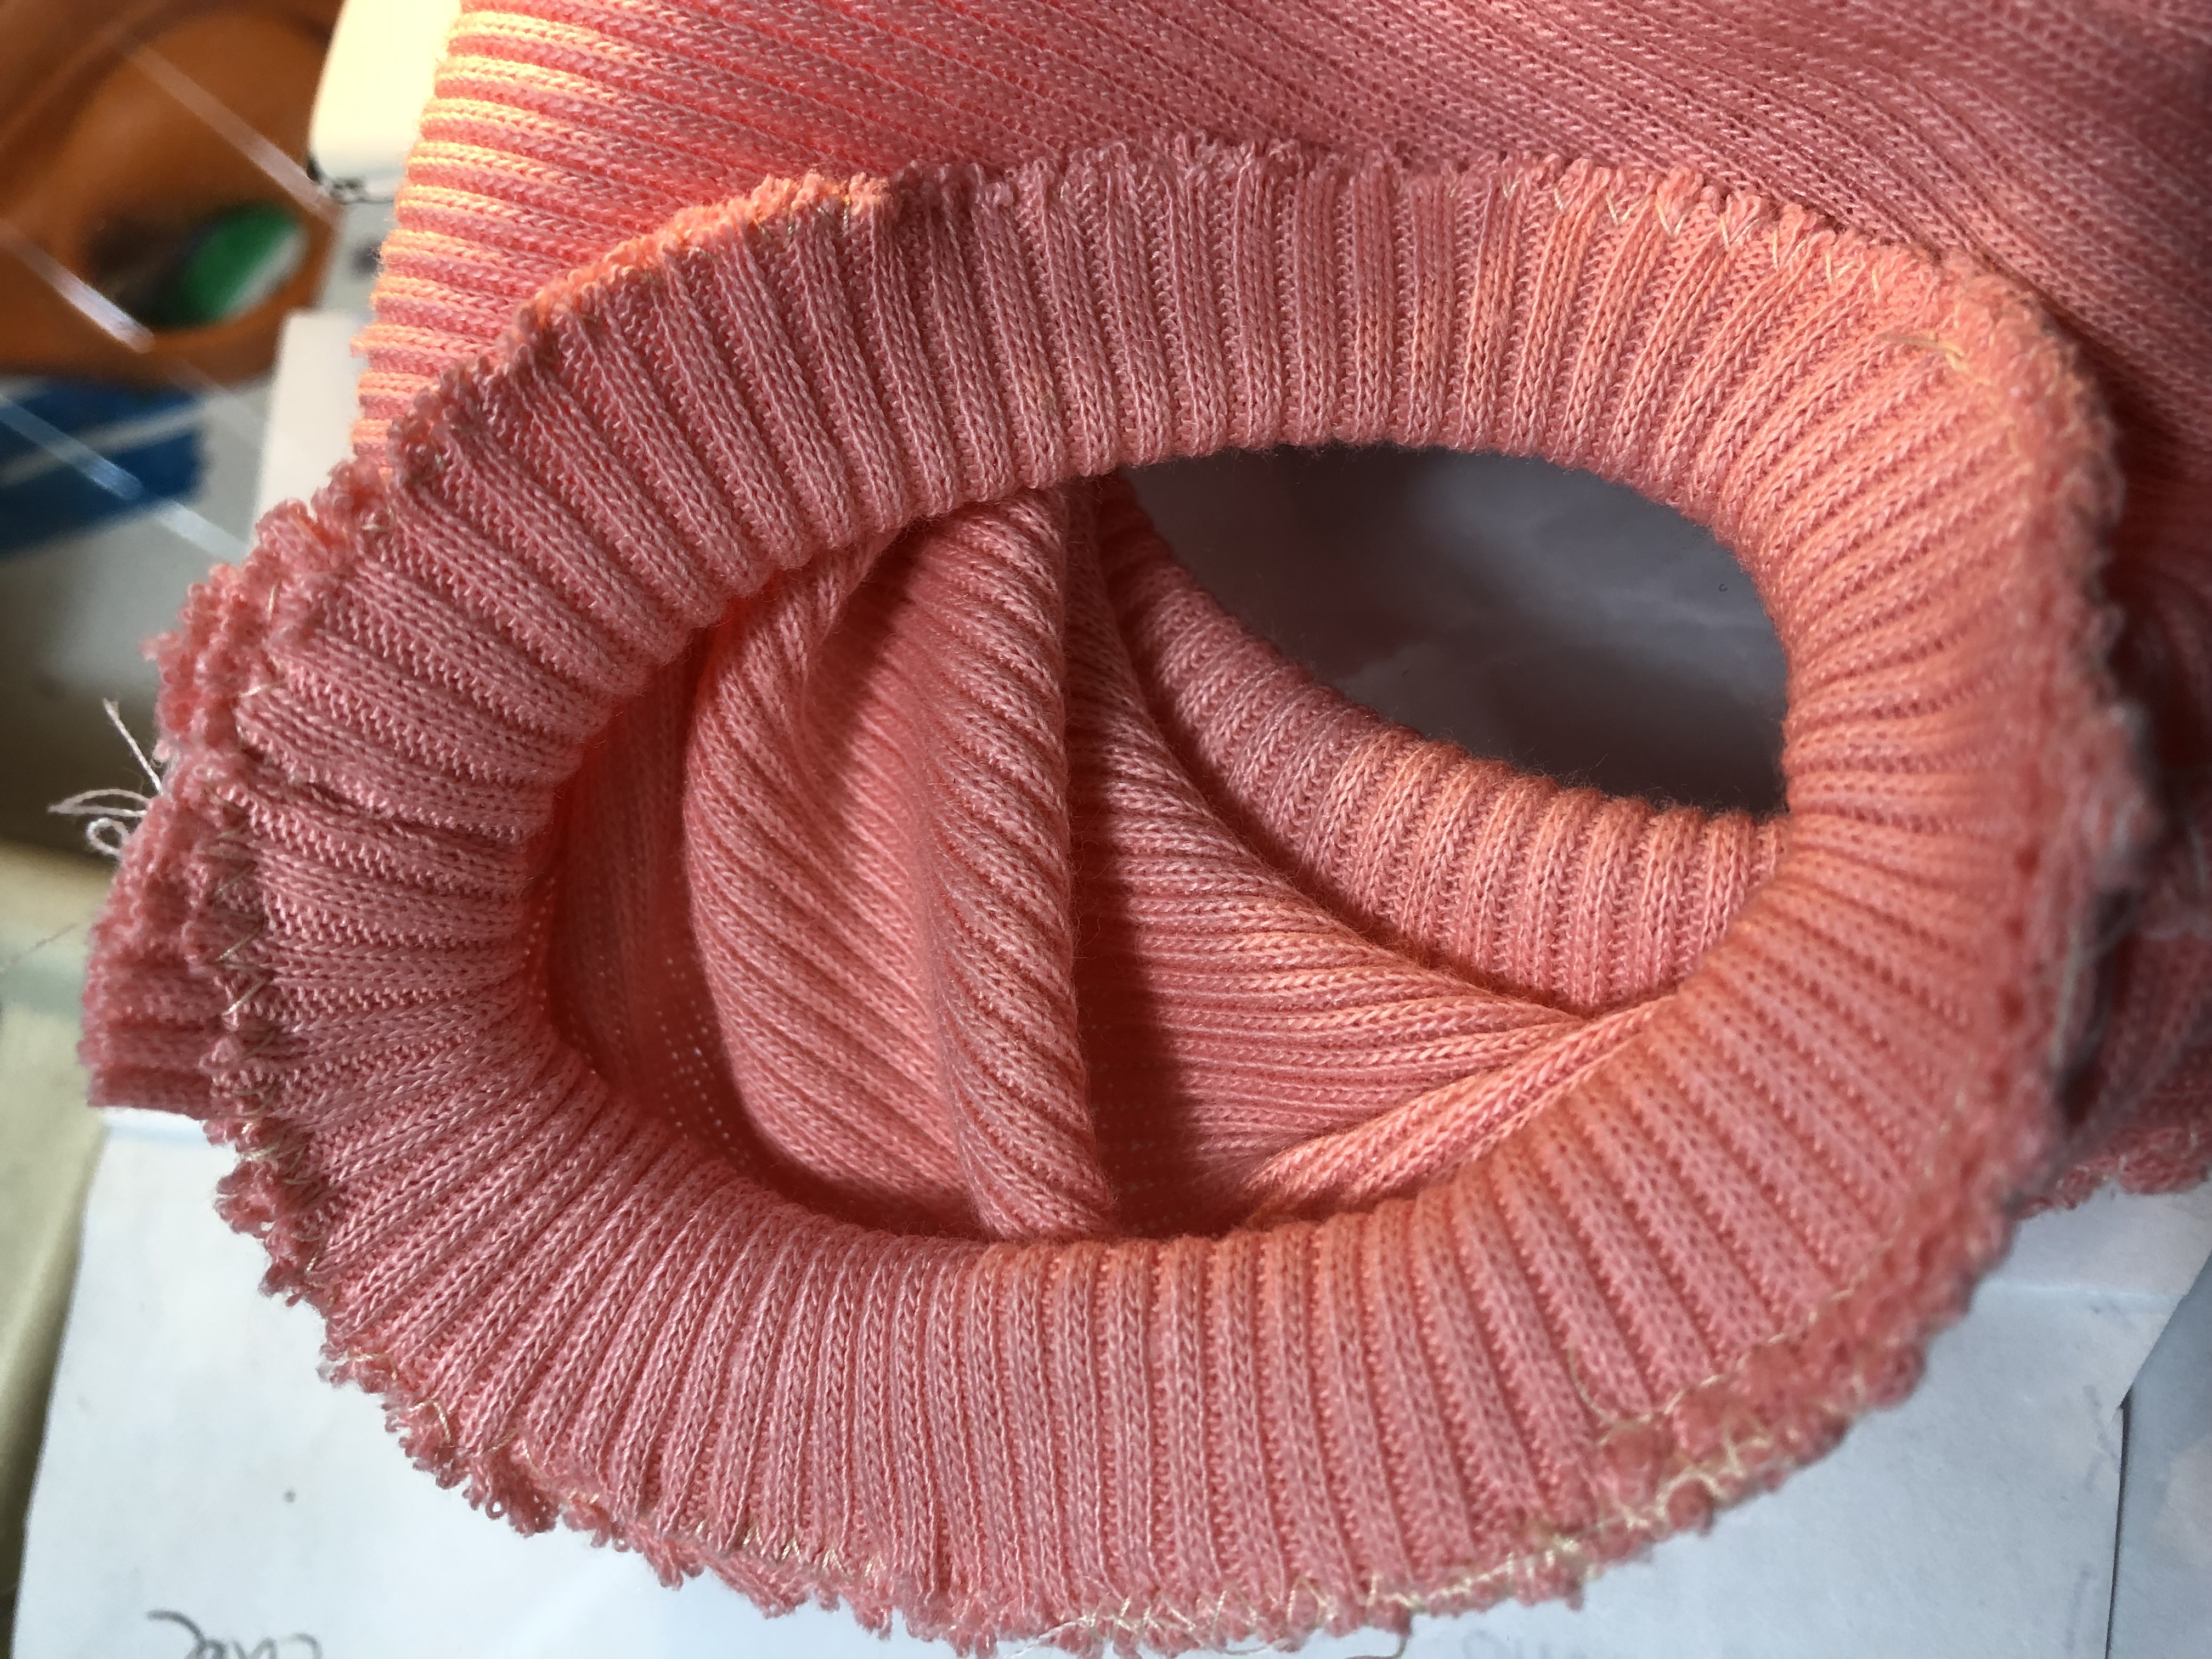
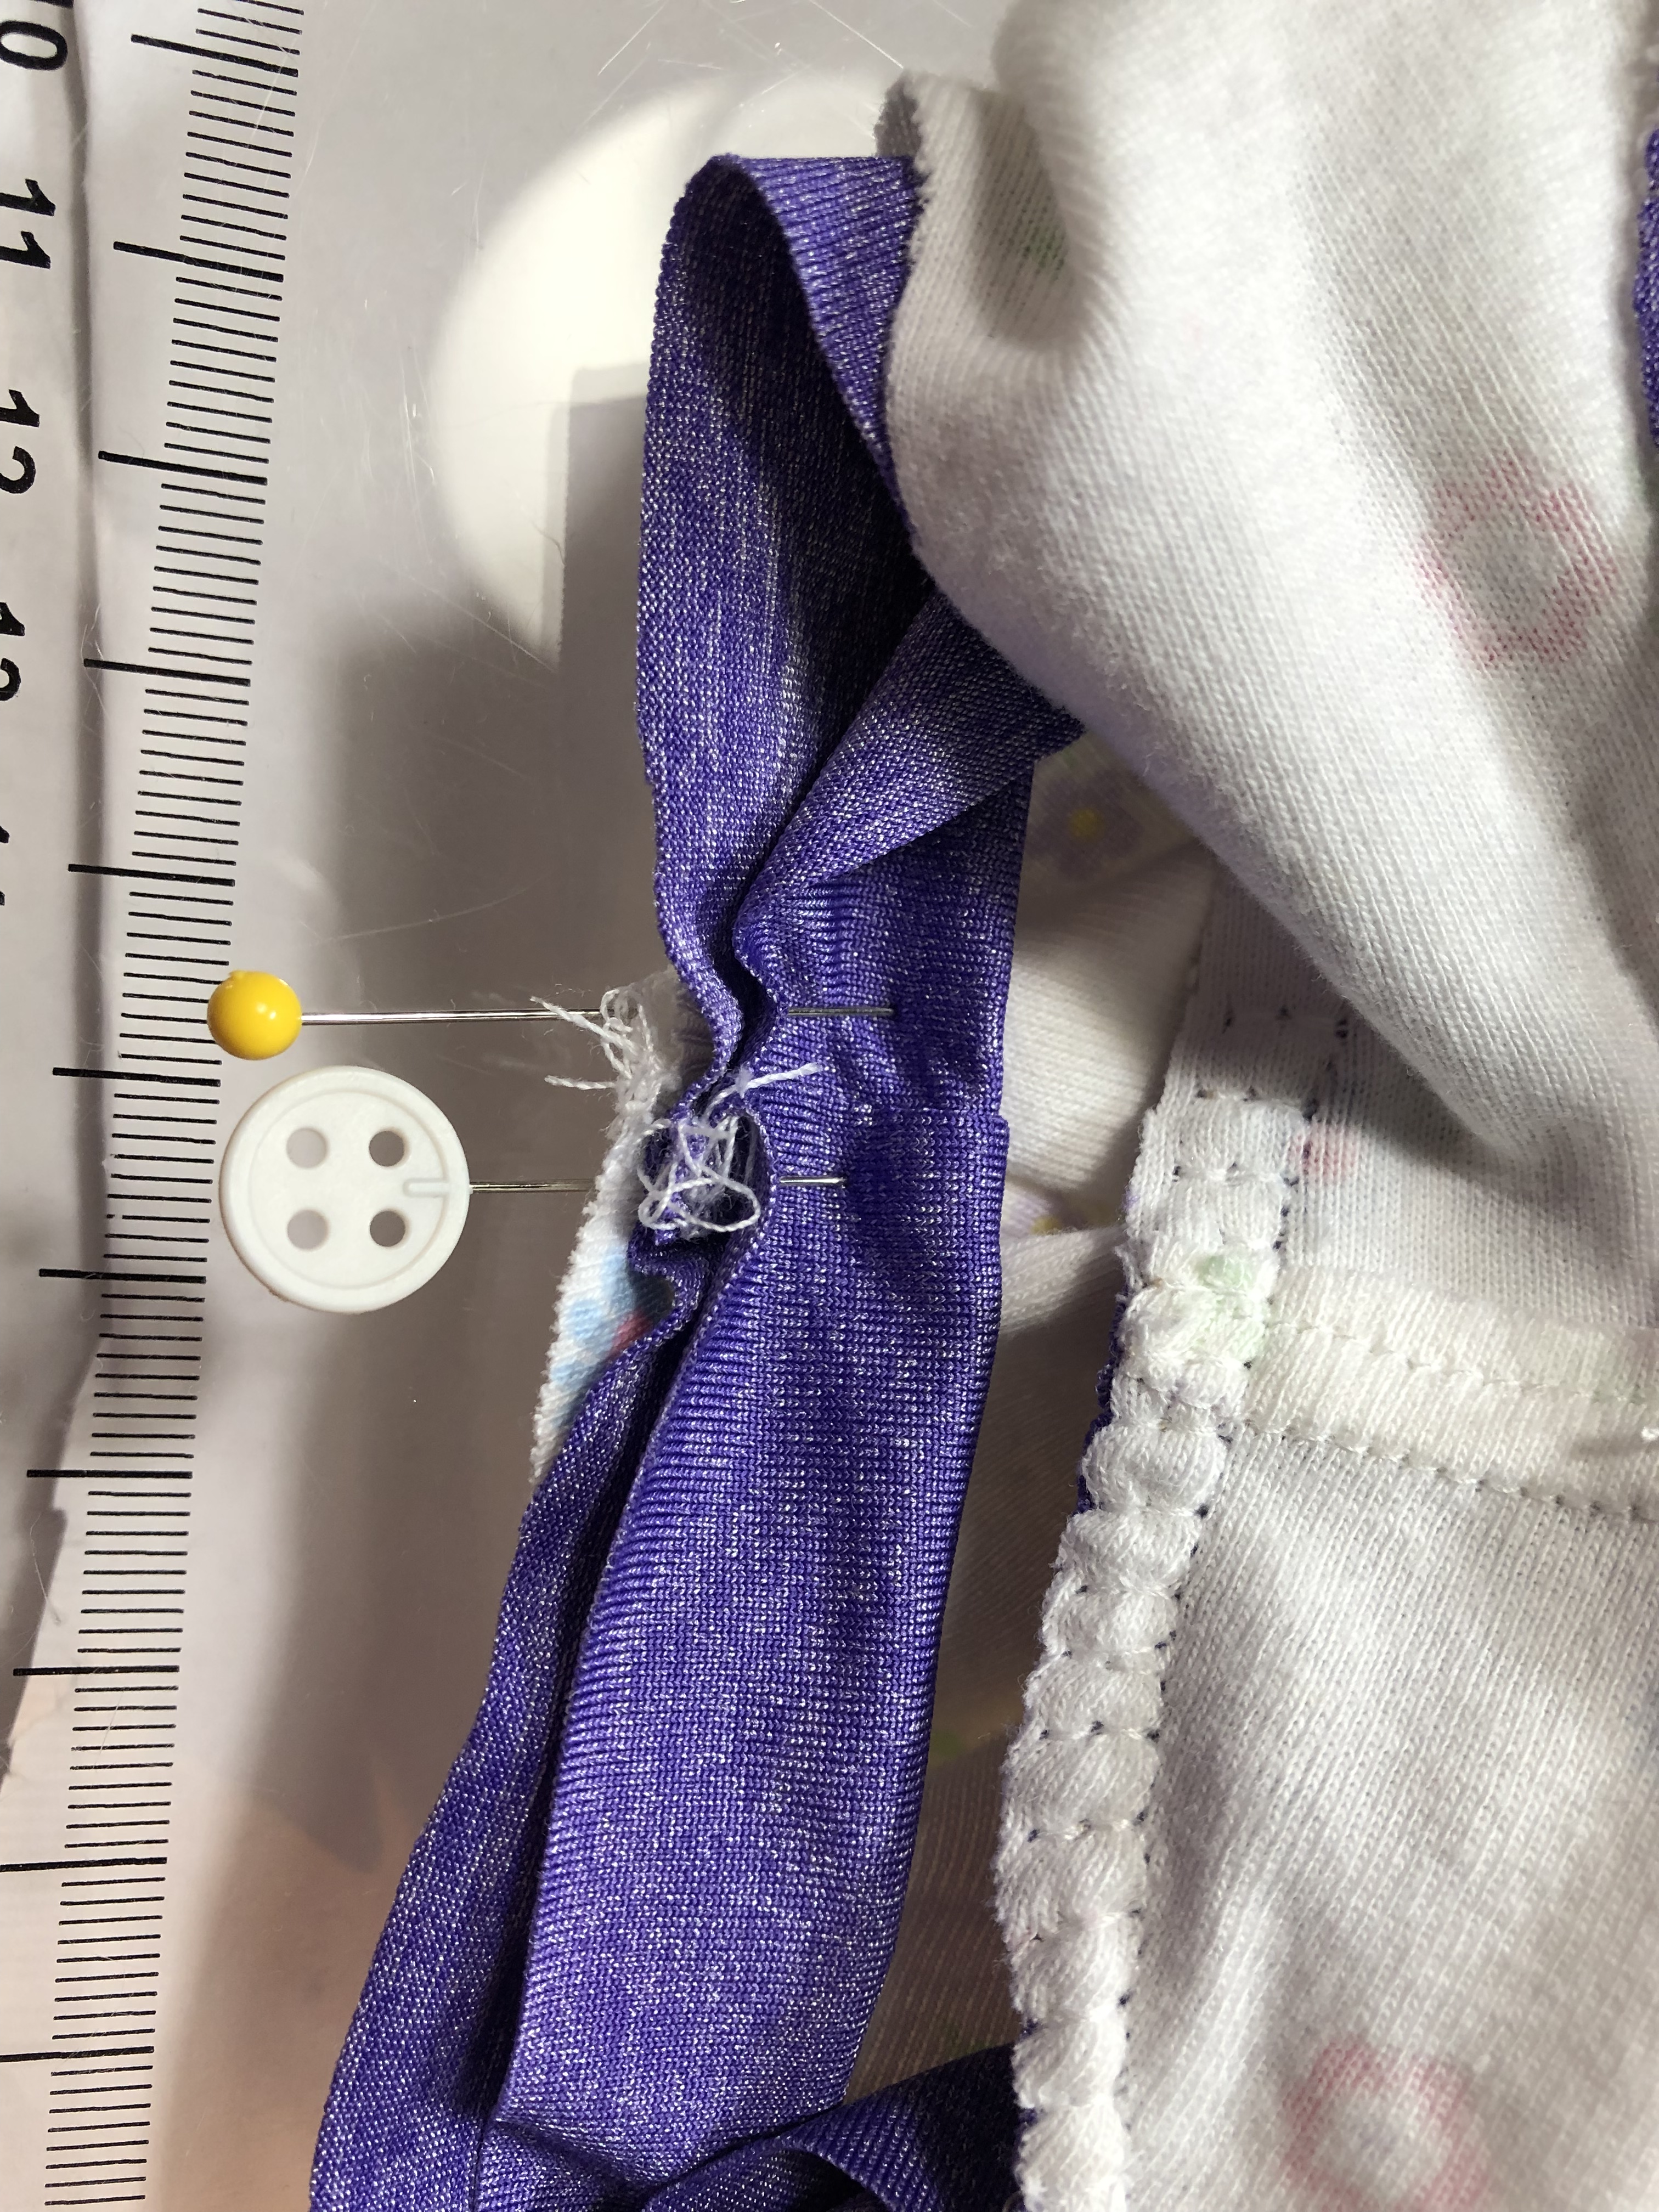
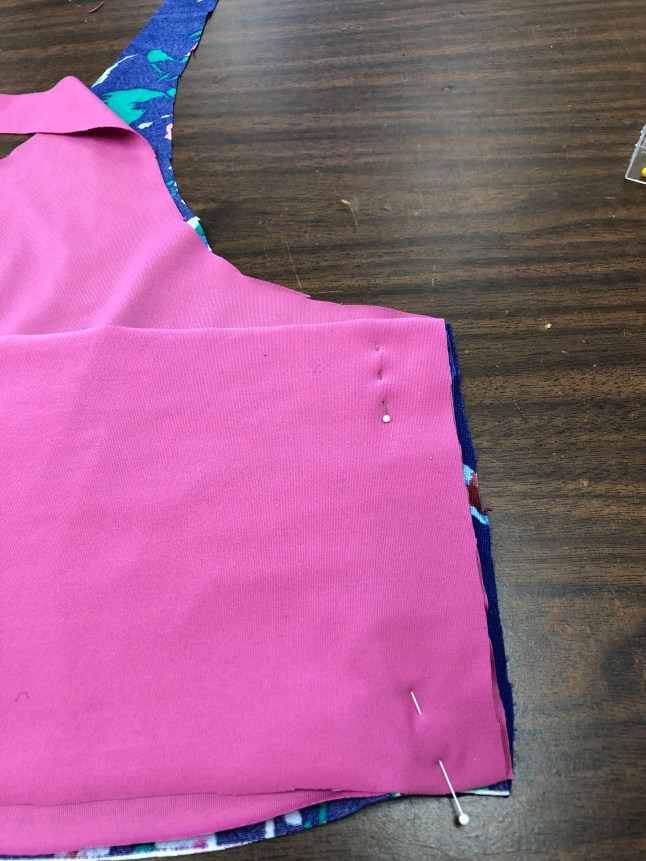
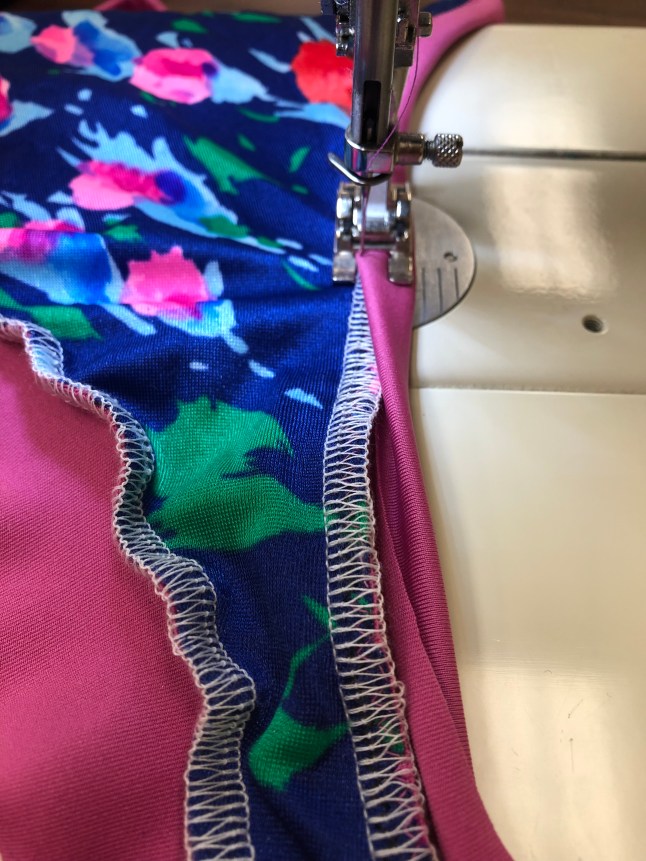
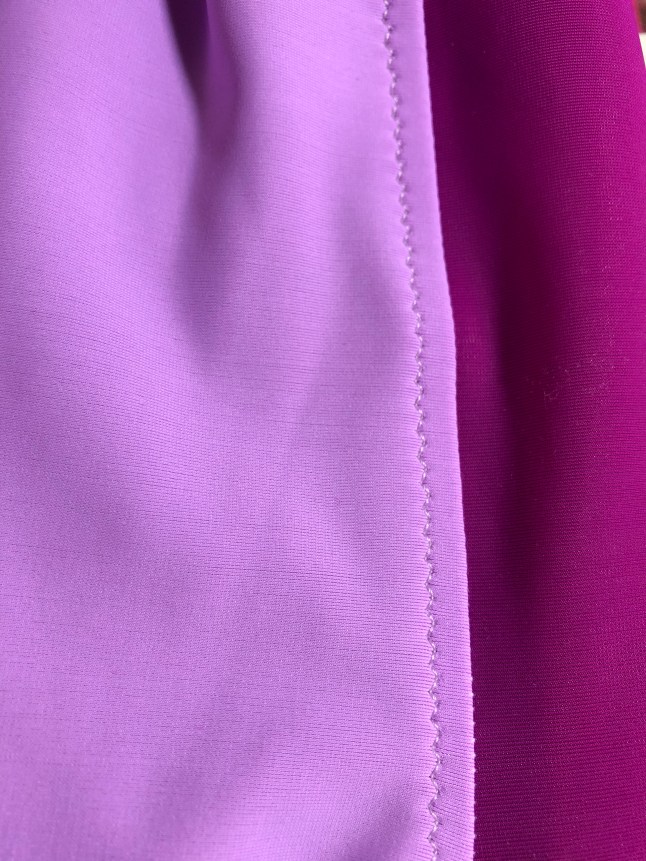
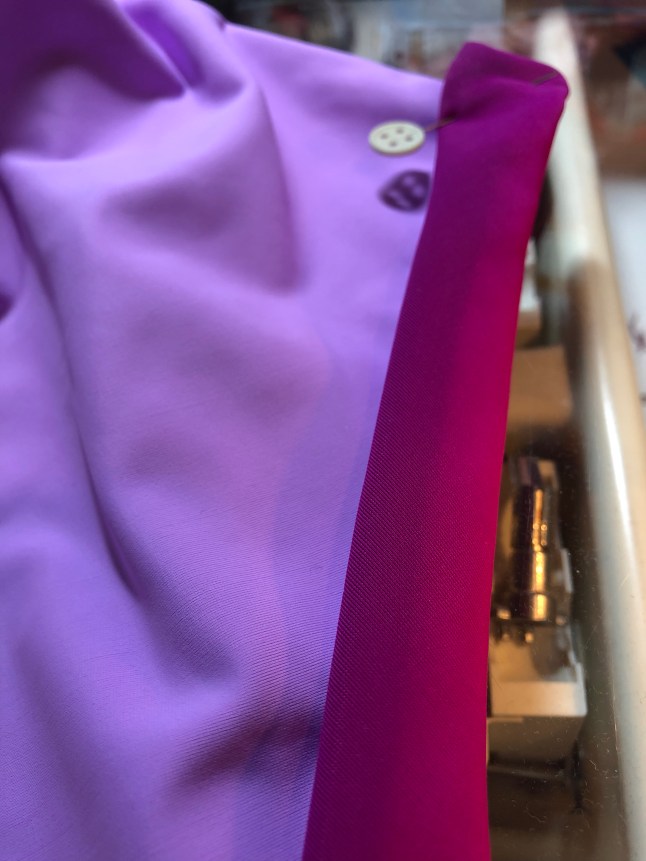
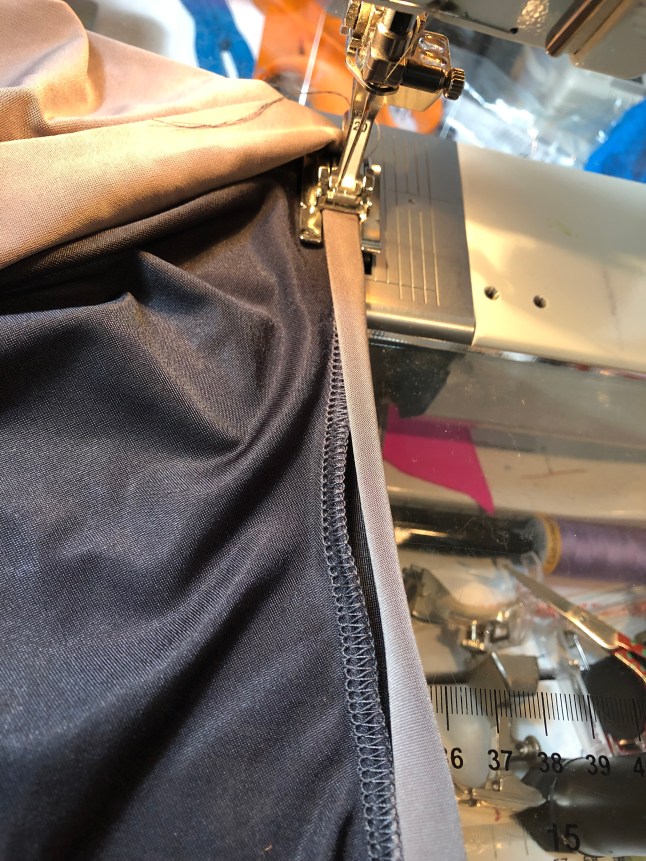
3. Next, I stitched the side seams and pressed them open. With the right sides of the front and back facing each other, I serged around the top of the bra, from the top of one breast to the other. Since I under stitched the front center seam, I was careful to wrap those seams to make crisp corners when I turned it right side out.
Top of bra sewn right sides together, with wrapped corners.
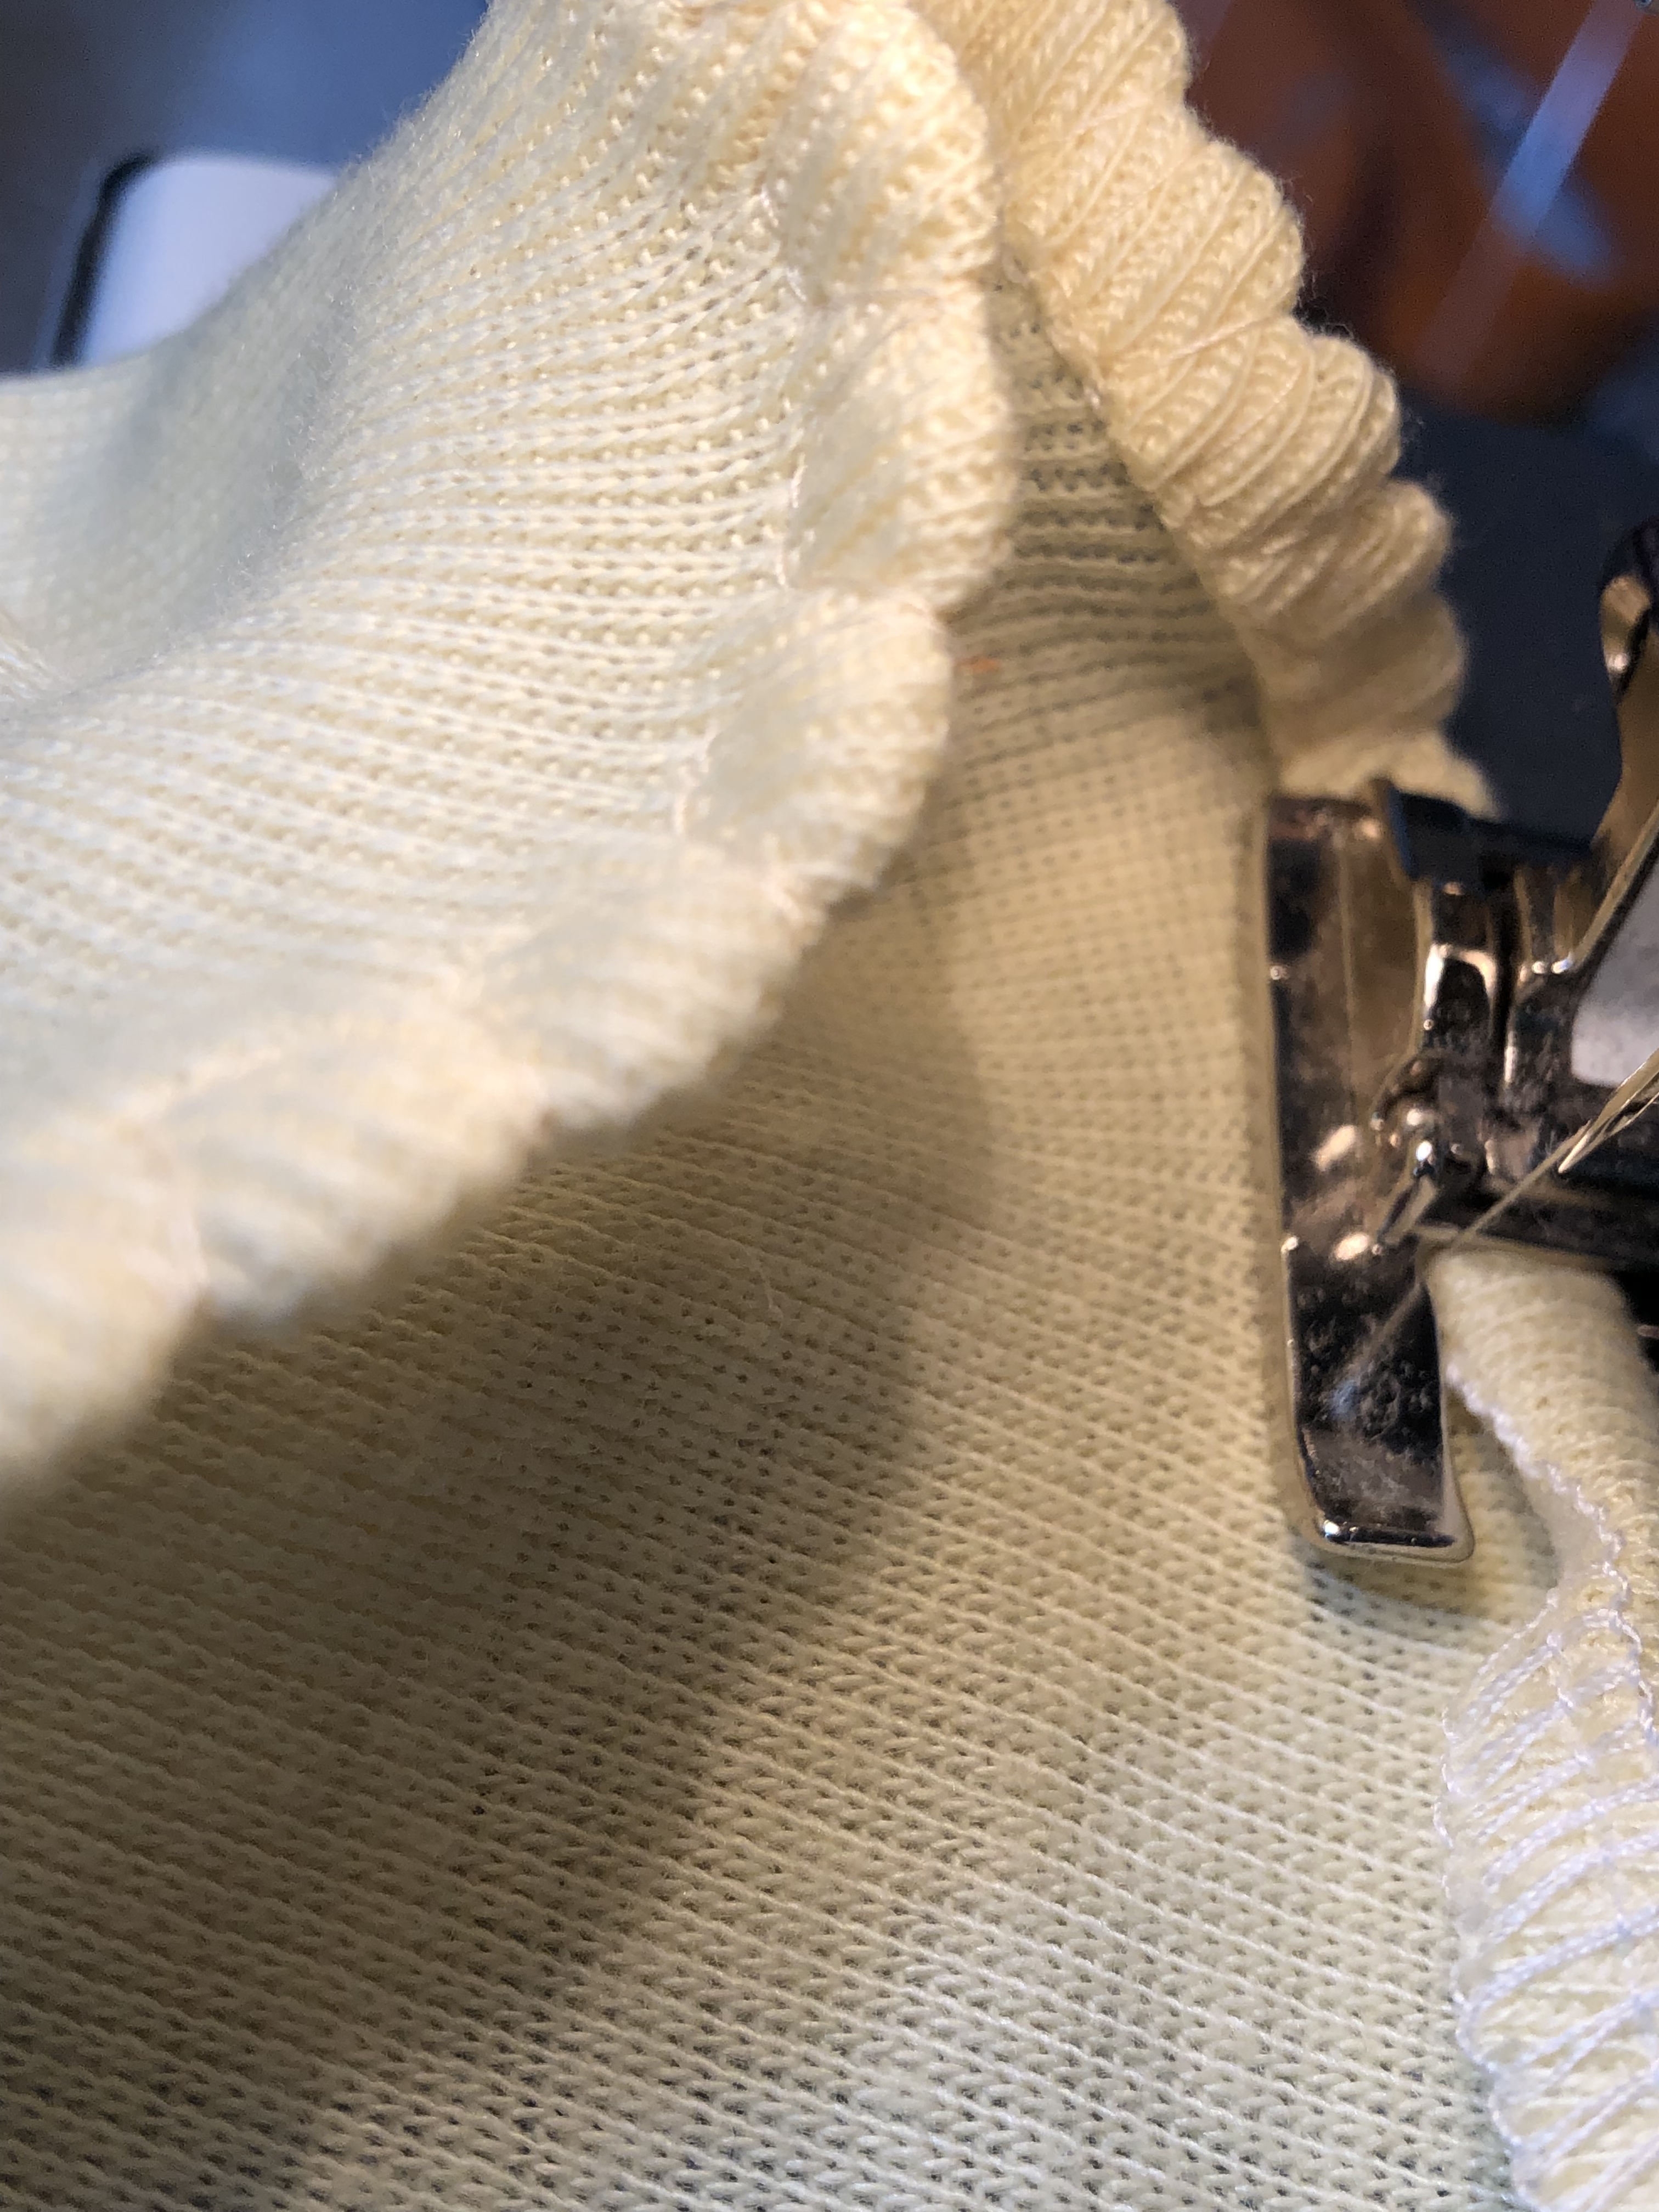
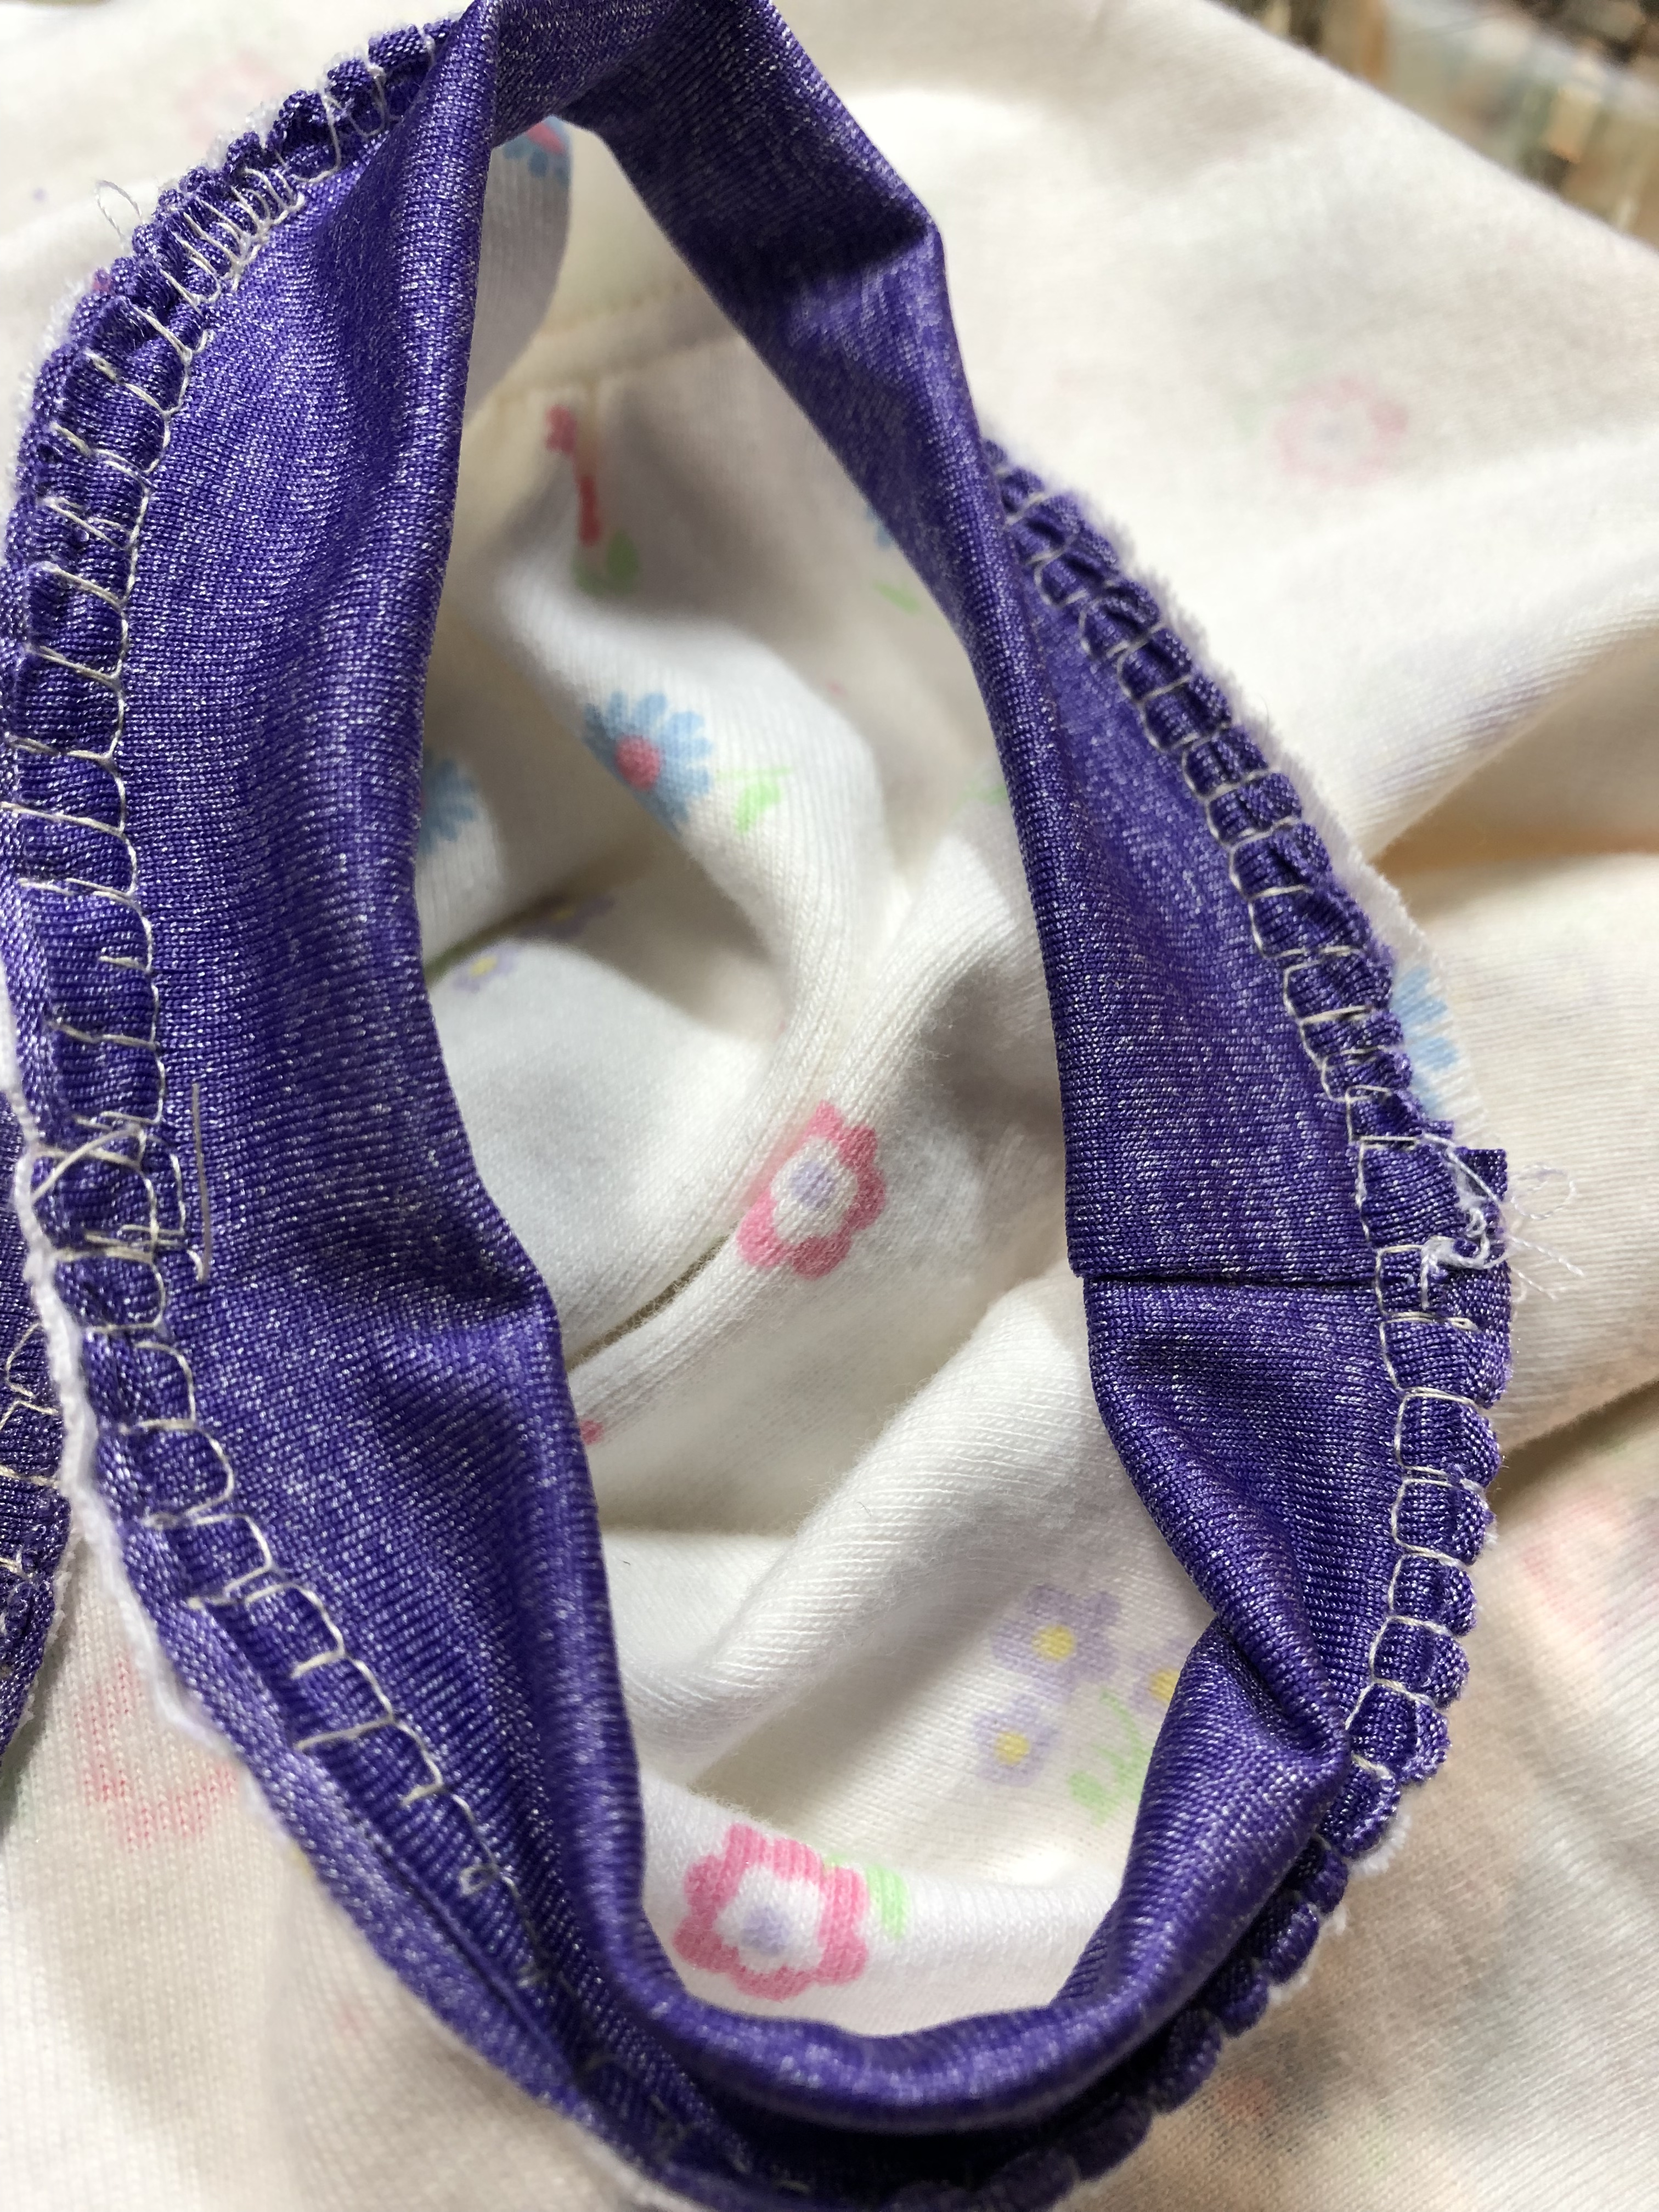
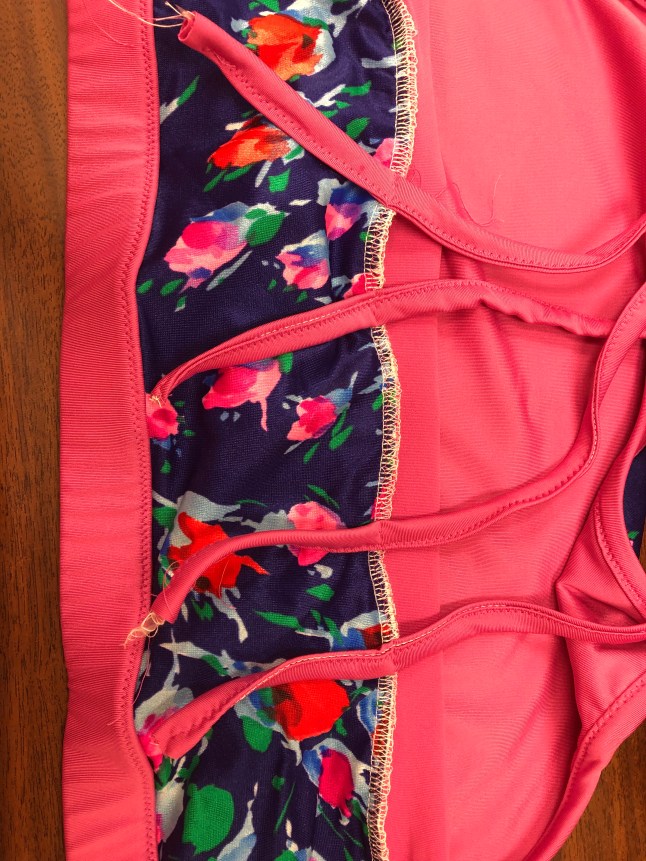
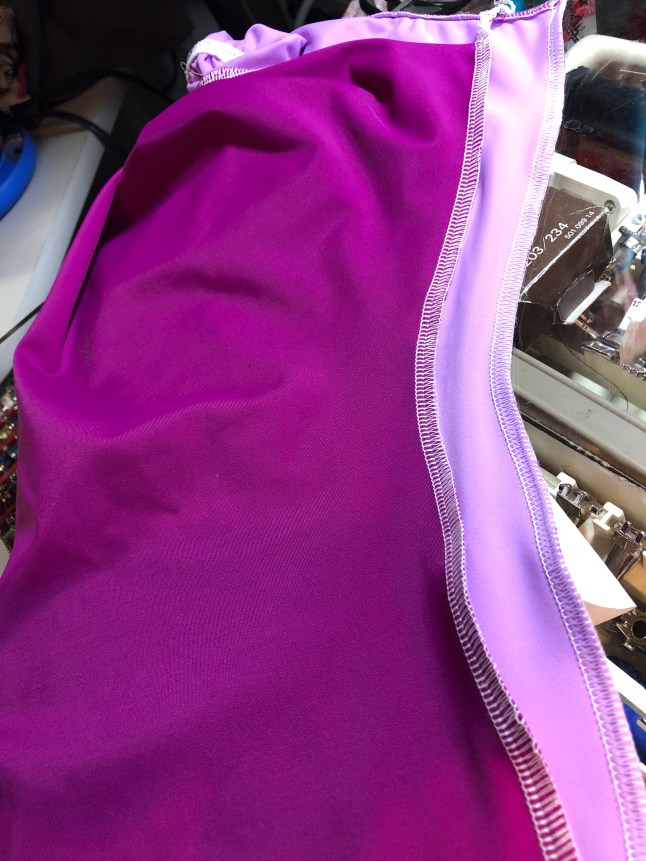
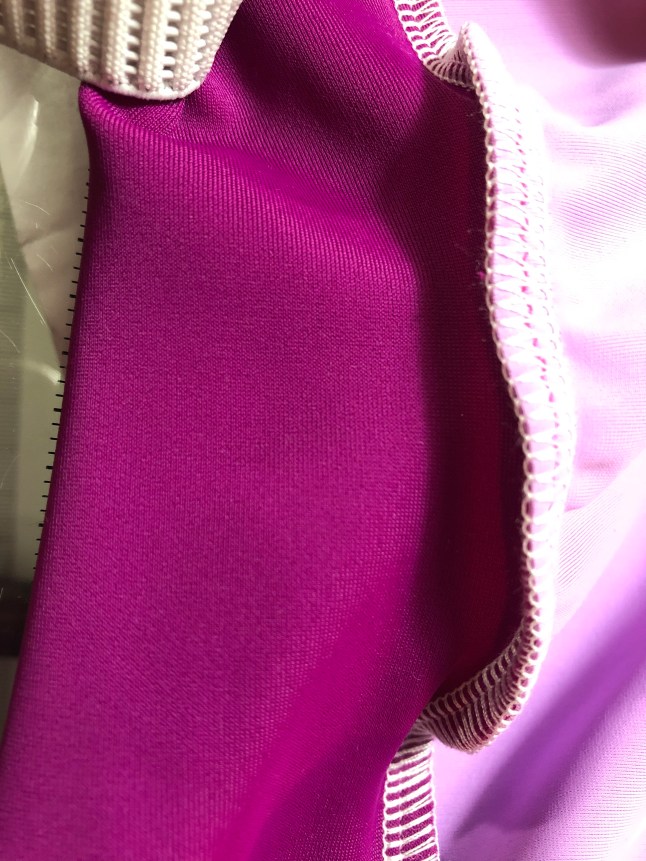
4. I pressed that seam outwards, and decided which side would get the pop of color and folded back 5/8 inch of this edge (top of one breast, around the back to the top of the other), pinned, and stitched it down to make a casing. Since that edge was finished, it turned out pretty on both sides. ** Note going forward I would leave the back un sewn about 4 inches from either side of center. This would make it easier to slip in those straps.
Top edge folded over and stitched down to form a casing.
5. After that, I made the drawstring per pattern instructions.
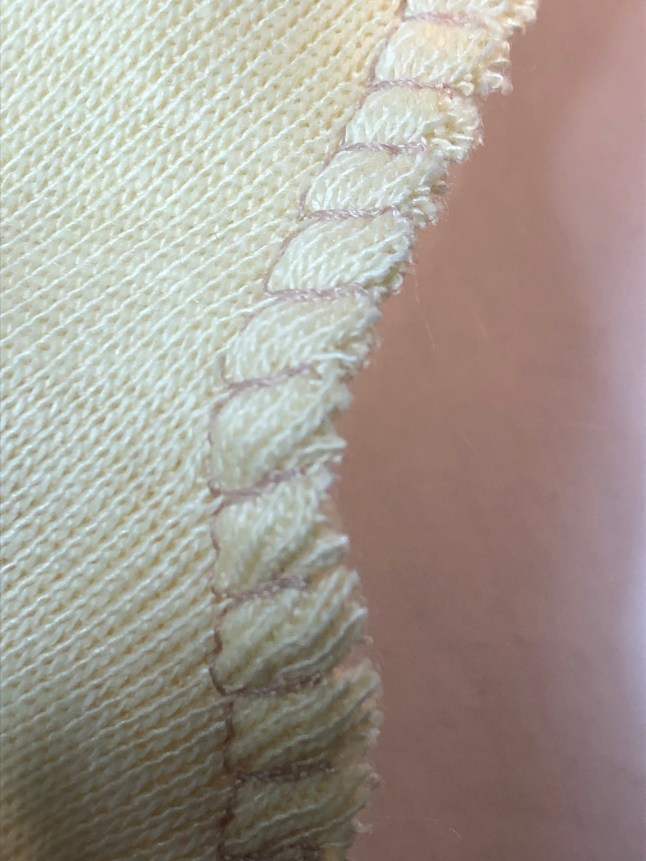
6. Now to finish the bottom of the bra. If I had cut it one inch longer, then it would be super easy to serge the ring of elastic around the bottom, flip it back twice and top stitch like I did on the agility here.
*However, I felt that there would not be enough room to turn this twice, I added a separate 3 inch strip (waistband like casing) for my under bust elastic.
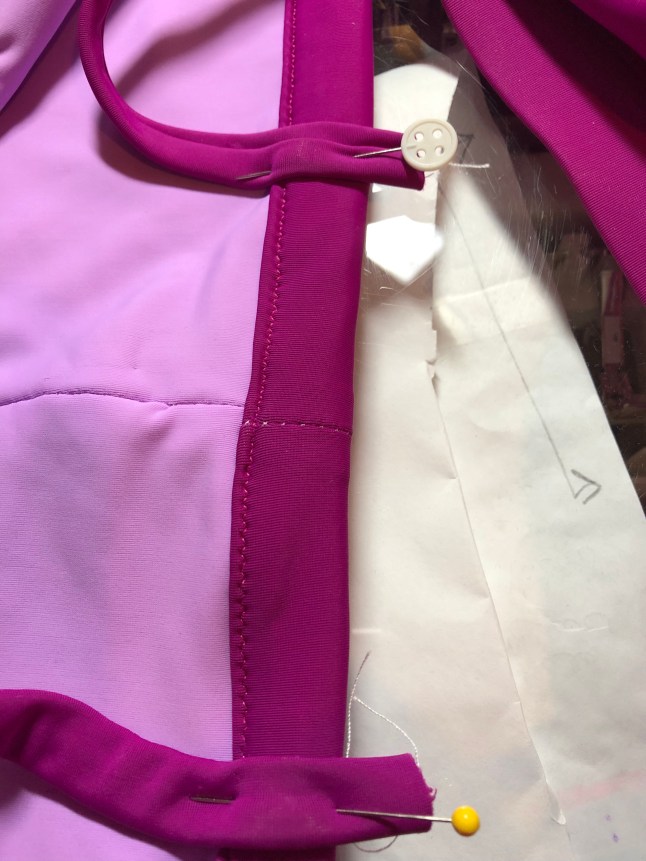
 It was simple enough to figure how much I wanted to go around my under bust, serge a single layer to the same color side, right sides together, and wrap that around my elastic tuck it under and top stitch it to the other side. Best to use bobbin thread to match the fabric underneath, to stitch on the contrasting side, so you can see where to sew!
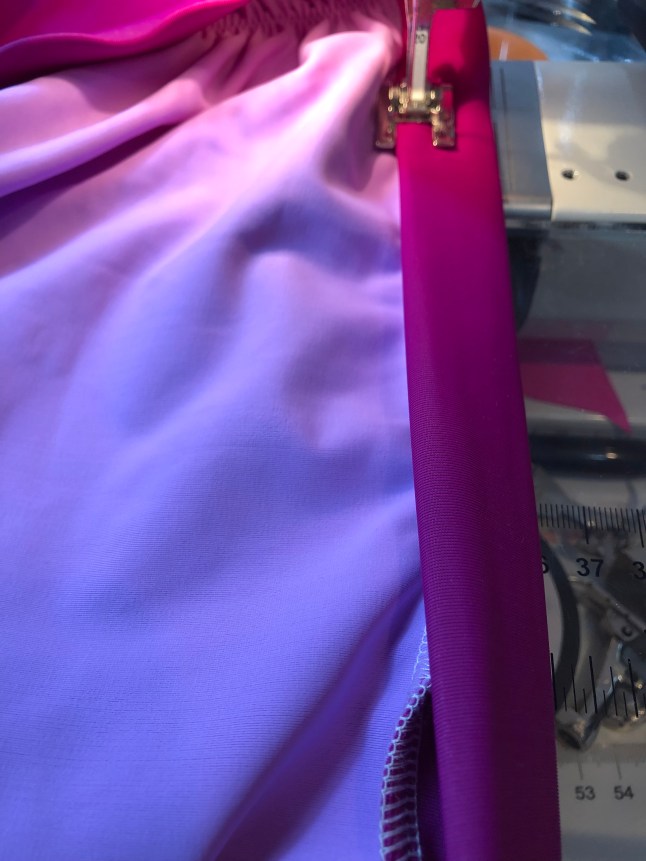
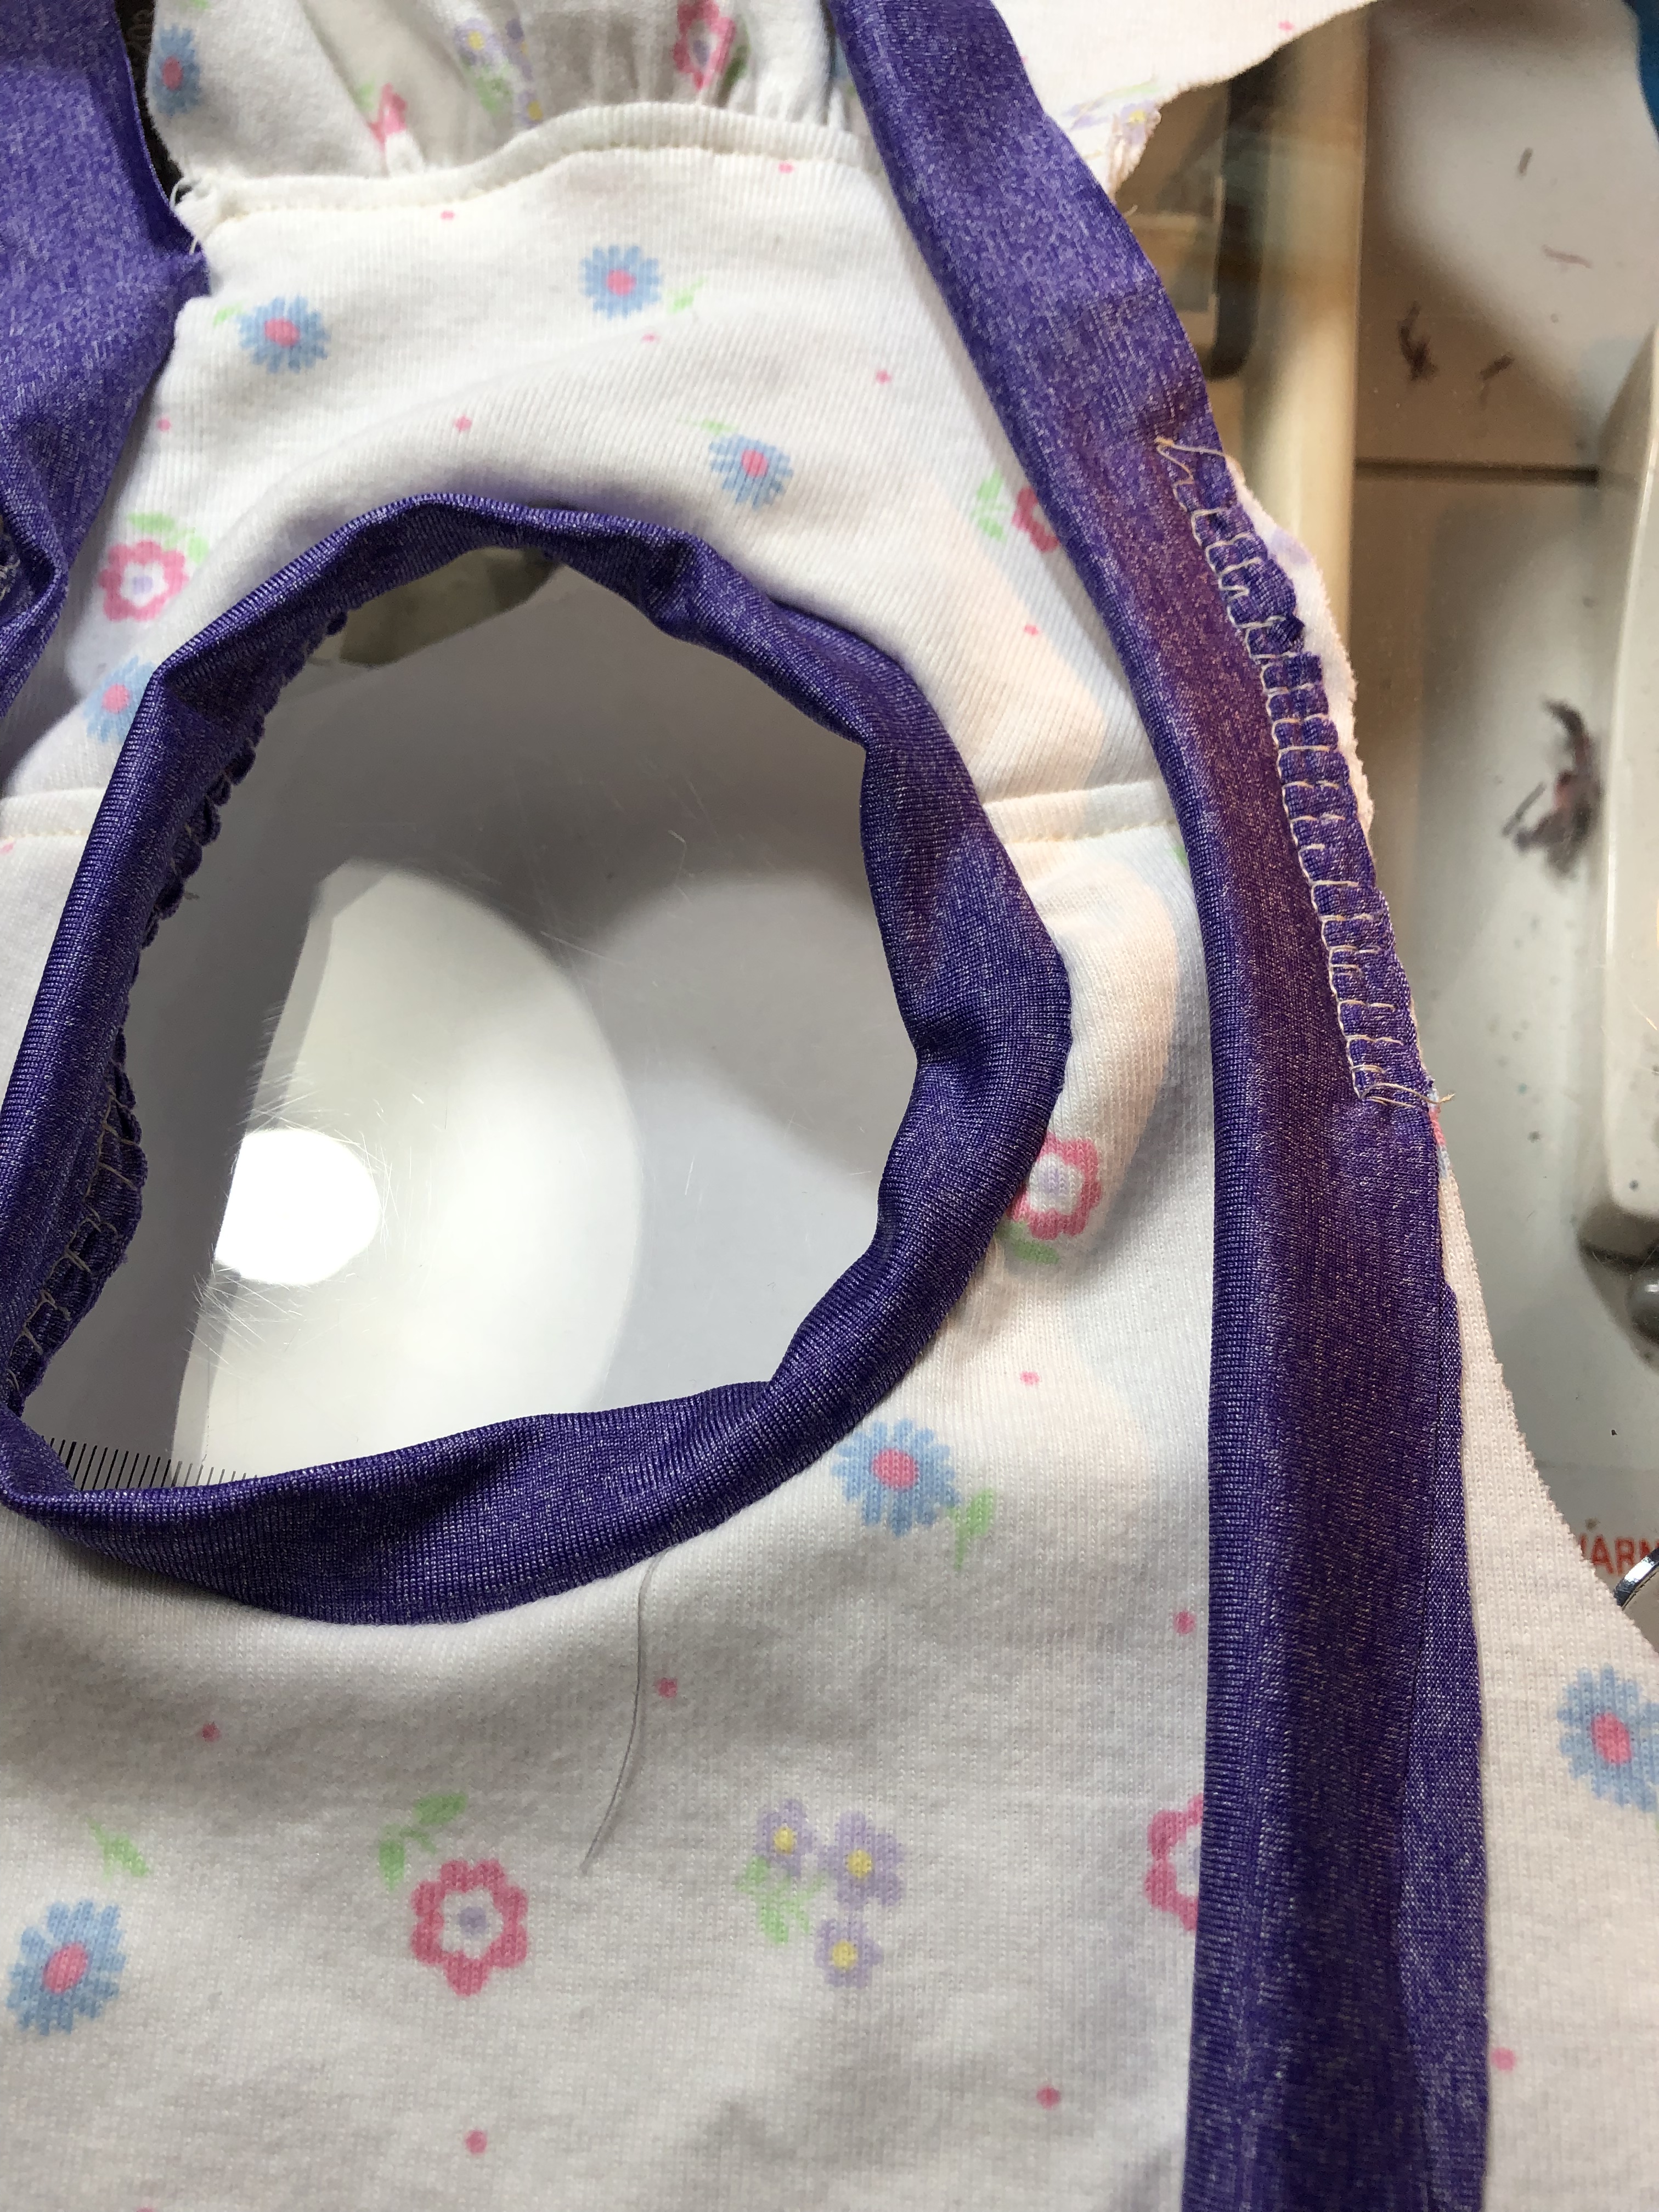
Next, I threaded my tie/strap through the casing, and adjusted where I wanted the straps to hit on the back. I like them closer to the center than to the sides, so I can wear them with racer back tops and tanks like the Taylor. I suggest pinning them with a pair of safety pins, makes it less painful to take off.
To make the strap attachment look nice from either side, I sewed them with the raw edge toward the top of the casing across the area where I had stitched down that casing. Afterwards I clipped close to that seam, brought the strap up and top stitched the top of the bra edge. ** going forward, I could slip the straps into the spot left open and top stitch across the seam I had made in step 4. Still experimenting.
The house I grew up in sold to a young family 20 some years ago. They filled in the pool, and daily swimming is no longer part of my life, but we do go on vacation a few times a year, and I relish early morning swims, when the water is like glass, and no one else is around. Making a ton of swim wear to wear a few times a year, does not make sense, so when I read about Phee’s Nylon Spandex Tricot being useful for swimwear, It got my wheels turning.
This is my new favorite. It is a dream to work with and a dream to wear. It wicks, and is comfortable to wear in our super hot summers. My plan is to make several bra/swim tops, and swim shorts/bottoms that could be worn as either depending on what is needed. We go to the beach and sit by the pool on vacations, and swim fabric gets really swampy. I am hopeful that this will be more comfortable sitting by the pool. My 61 year old self will feel 16 again with a whole capsule wardrobe of garments that can be worn year round, and to swim in! Planning some tidal waves to wear as swim bottoms/slip shorts in this fabric.
Those who want more support or coverage may want to add a layer of power net or tech sheen.
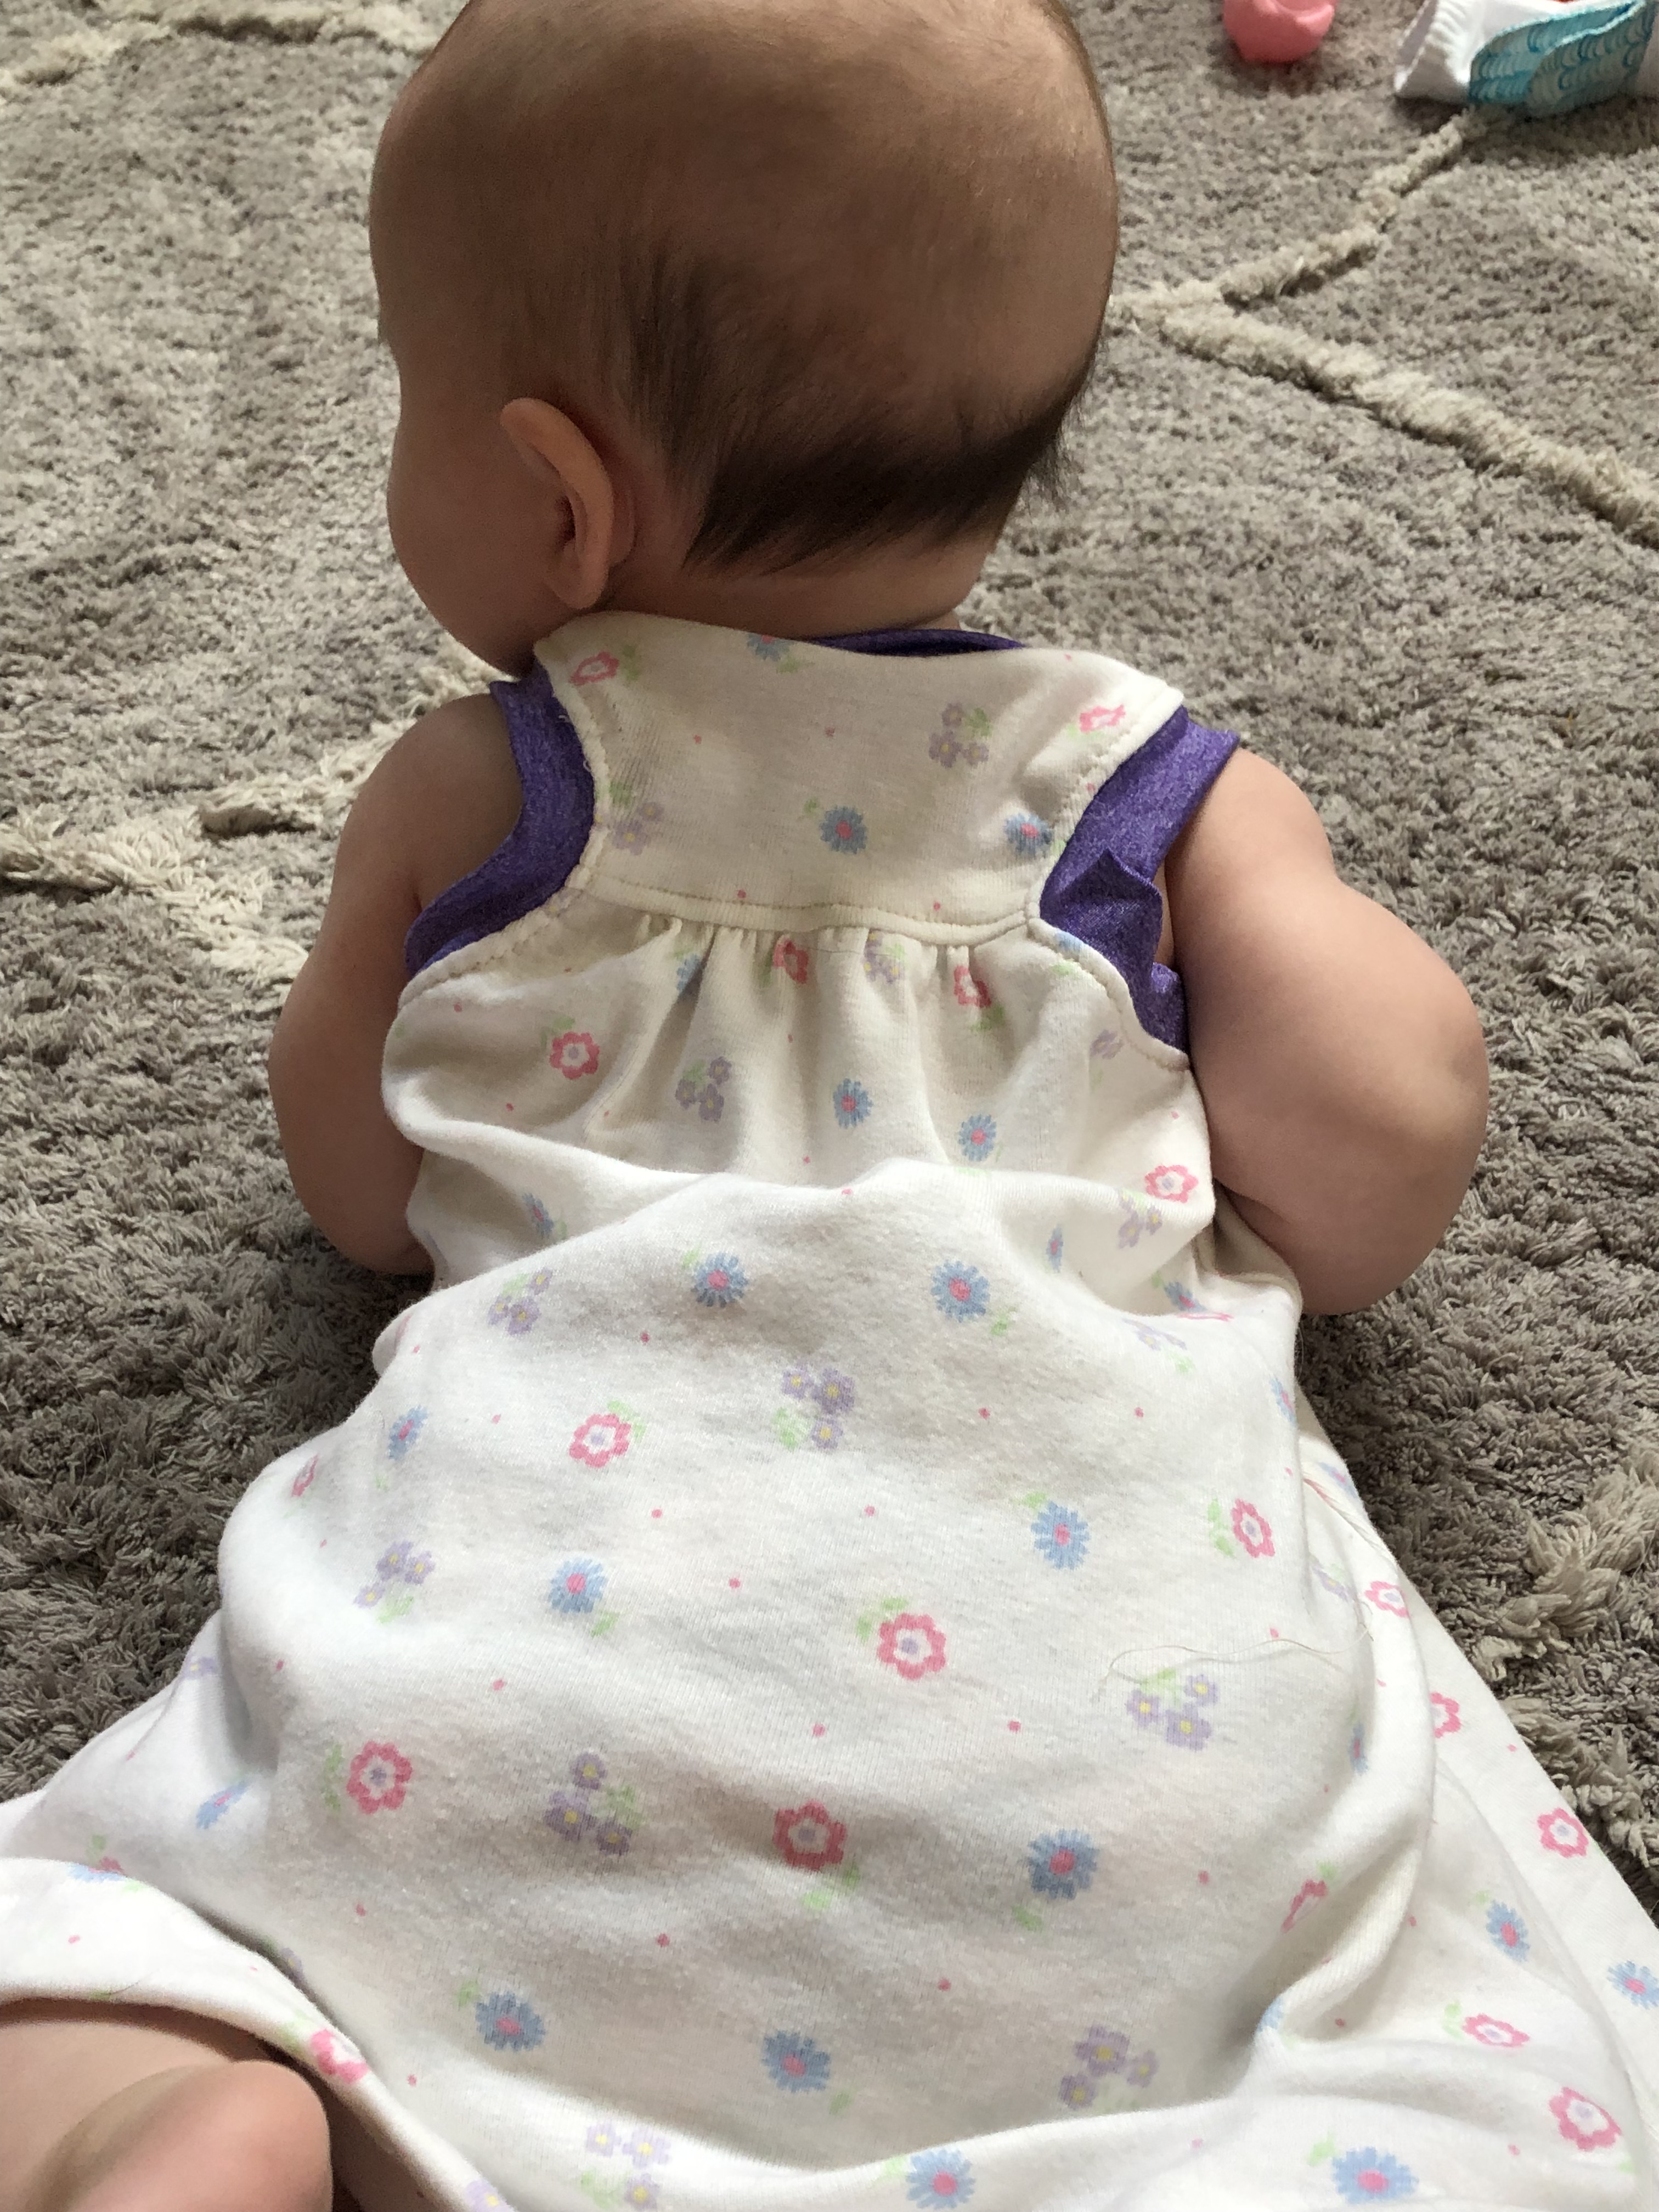
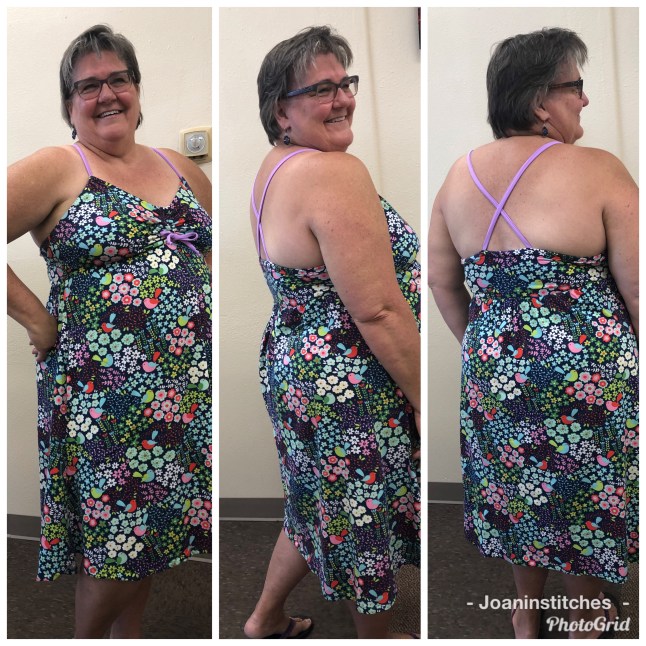
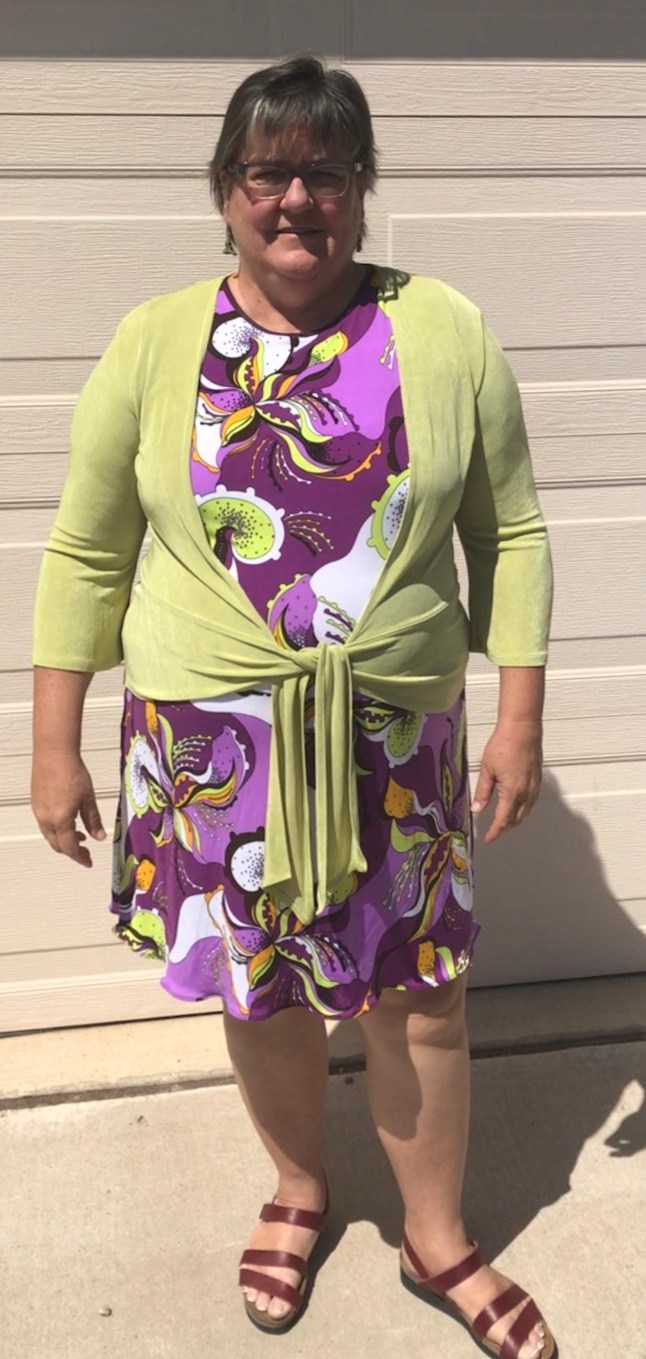
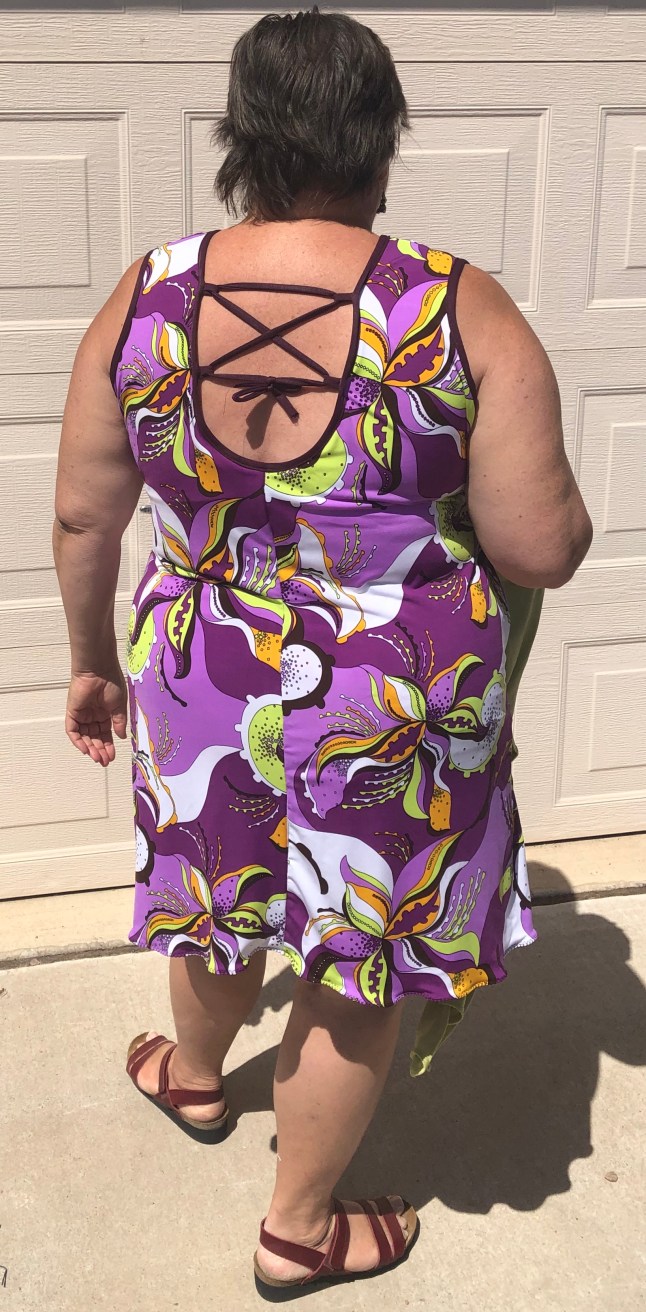
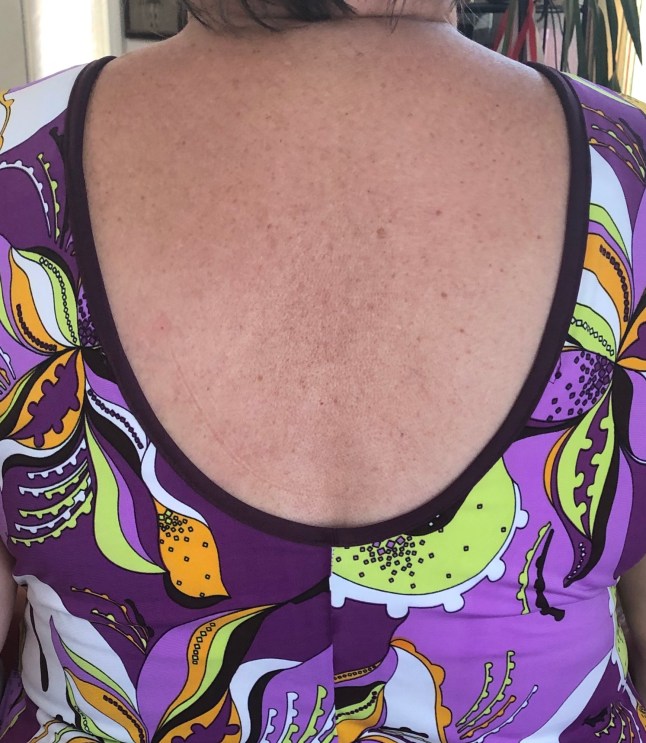
The Escapade makes a great summer dress! I love the swing of the skirt of the Taylor, not to mention the pockets, and mashed that skirt to the Escapade here.
I am happy for the colors and comfort of the wicking fabric in patterns that are comfortable, fun and practical. I made a dress from regular tricot and lined the bust with circular knit from Phee. I added a few inches to the center front and back of the skirt and pleated the front and back. It is the most comfortable night gown I own.
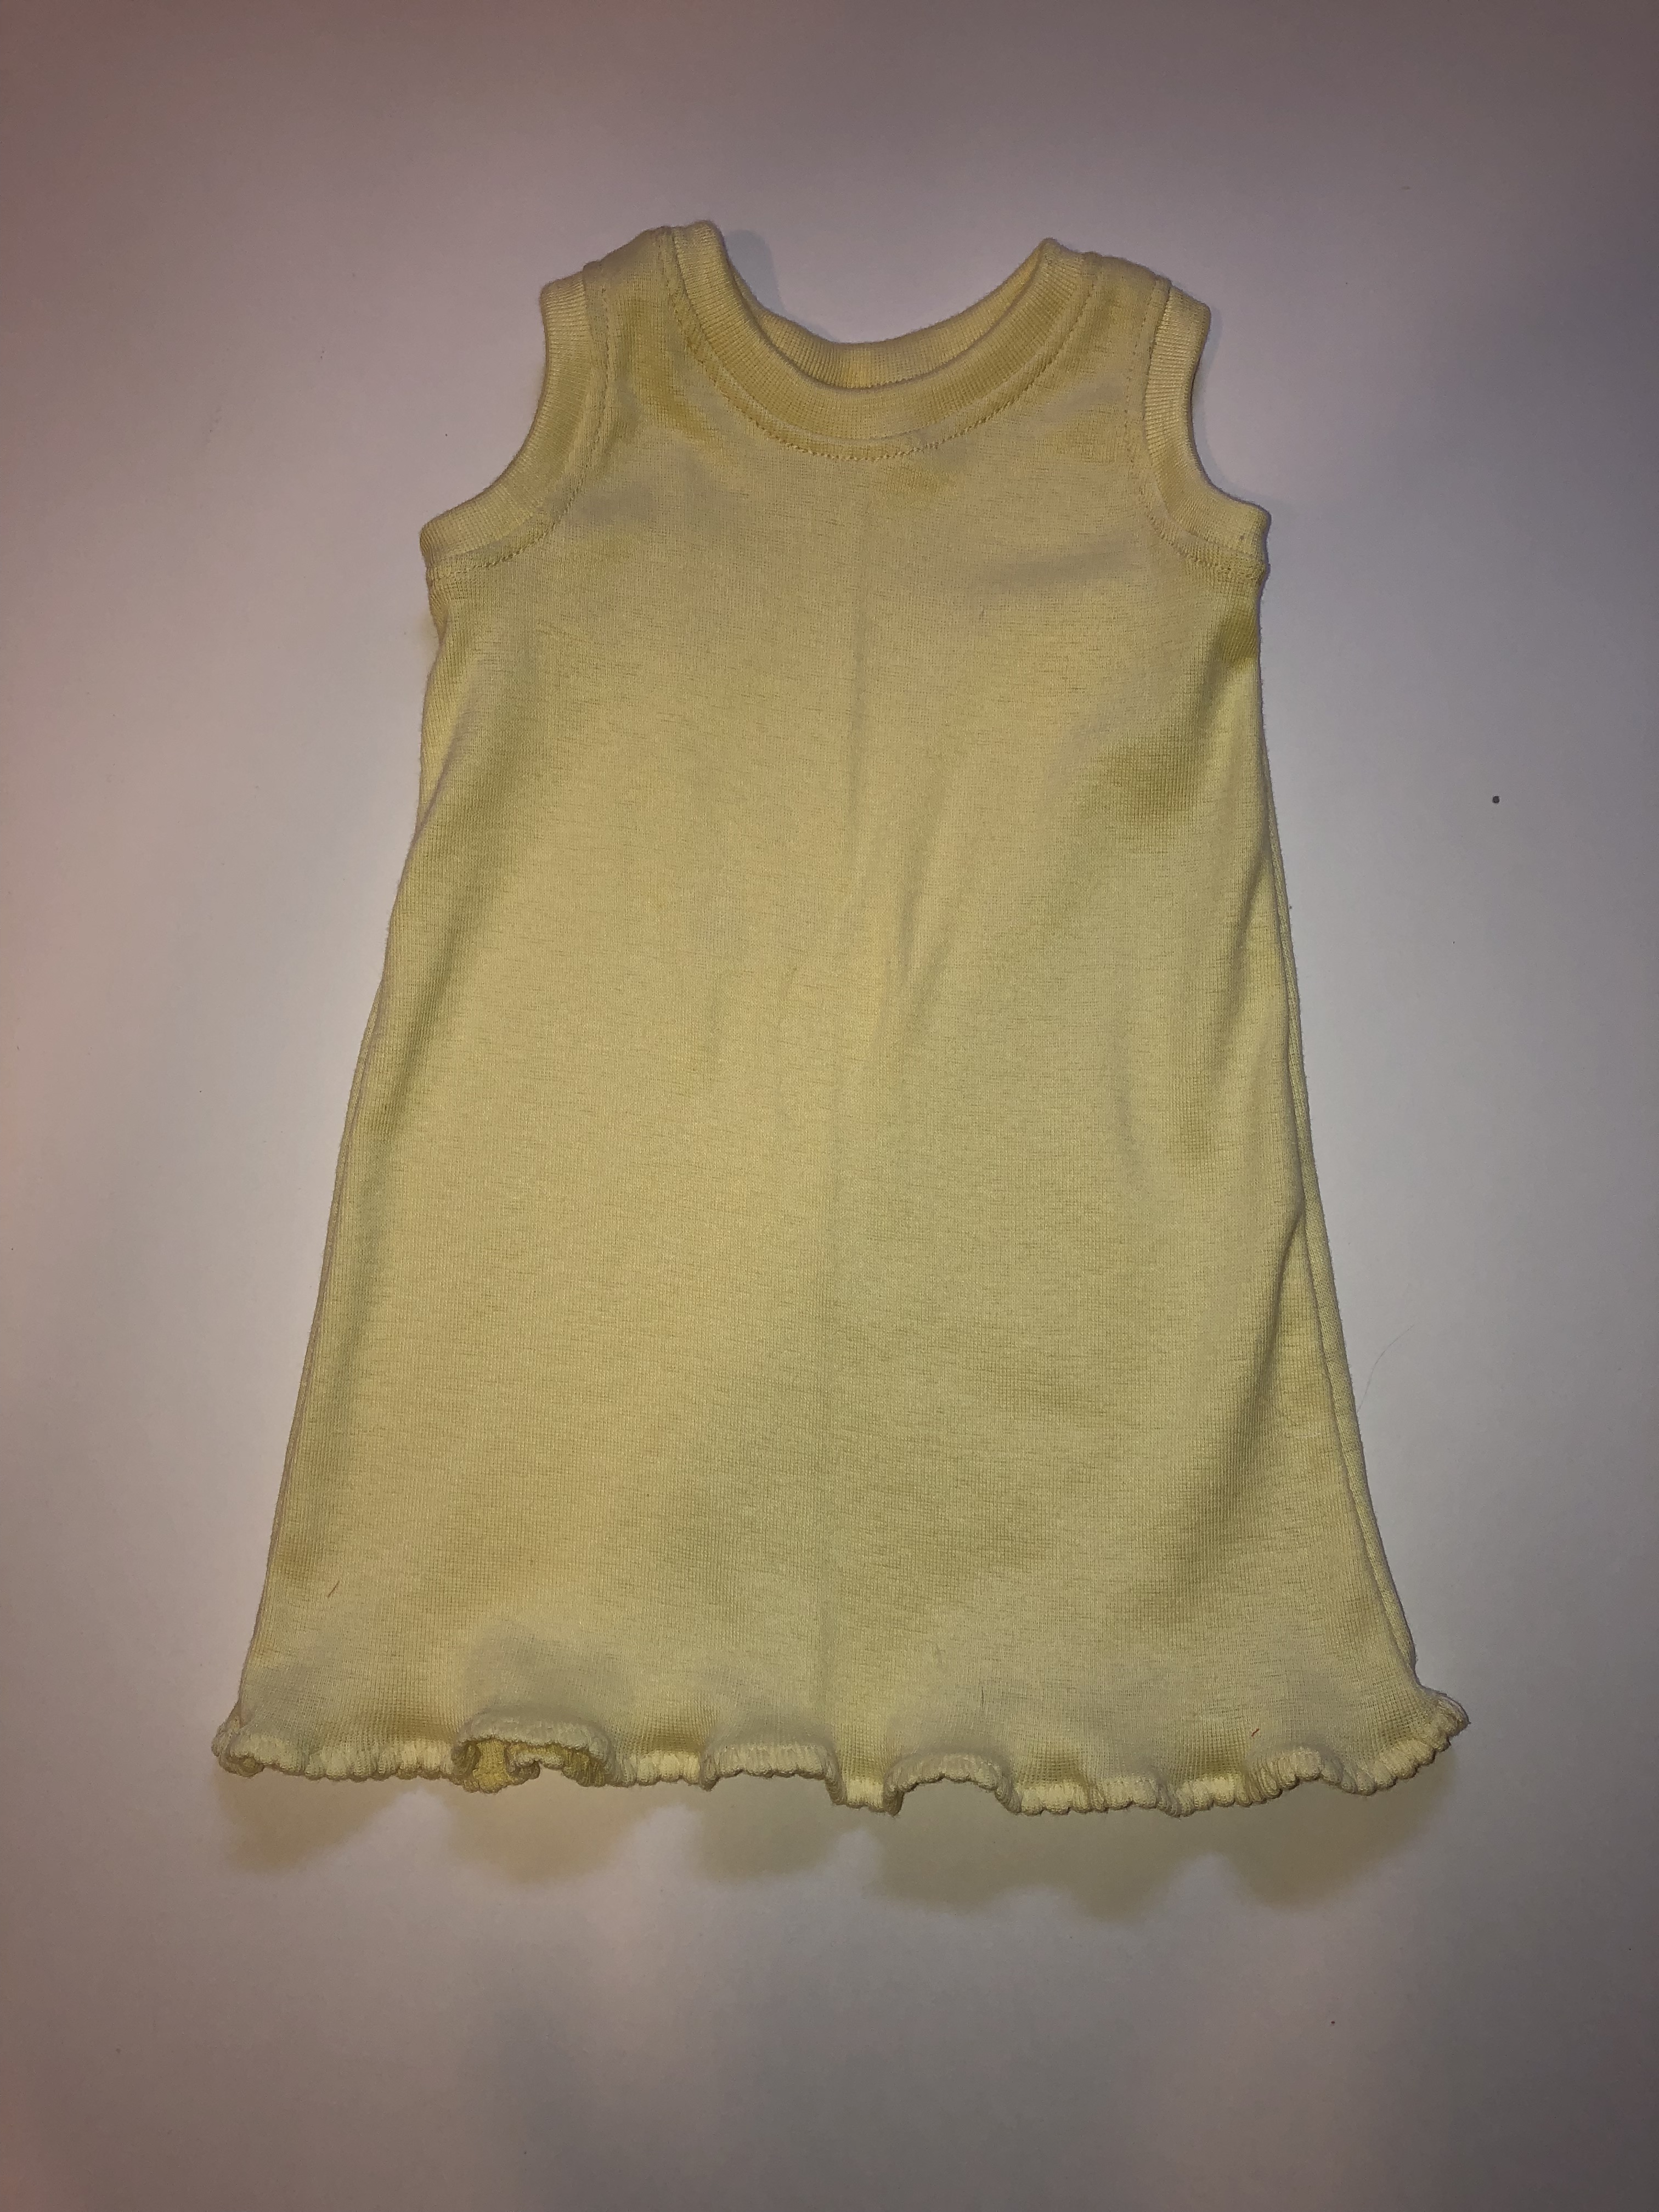
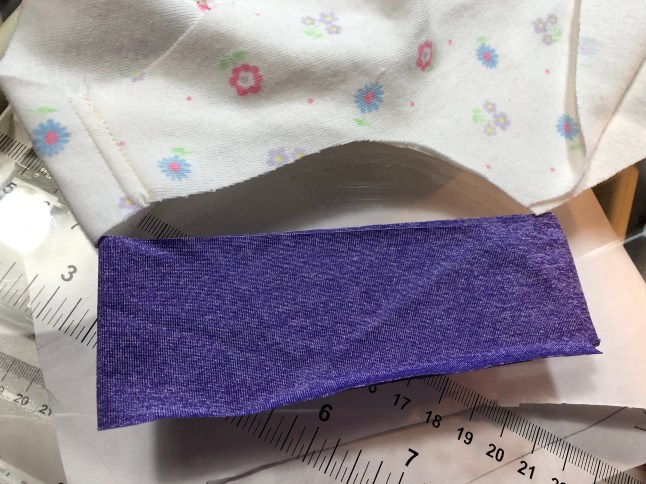
Below are the Tidal Waves and my first reversible Escapade made from swimwear scraps a few summers back. 
This post is filled with affiliate links for favorite patterns and fabrics. Thank you for using them and supporting the community❤️


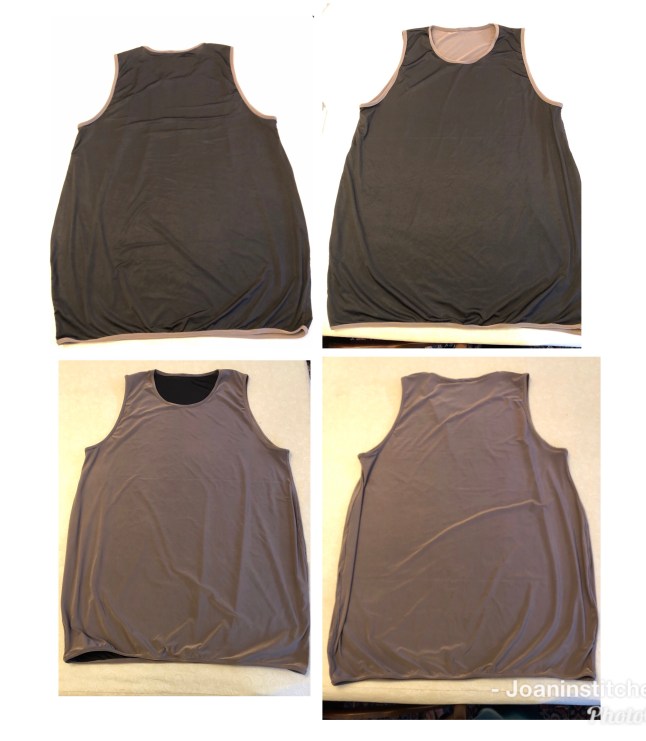
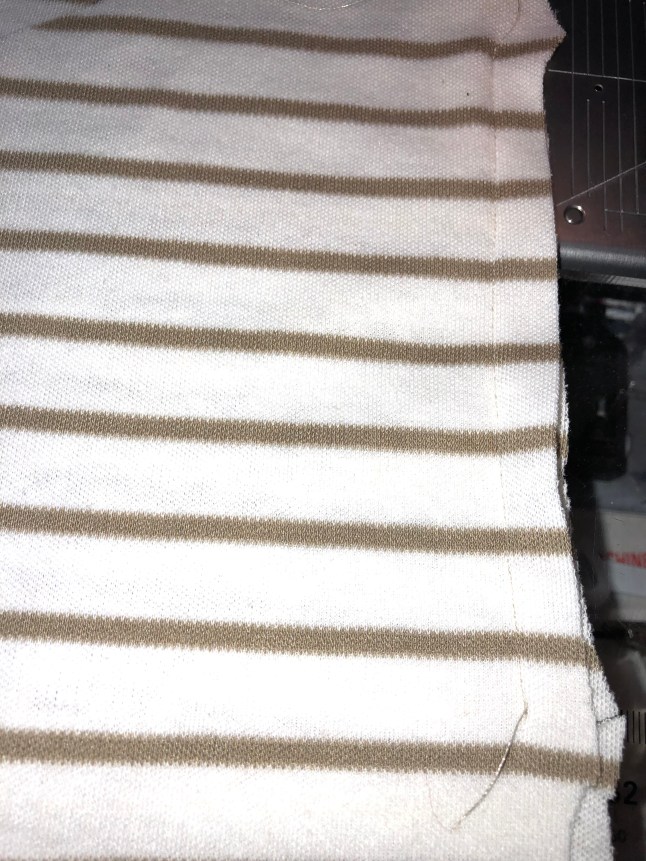
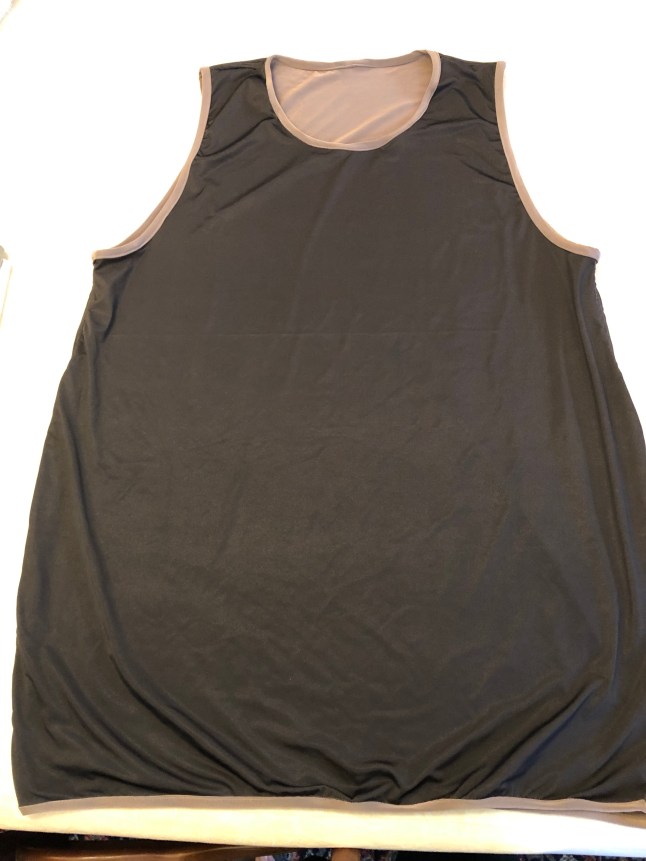 On our last little jaunt out of town, we were headed west in the car, and I looked over at my husband, who was driving. My heart was happy, cause he was wearing a shirt I made for him. I have more than one serger, but had been practicing my fine finishing of woven seams, with flat felled and french seams.
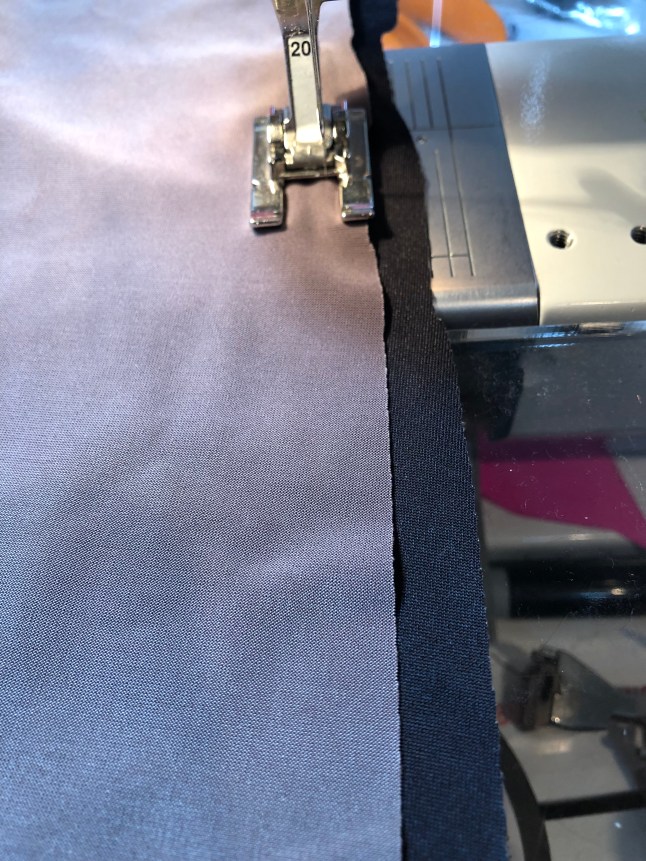
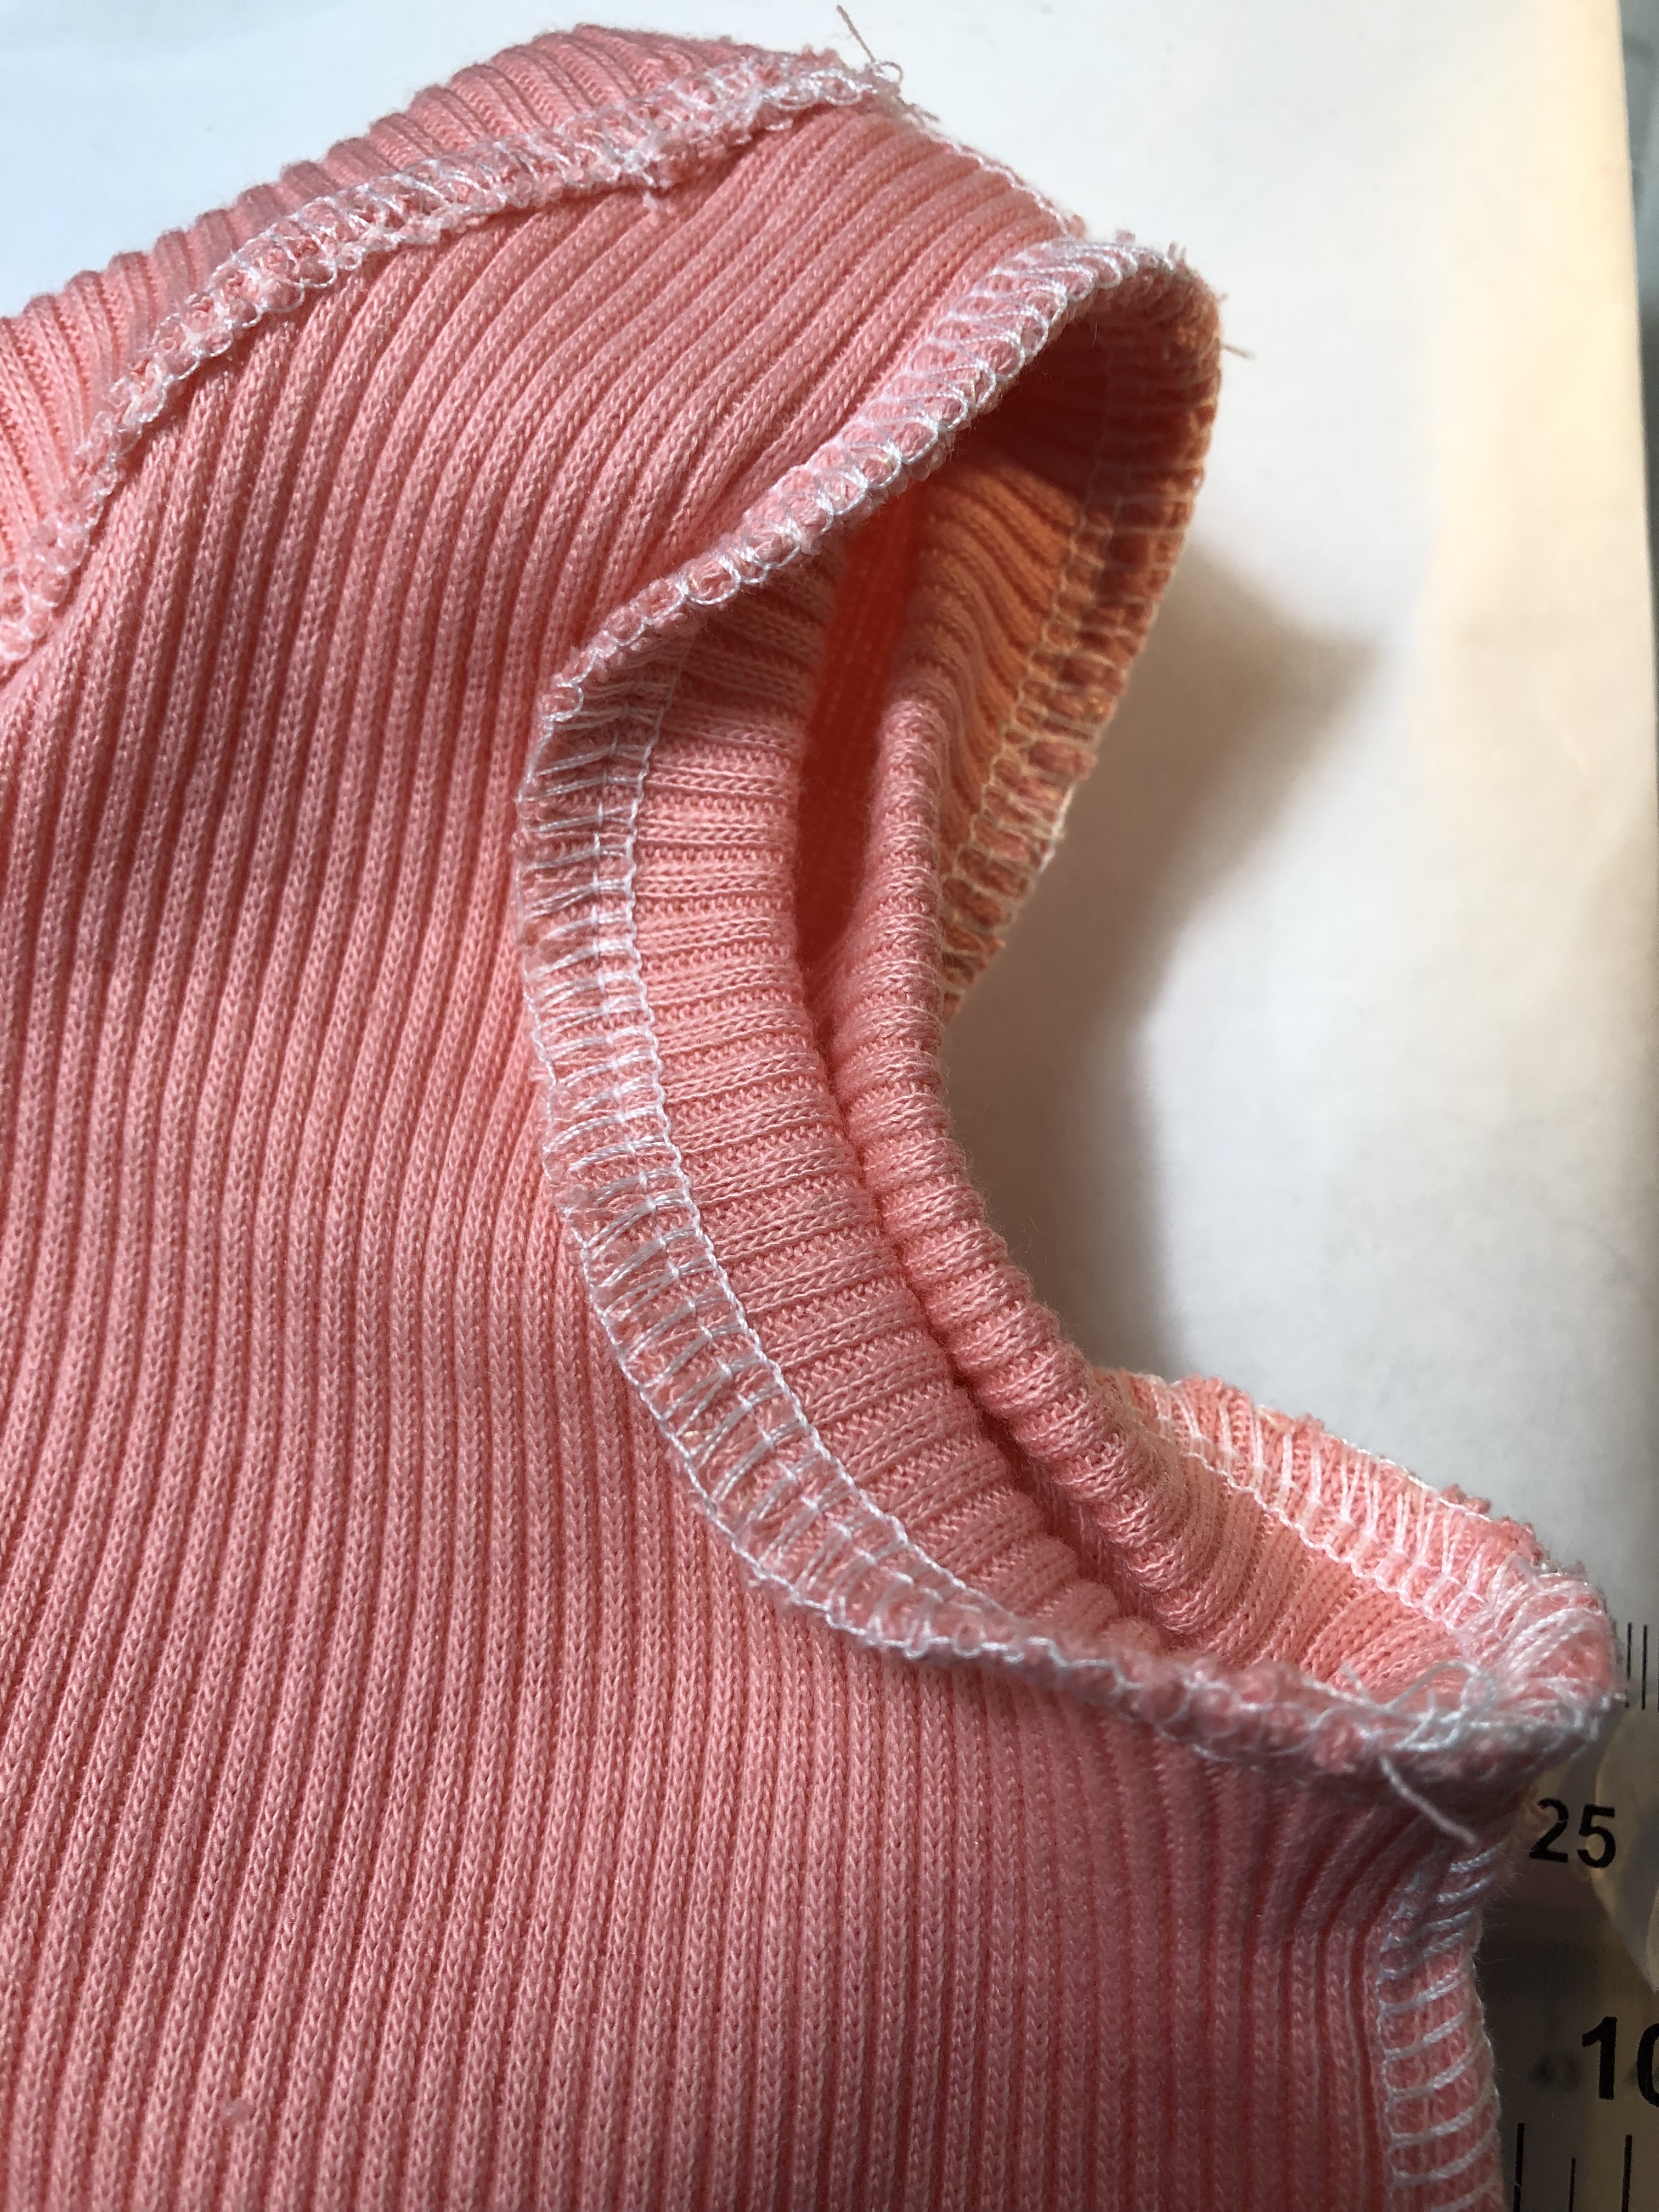
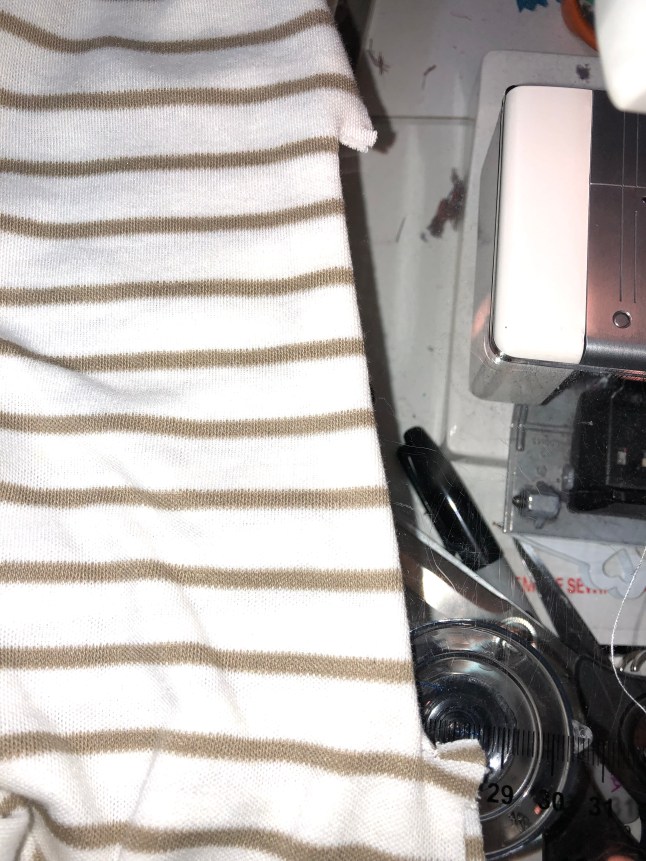
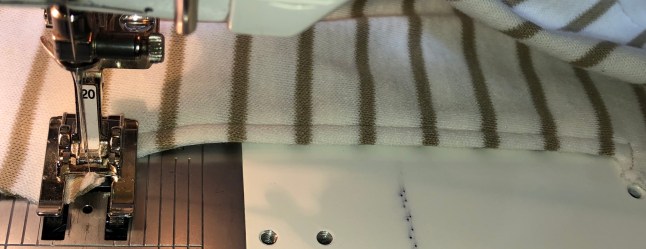
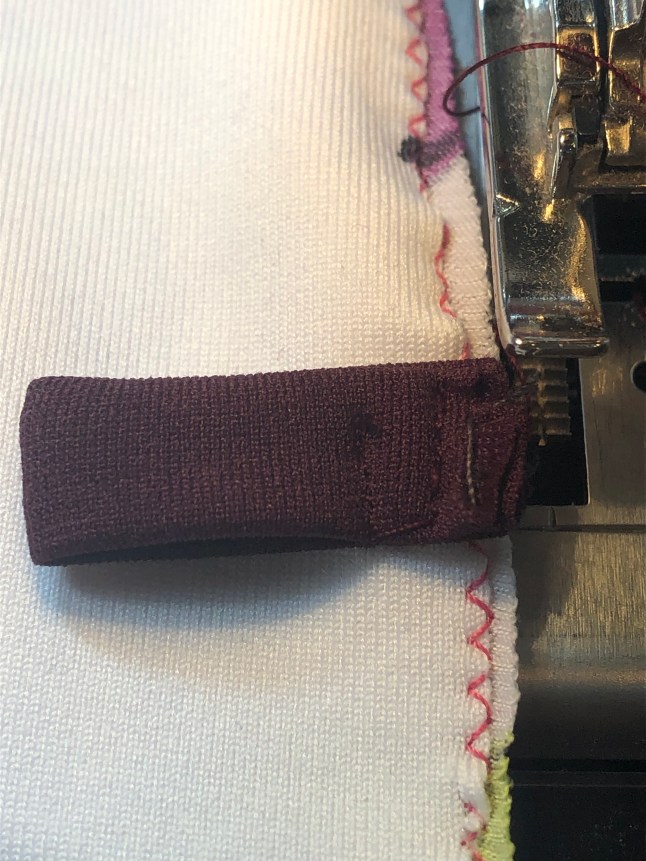
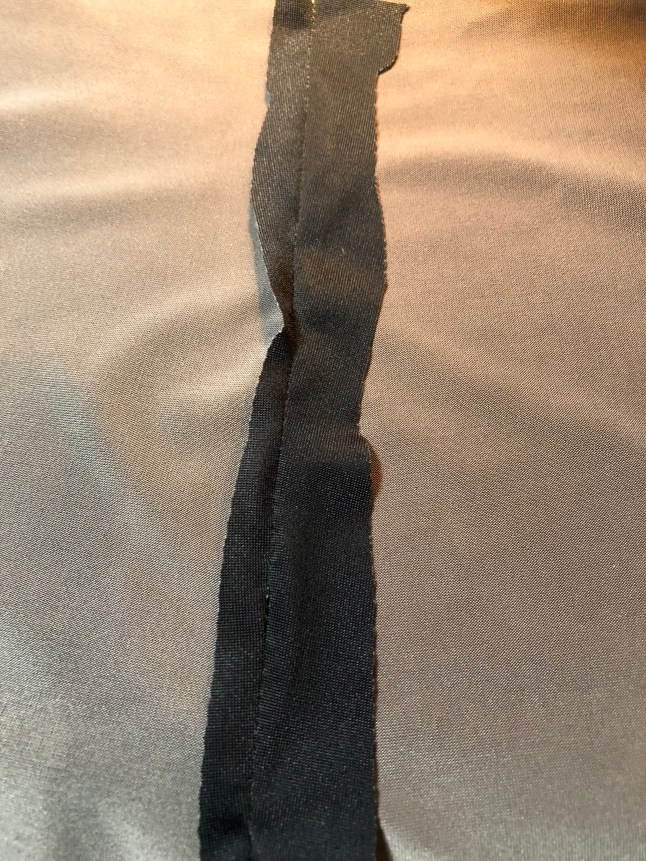 Wrapped the longer seam around the shorter seam, and top stitched that. My #20 foot really comes in handy. I moved the needle on my Bernina 1630 to the left (but not all the way) to make the second seam. And stitched. If this was a woven, I might have pressed that larger seam in half so that the sewing would go easier, but this mystery poly blend was not going anywhere near my iron.
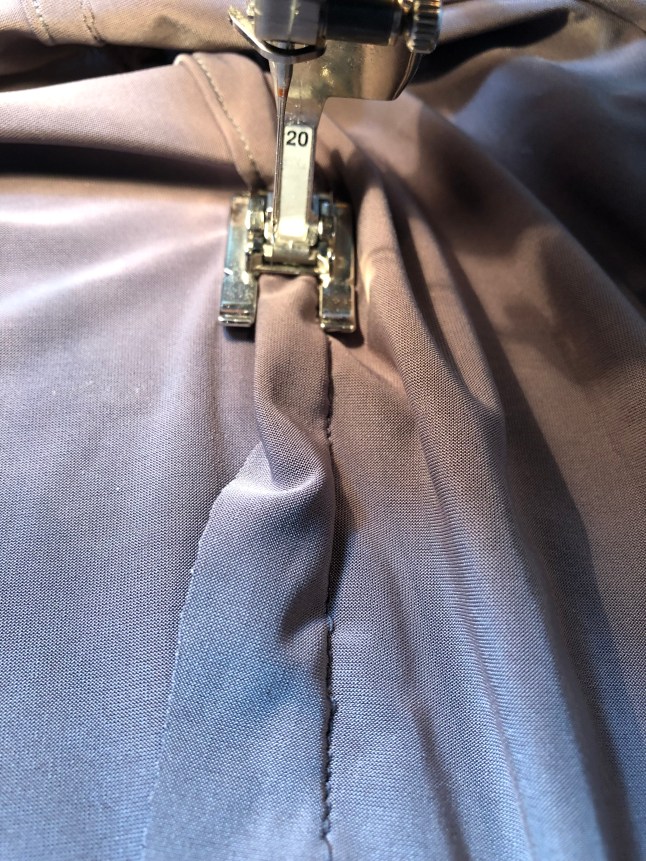 I stitched the shoulder and both side seams like this.
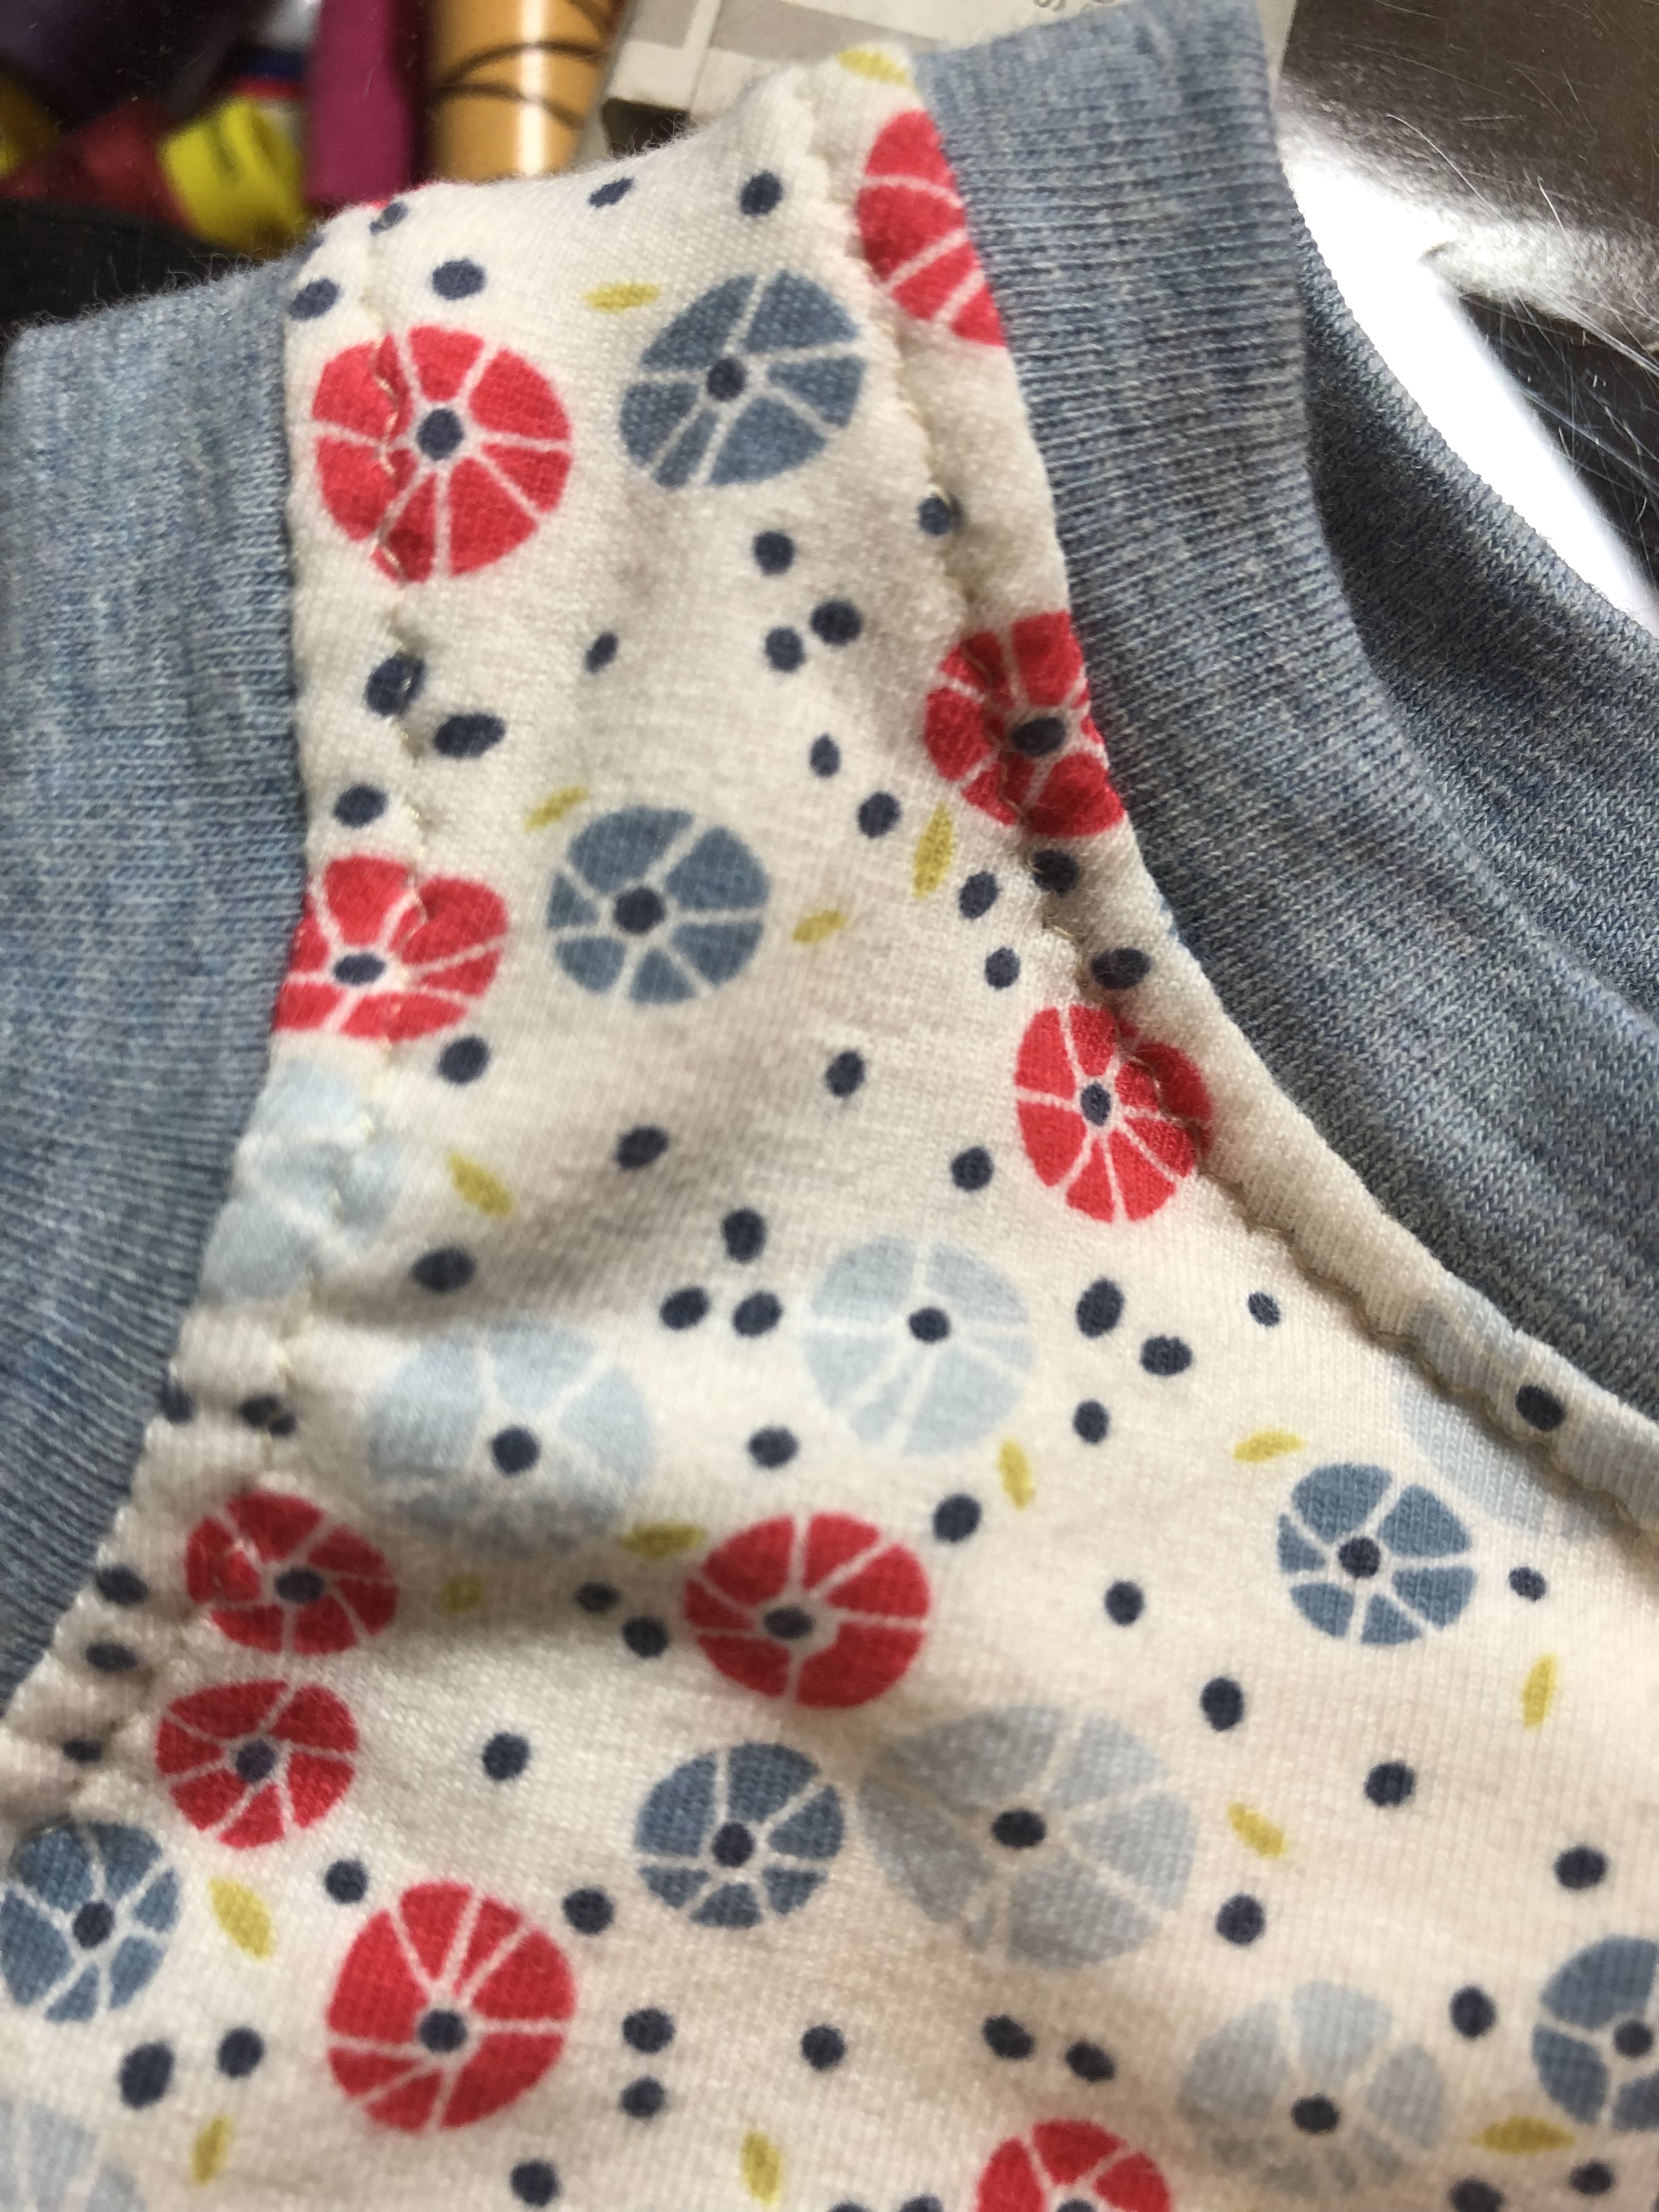
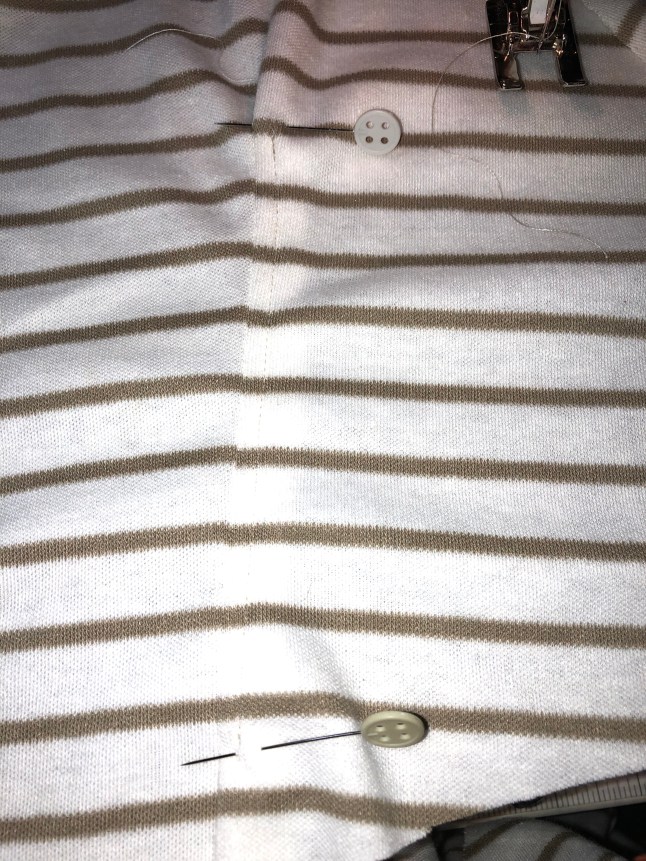
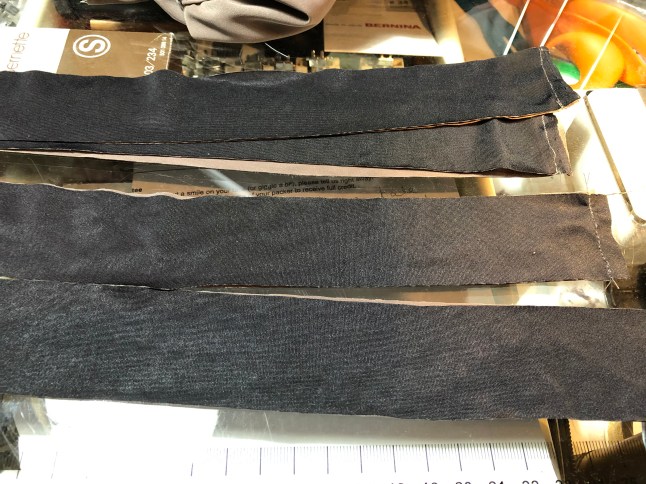 Marked center points, and serged those bands on. In keeping with the reversible theme, I even made a band for the hem.