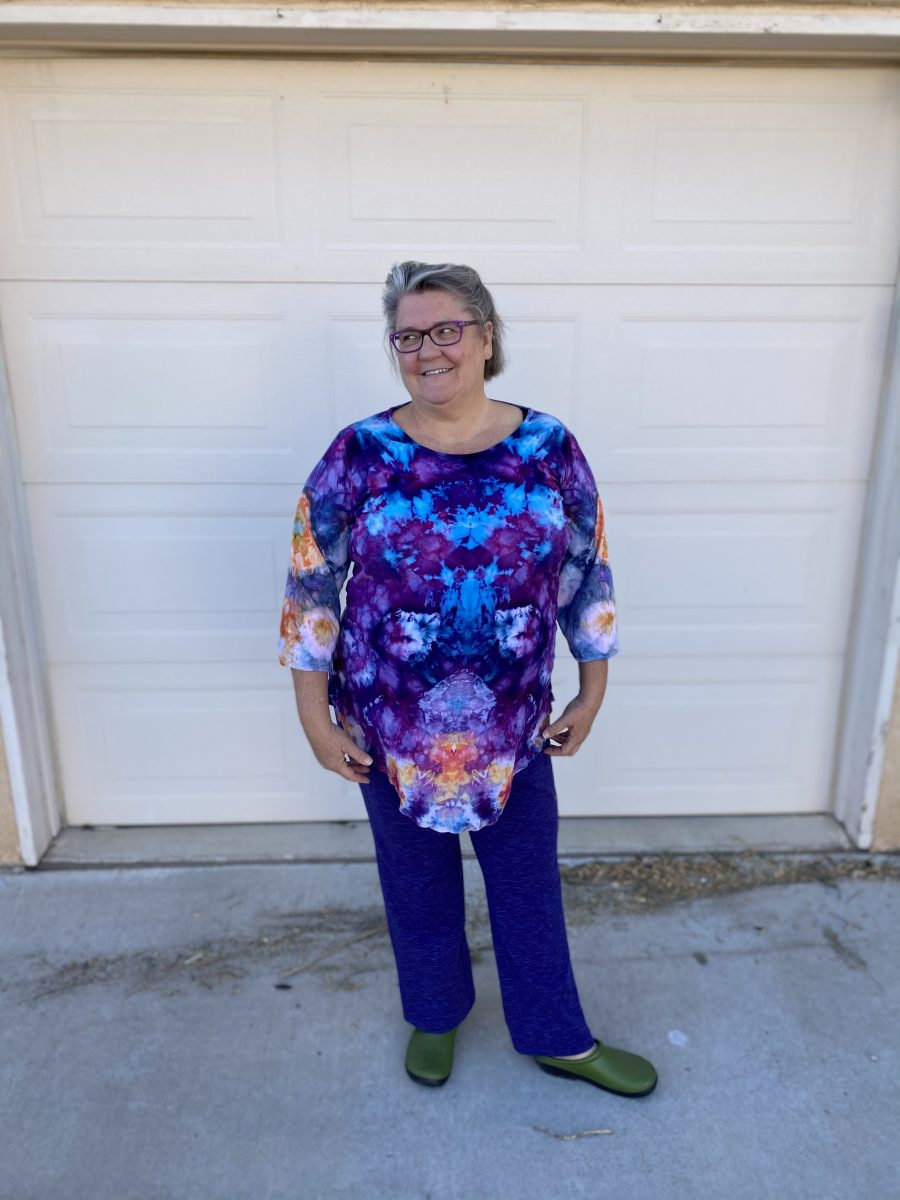
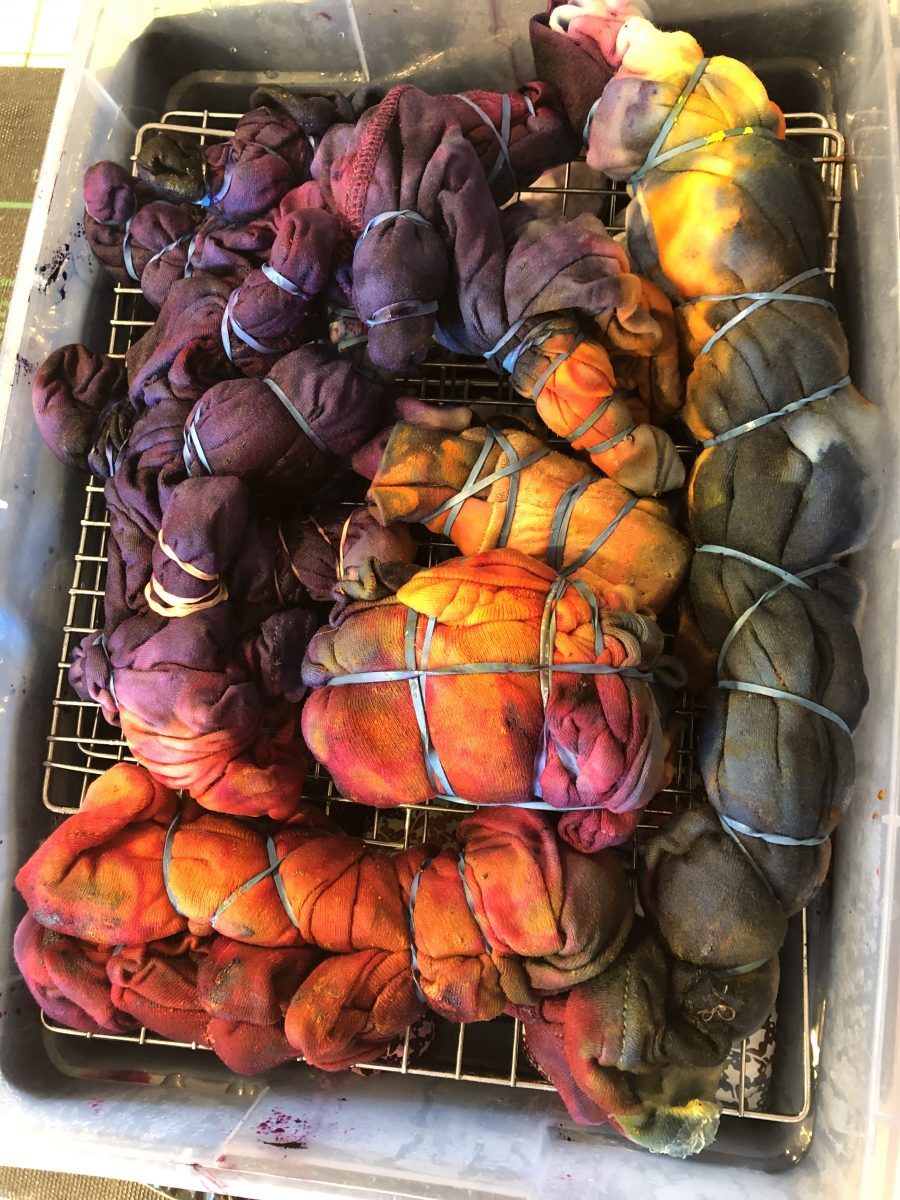
In December, I made a Molly PJ top as part of a promotion for 5 out of 4 patterns. I used some very thin cotton jersey from Kathy’s Lace and Elastic, and ended up dyeing the fabric. It started out in a sweet baby pink. I like purchasing deadstock fabric (or using from my stash) something that I would not be heartbroken if the pattern did not fit. Since this was my first attempt at this pattern, I would call it a wearable muslin.
There is no lycra in this fabric, and being thin, I found that holding the threads when sewing the short band seams was critical. Also not cutting the thread in between sewing the pieces helped to keep the fabric from meandering its way down below the feed dogs. This is called chain stitching. It is often used in quilting small pieces together. Saves thread and frustration in garment sewing too. Just leave 1/8 to 1/4 inch between pieces and clip them apart later.
I lengthened the top. The lower edge of the ruler shows where the pattern stops. I had planned for a solid tunic length top that I could wear over my crazy patterned leggings. This ended up being 8 inches longer in the center and curved up to where the original hem line ended. At first I thought it was too long, but this has quickly become one of my favorite tops. I added this length to the front and the back.

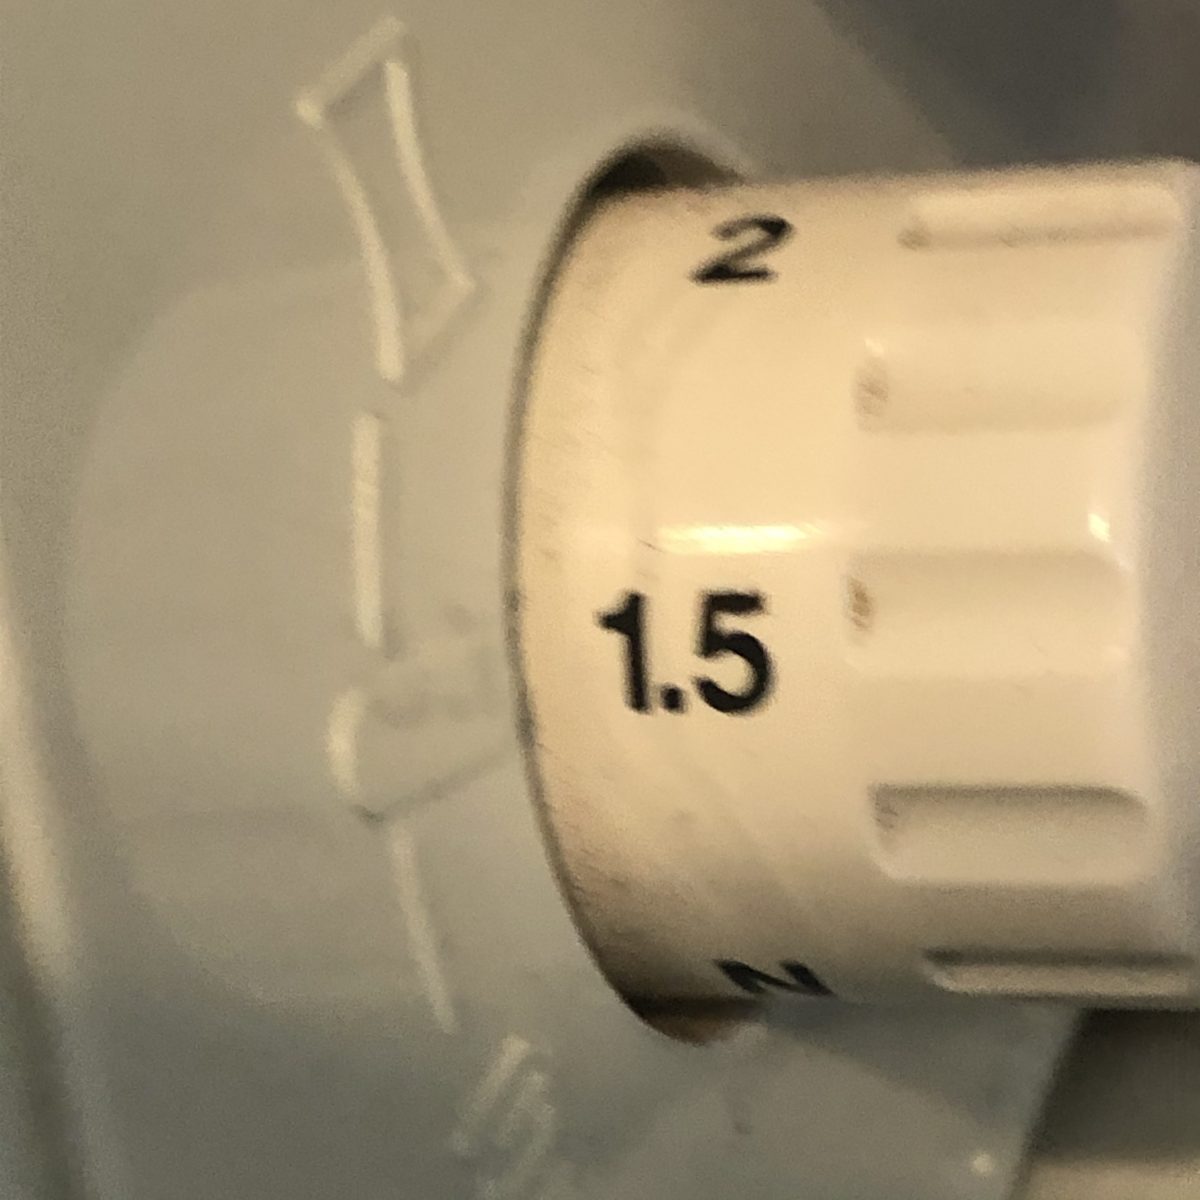
Used differential feed. As part of hemming, I serged around the hemline. By using this setting, I slightly gathered one curved edge of my hem. I switched the differential feed to neutral for all the other parts.
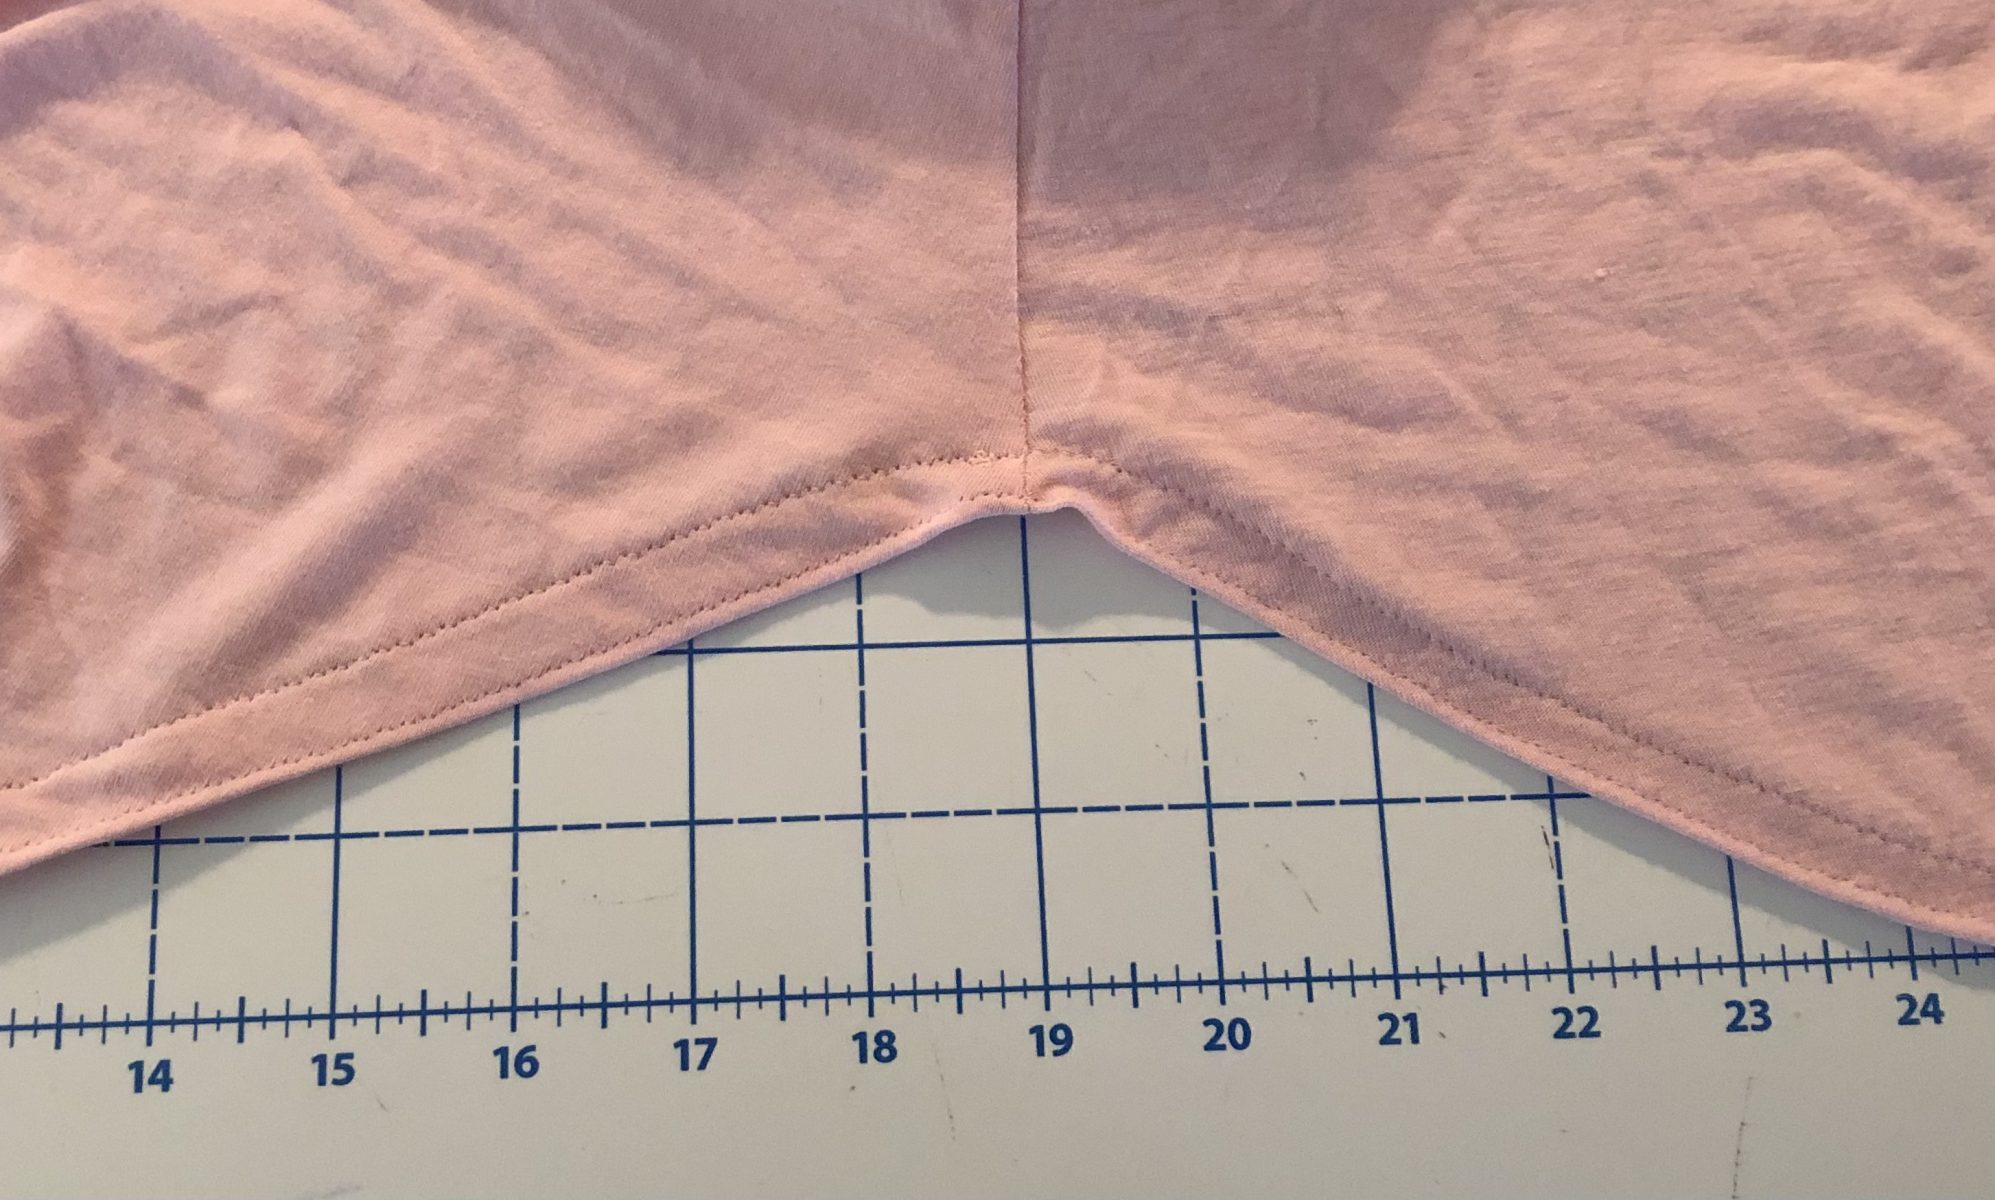
The portion of the hem that was serged with the differential feed naturally wants to roll up into position.

This makes hemming so much easier. If your fabric has lycra or a greater stretch, I would recommend testing your stitches on scraps, till you are comfortable that you have a good match. Pin, clip, press or use the guides on your machine to make this hem as even as you possibly can (or wish to) sew. Since this fabric has little stretch, a slight zig zag worked well.

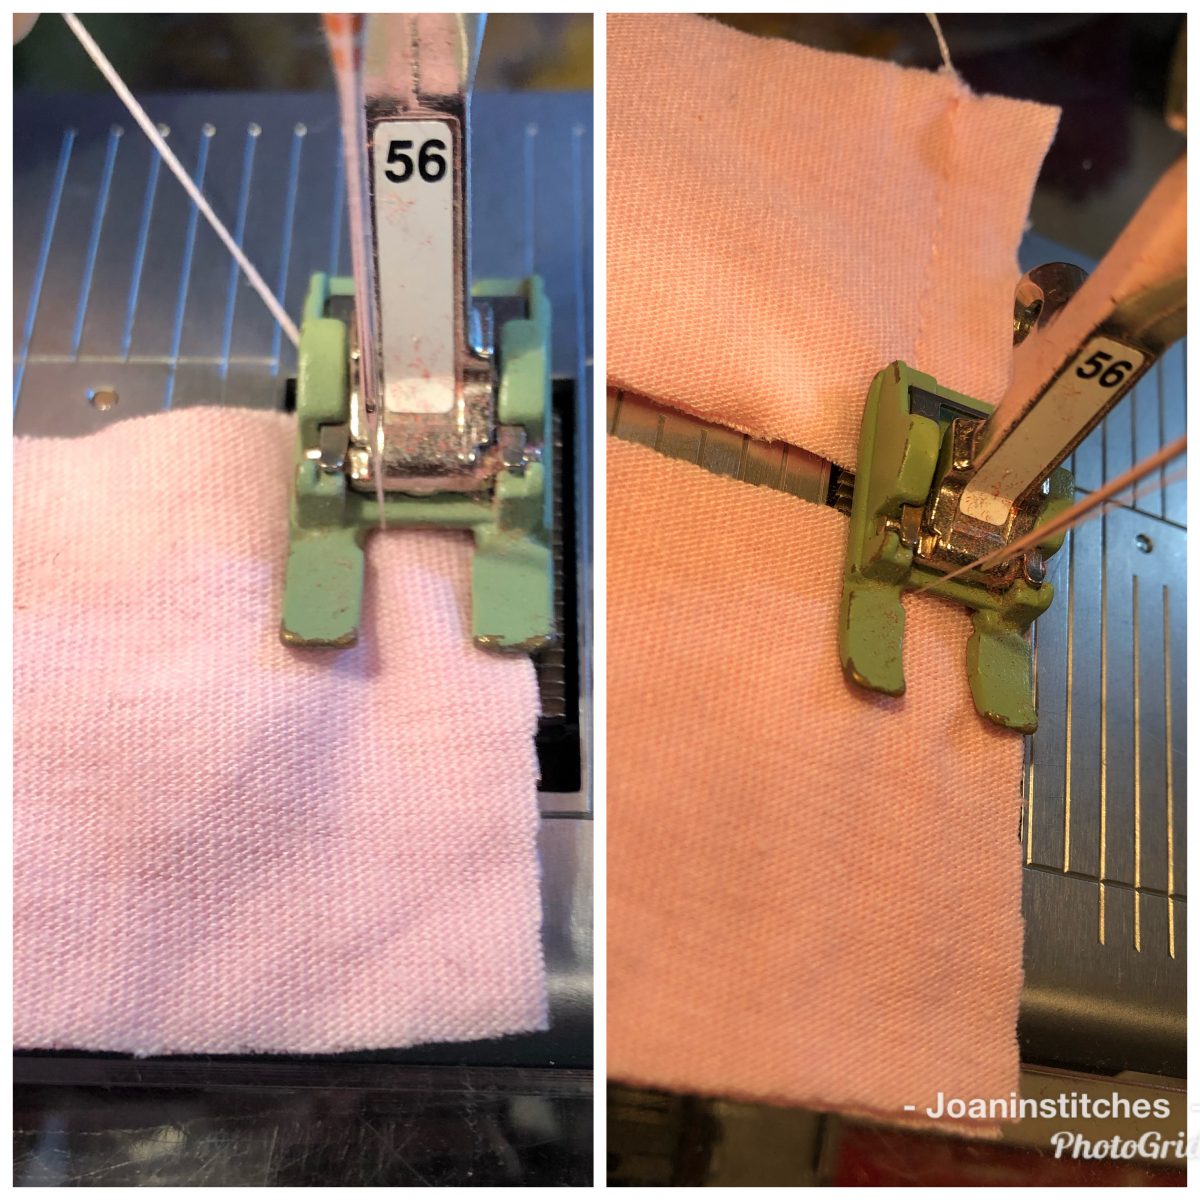
The thing about curved hems is that they want to twist like the photo below. I solved this by edge stitching with a teflon coated open toed embroidery foot, and edge stitching the front side of the hem. The teflon was not necessary, but this is my favorite type of foot. Other machines call it an open toe embroidery foot. It was easier than I expected to manipulate the fabric by finger pressing from left to right just before the foot to eliminate this wrinkle that wants to form. The edge stitching keeps everything in place. You may have another foot with a guide that will help sew a straighter seam.

This is fast and easy and flat. A cover stitch machine or double needle could be fun to try too.
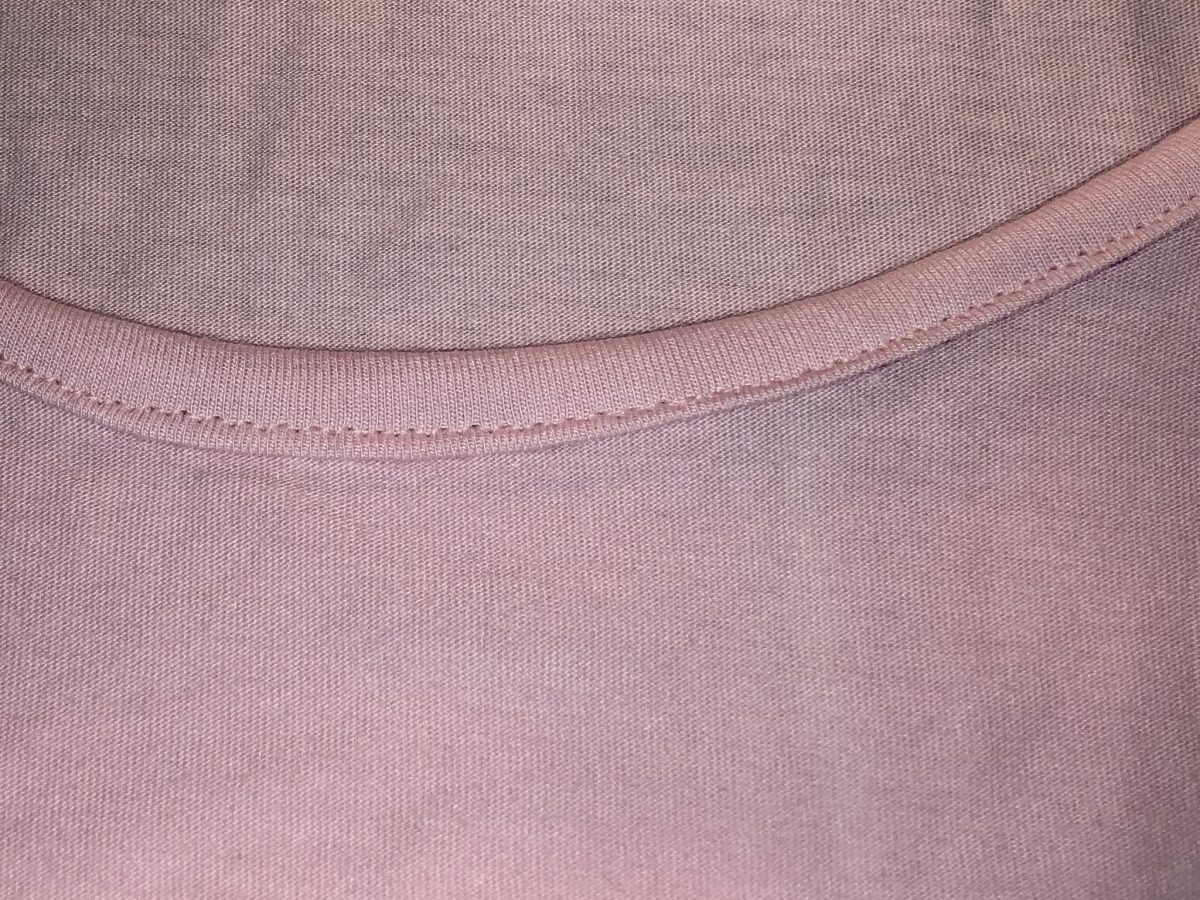
What about the other openings? The pattern calls for a neck band, which normally I love, but this fabric did not have the recovery that I like in a band, so I used a double fold binding. Cut the band length along the stretch, at 1.75 inch wide. You saw that I chain stitched the ends earlier. I may have needed to piece this one, as I see seams on either side of the neck. Double fold bindings work nicely with thinner fabrics. I like that you can see where you are sewing and make sure your edges are covered. Pins, clips or wonder tape can help tame fabrics that tend to slide.
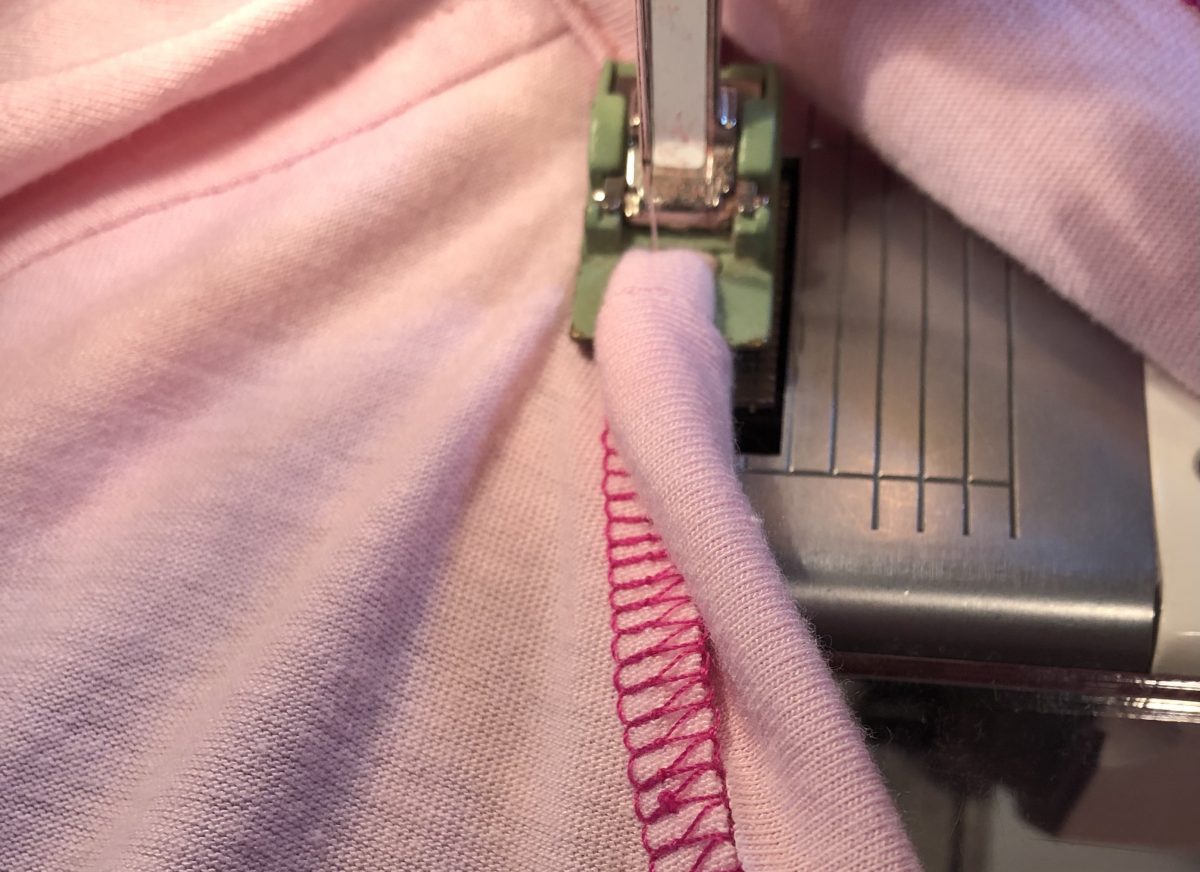
- To double fold band, sew right side of the band to the wrong side of the neck opening. If you need to baste first on a sewing machine that is great, you will ultimately want a serged edge here.

2. Double fold part two. Wrap the binding up and around that firm serged edge. Have the raw edge of the binding meet the finished edge of the serging and fold over the binding to fully cover the serged seam. In this photo, I moved the needle to the left and top stitched with a slight zig zag. This is a good time to start in the back and test the first few inches for stretch. Widen or shorten the stitch for more stretch. I finished the sleeves this way too.
Did you notice my fatal error yet? Ouch! I realized that I had sewn the front on inside out. Hard to tell. Solved this by adding a little color.
And done. Up close you can tell that this is a tiny zig zag. A cover stitch might be fun here.
First time ice dyeing. In this batch are some Penny PJ’s for my grand child too!
This post contains affiliate links that cost you nothing, but may net me a small commission from the pattern designer if you purchase their pattern with my link. I thank you if you do!
Thanks for reading and happy sewing! Joan

One thought on “Molly with double fold neck binding, a double sewn curved hem, and a splash of color.”