I had so much fun testing the Jackie Jumpsuit from 5 out of 4 patterns, I jumped on board with testing the Wanda with all its puffed sleeve glory that would even please Anne Shirley. Truth told, I have been wanting to make puffed sleeves for a while and even tried some modifications on the Easy Tee. The adult version of Wanda is here.
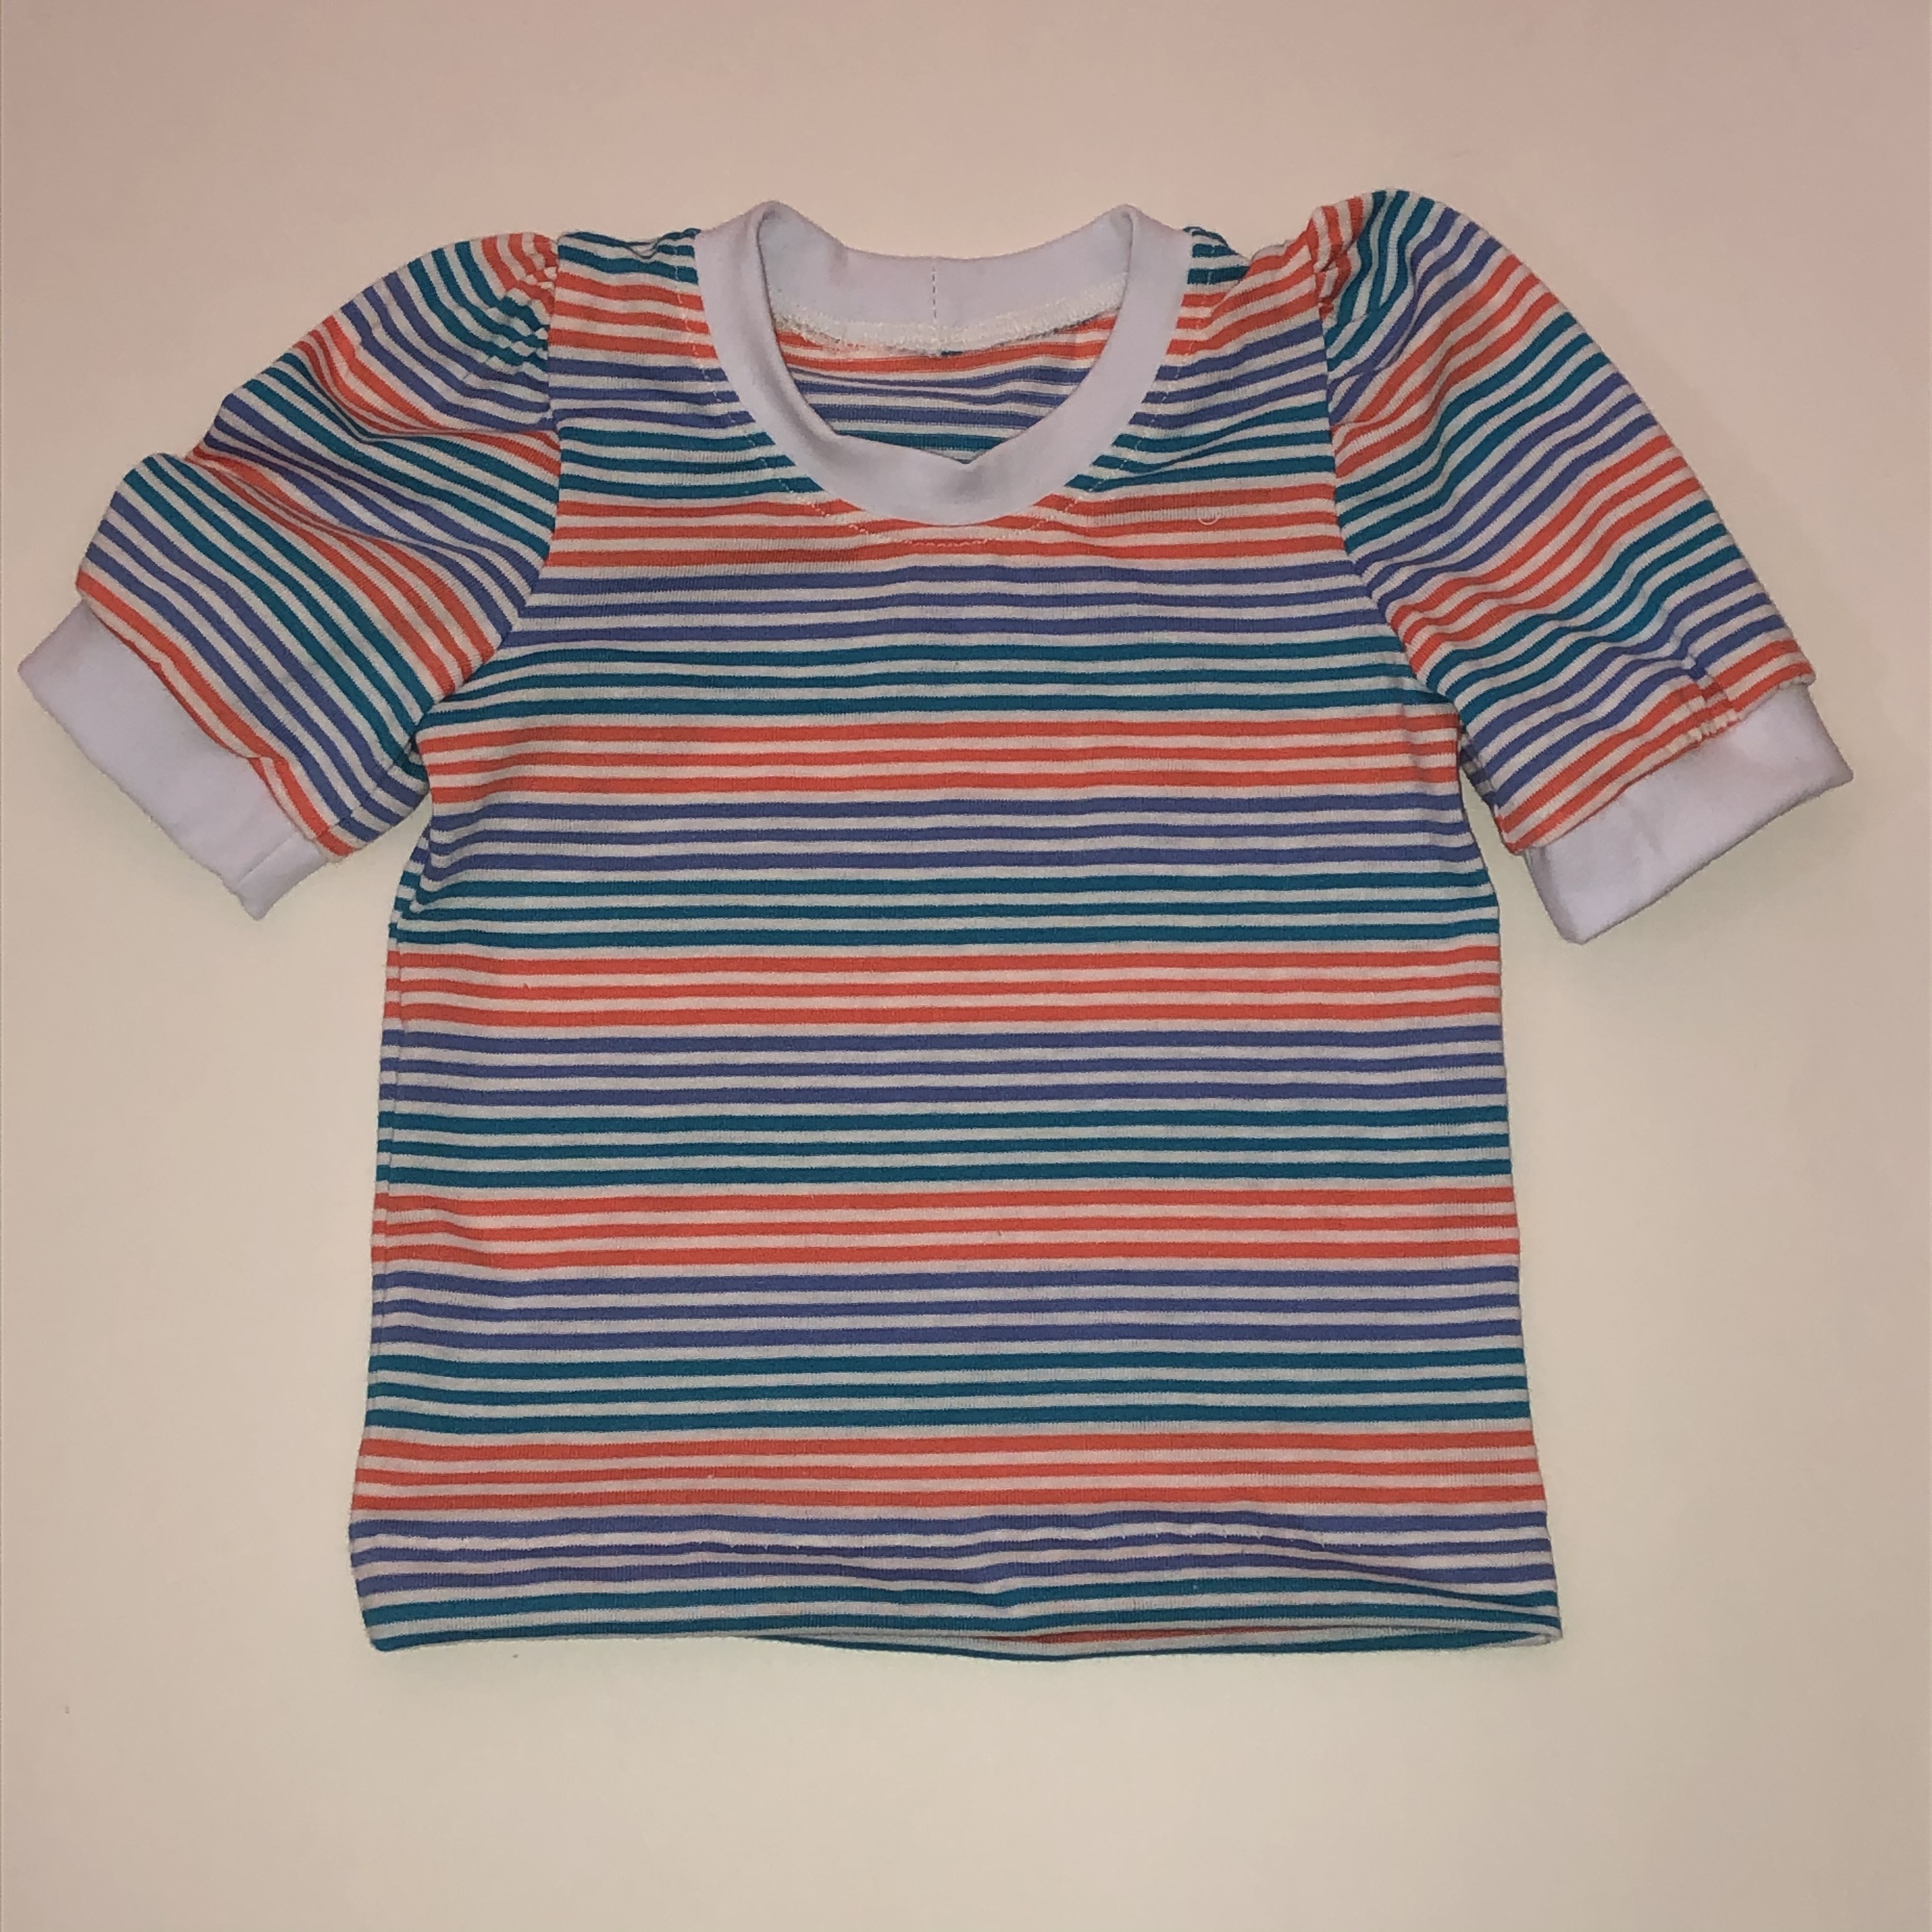
The pattern calls for a four way stretch. The first version I made used a vintage striped jersey to go with the vintage feel of the pattern. Plus the fabric was sitting there. I have a sweatshirt fleece that matches the lavender stripe, and may make some Jason Joggers from that, or an Adventure skort.
The stripes stretch, but without lycra, only moderately so. The bands are cotton lycra. Next time I will use a more narrow band to go with the delicate puff of sleeve.
Sleeves. I am an avid top stitcher. I like to install knit sleeves flat and top stitch around the armscye. First, for the look and secondly for more durability. 5 out of 4 patterns call for sleeves to be sewn in the round. I found a happy medium with the method of sewing partial seams.
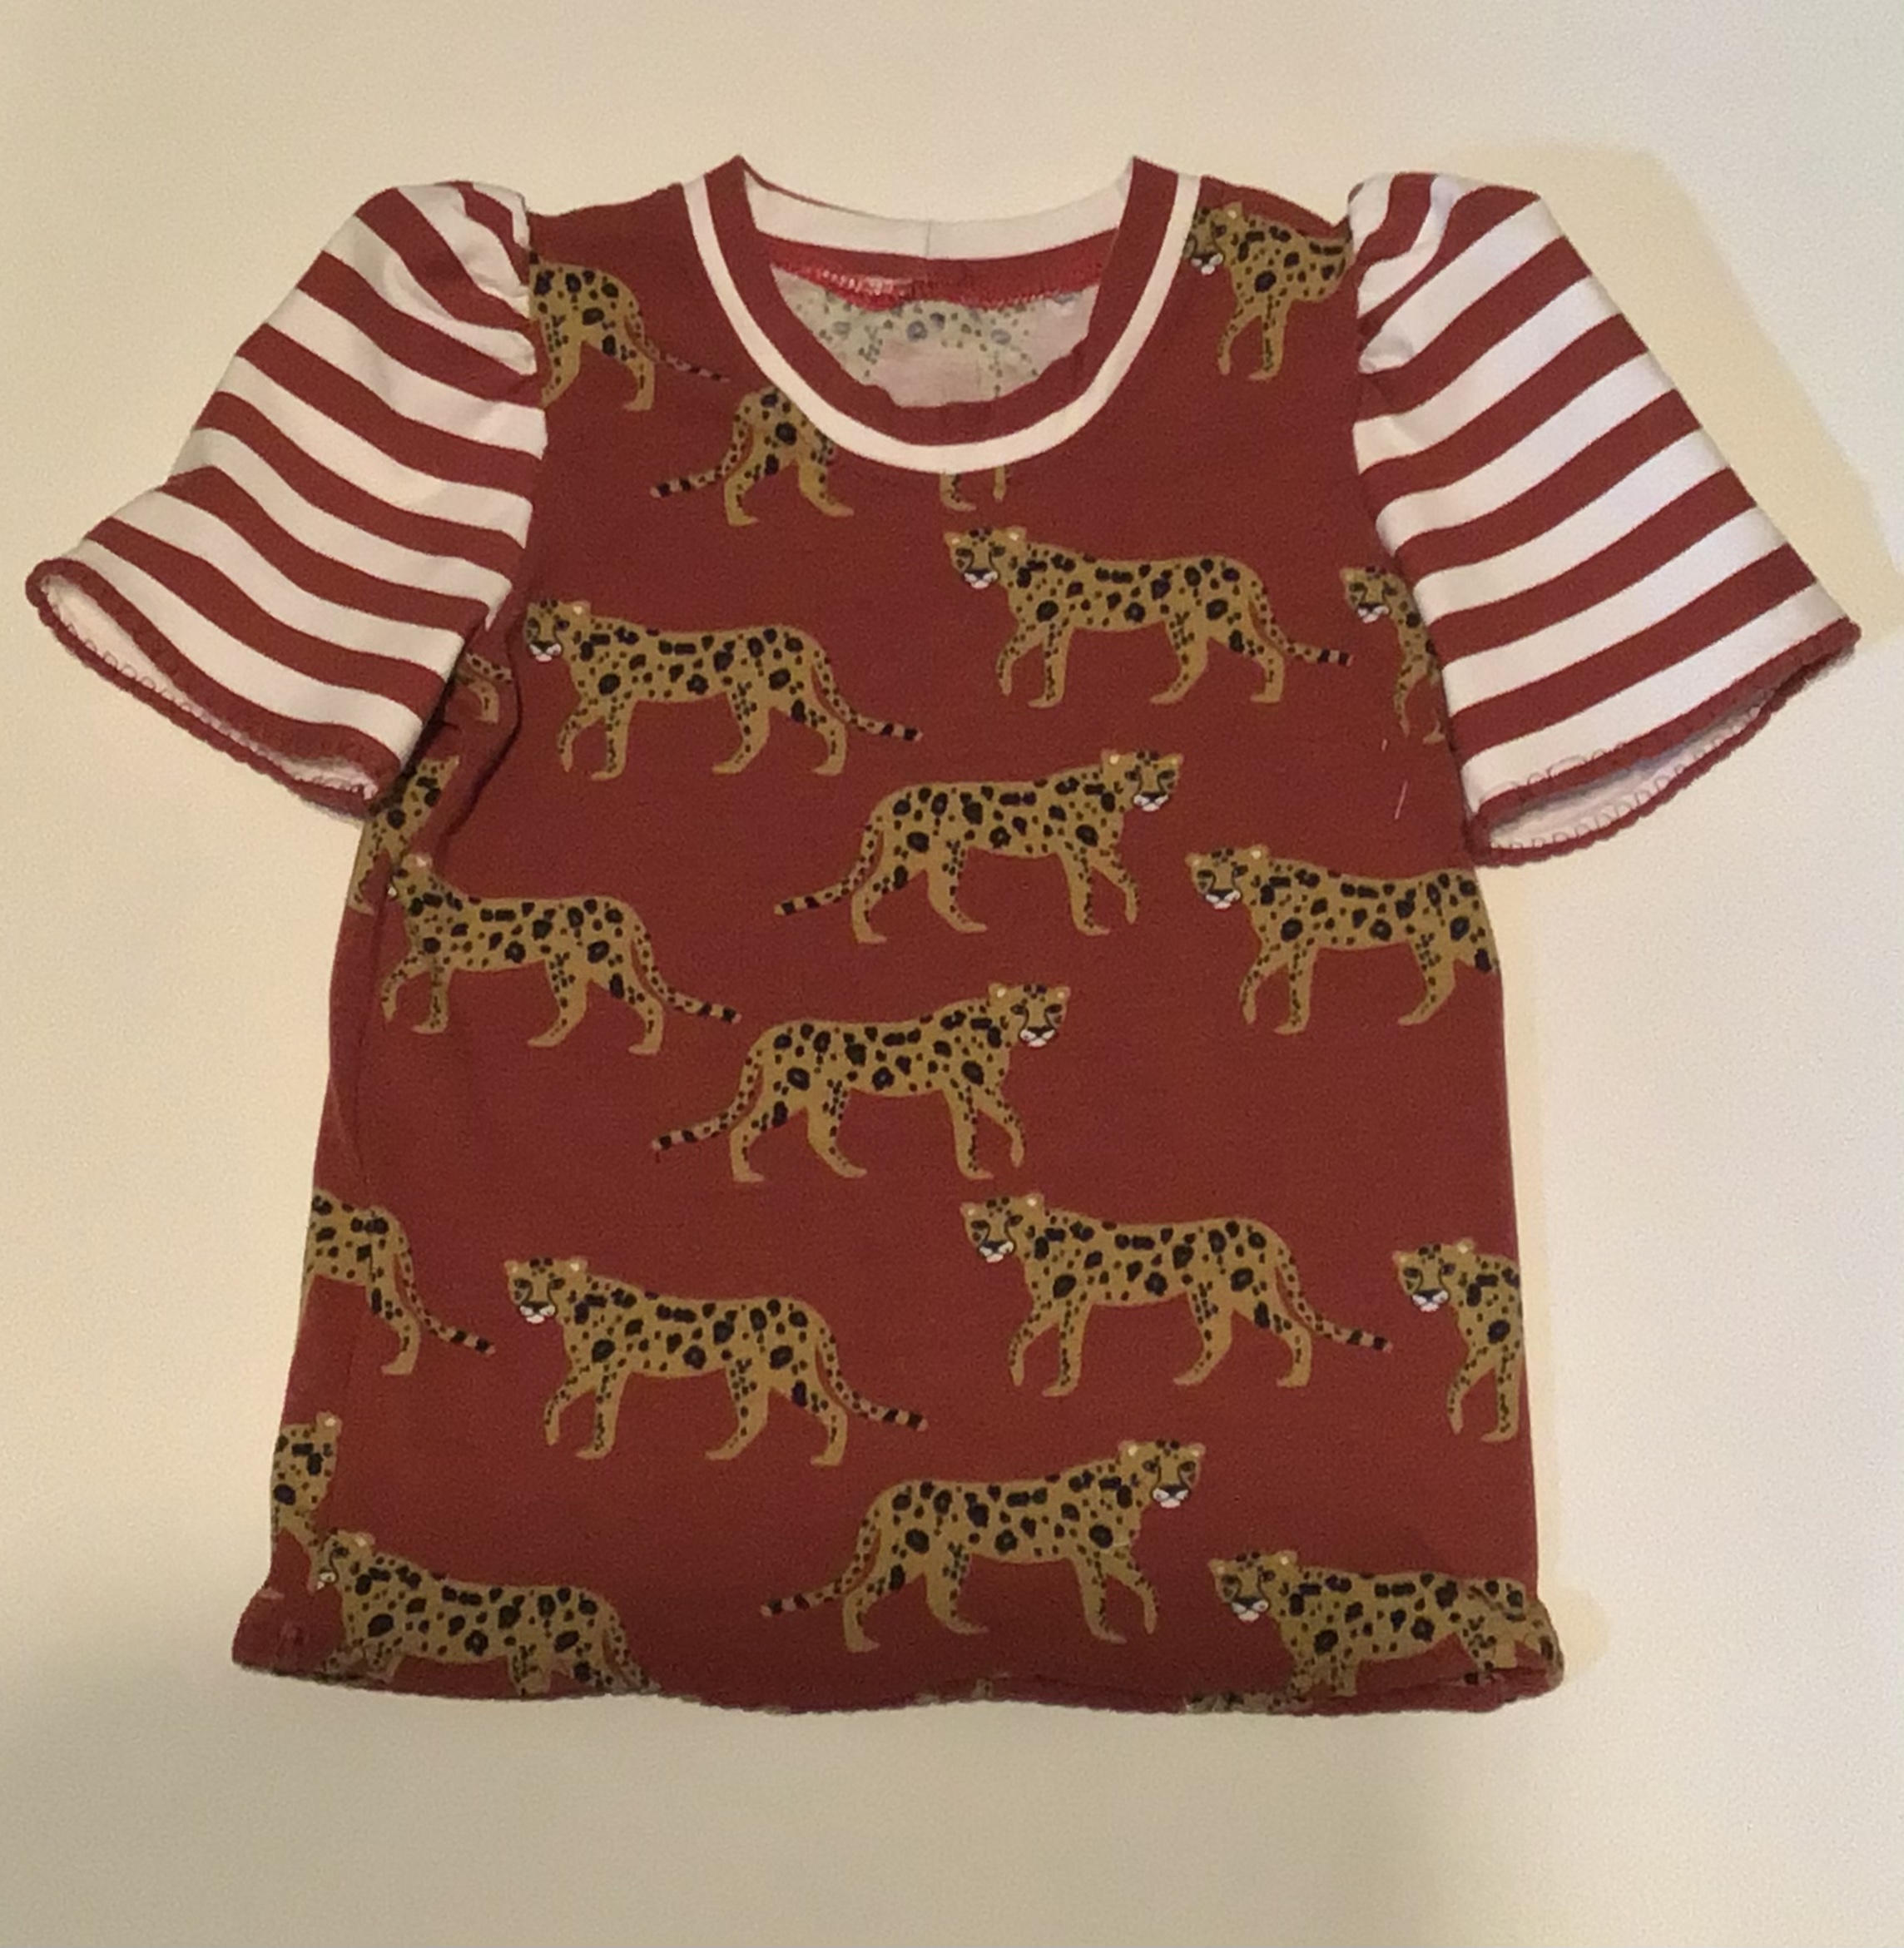
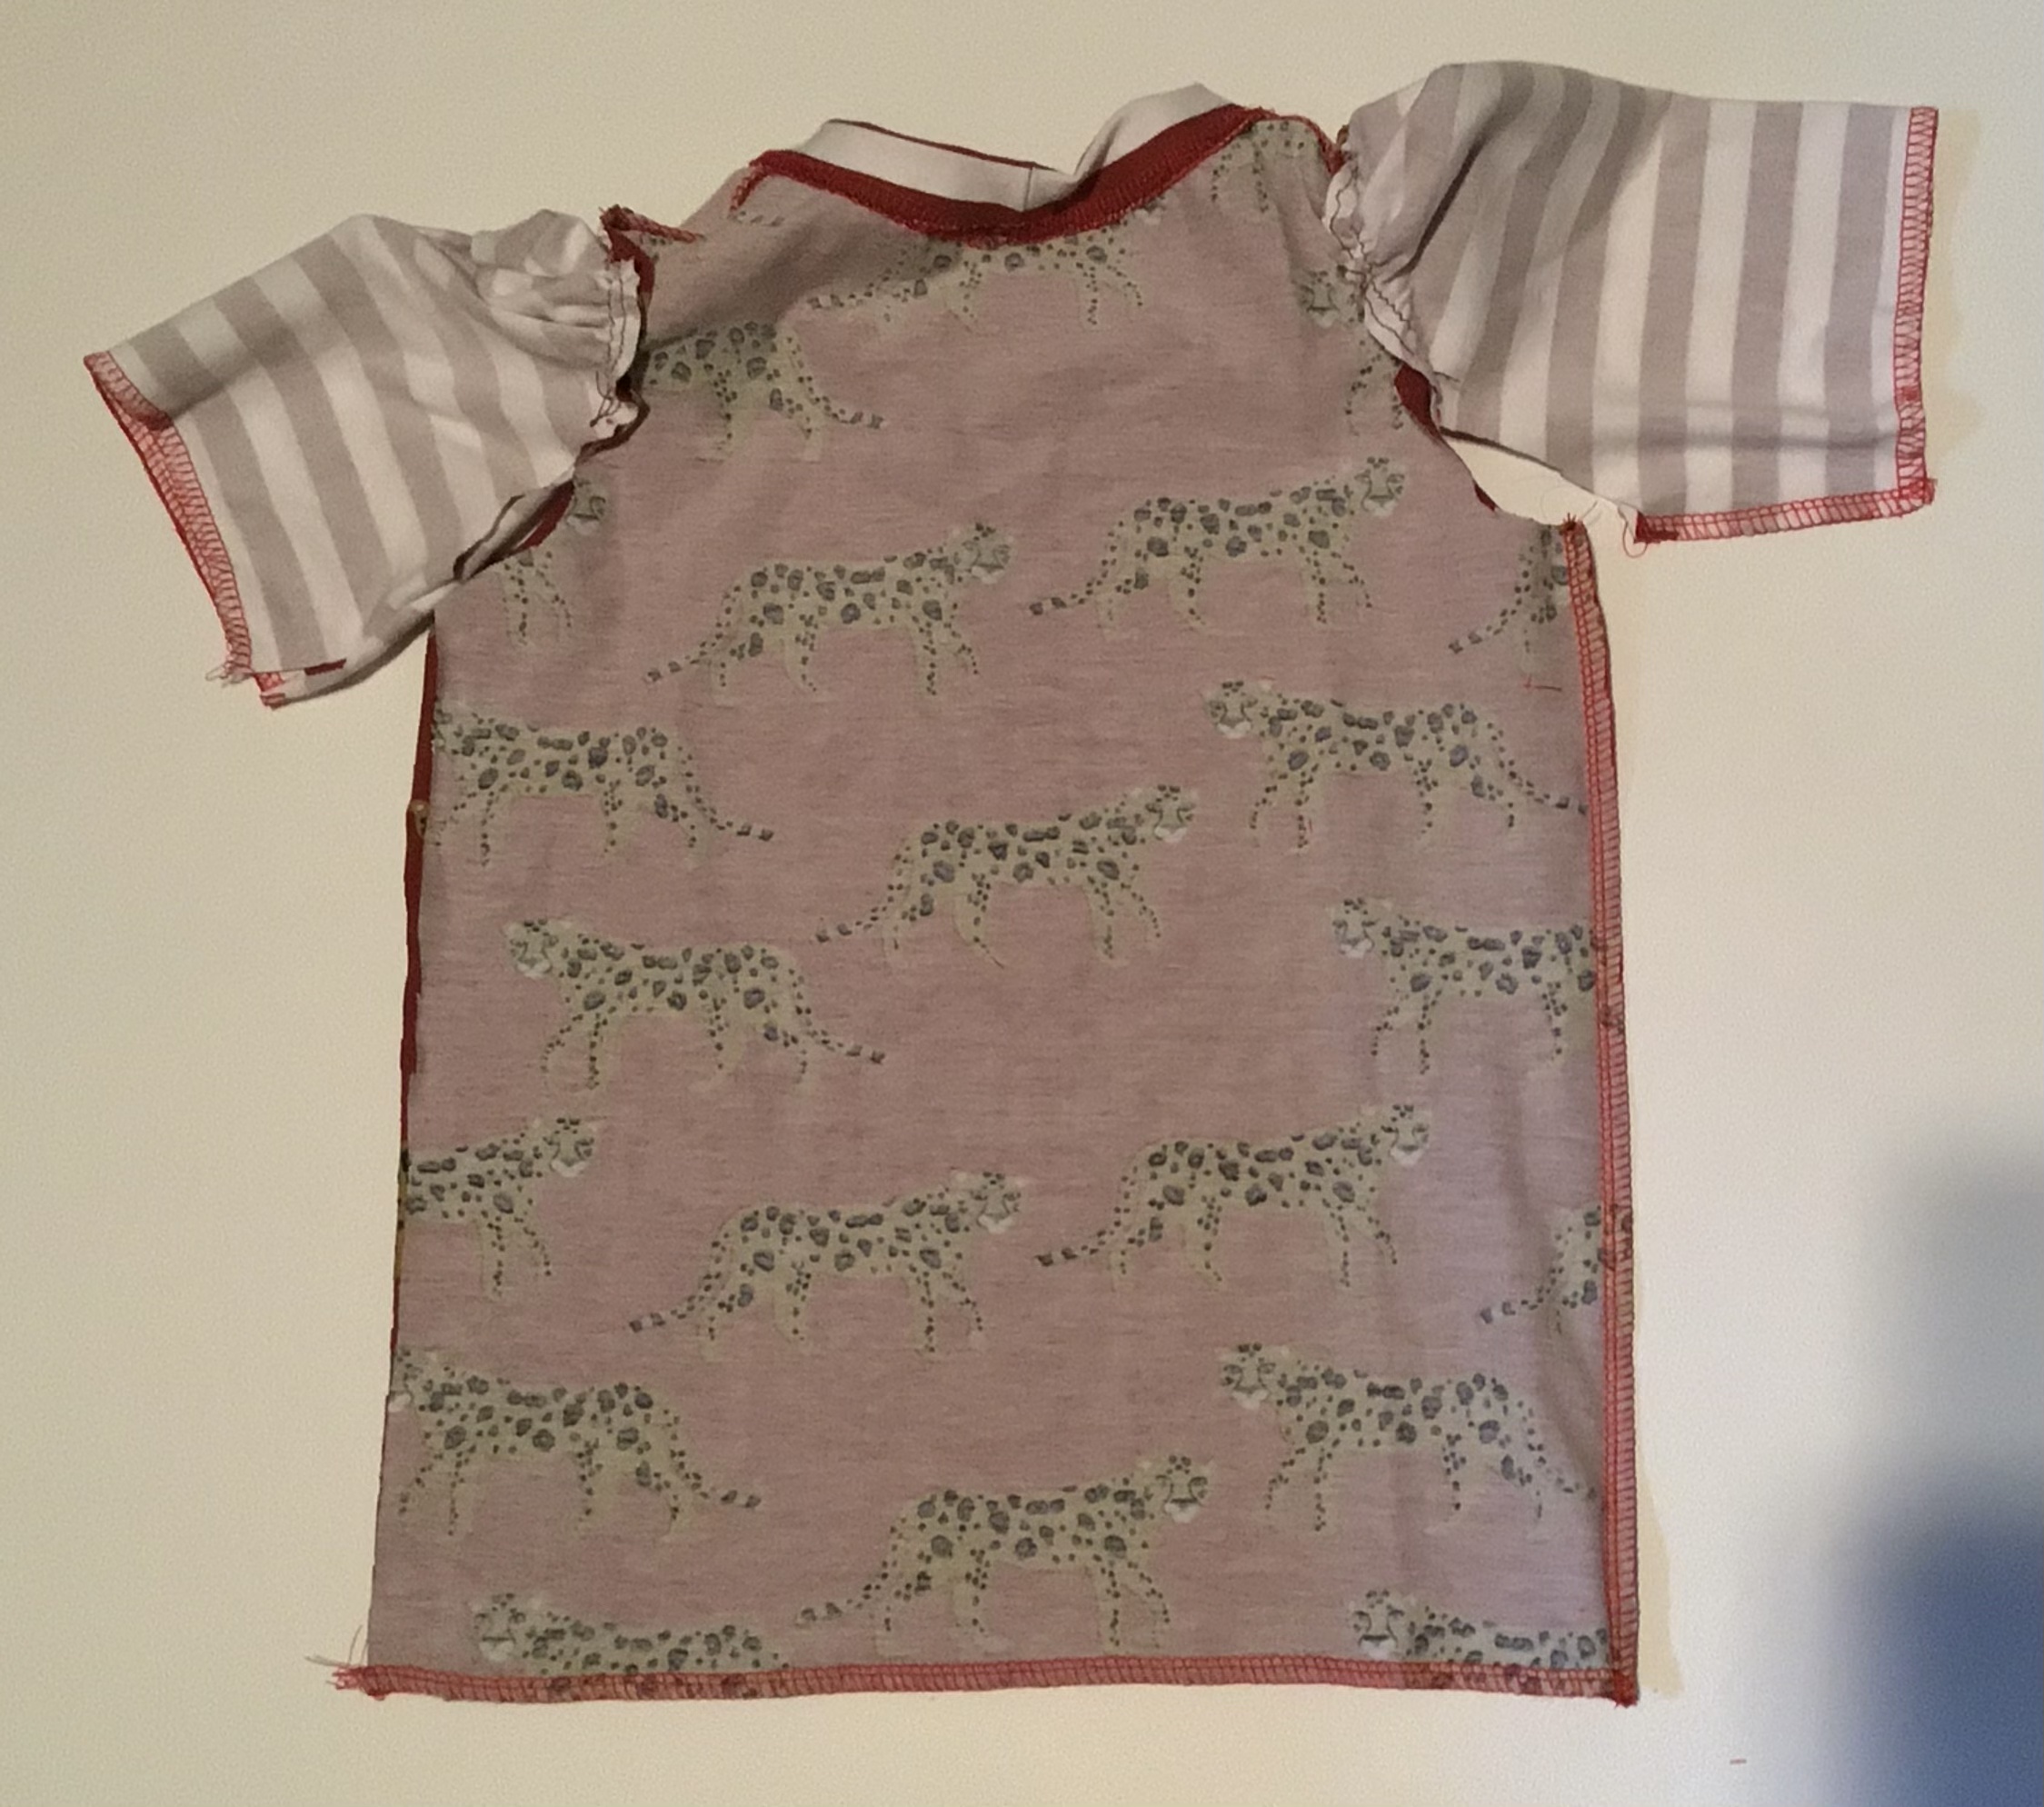
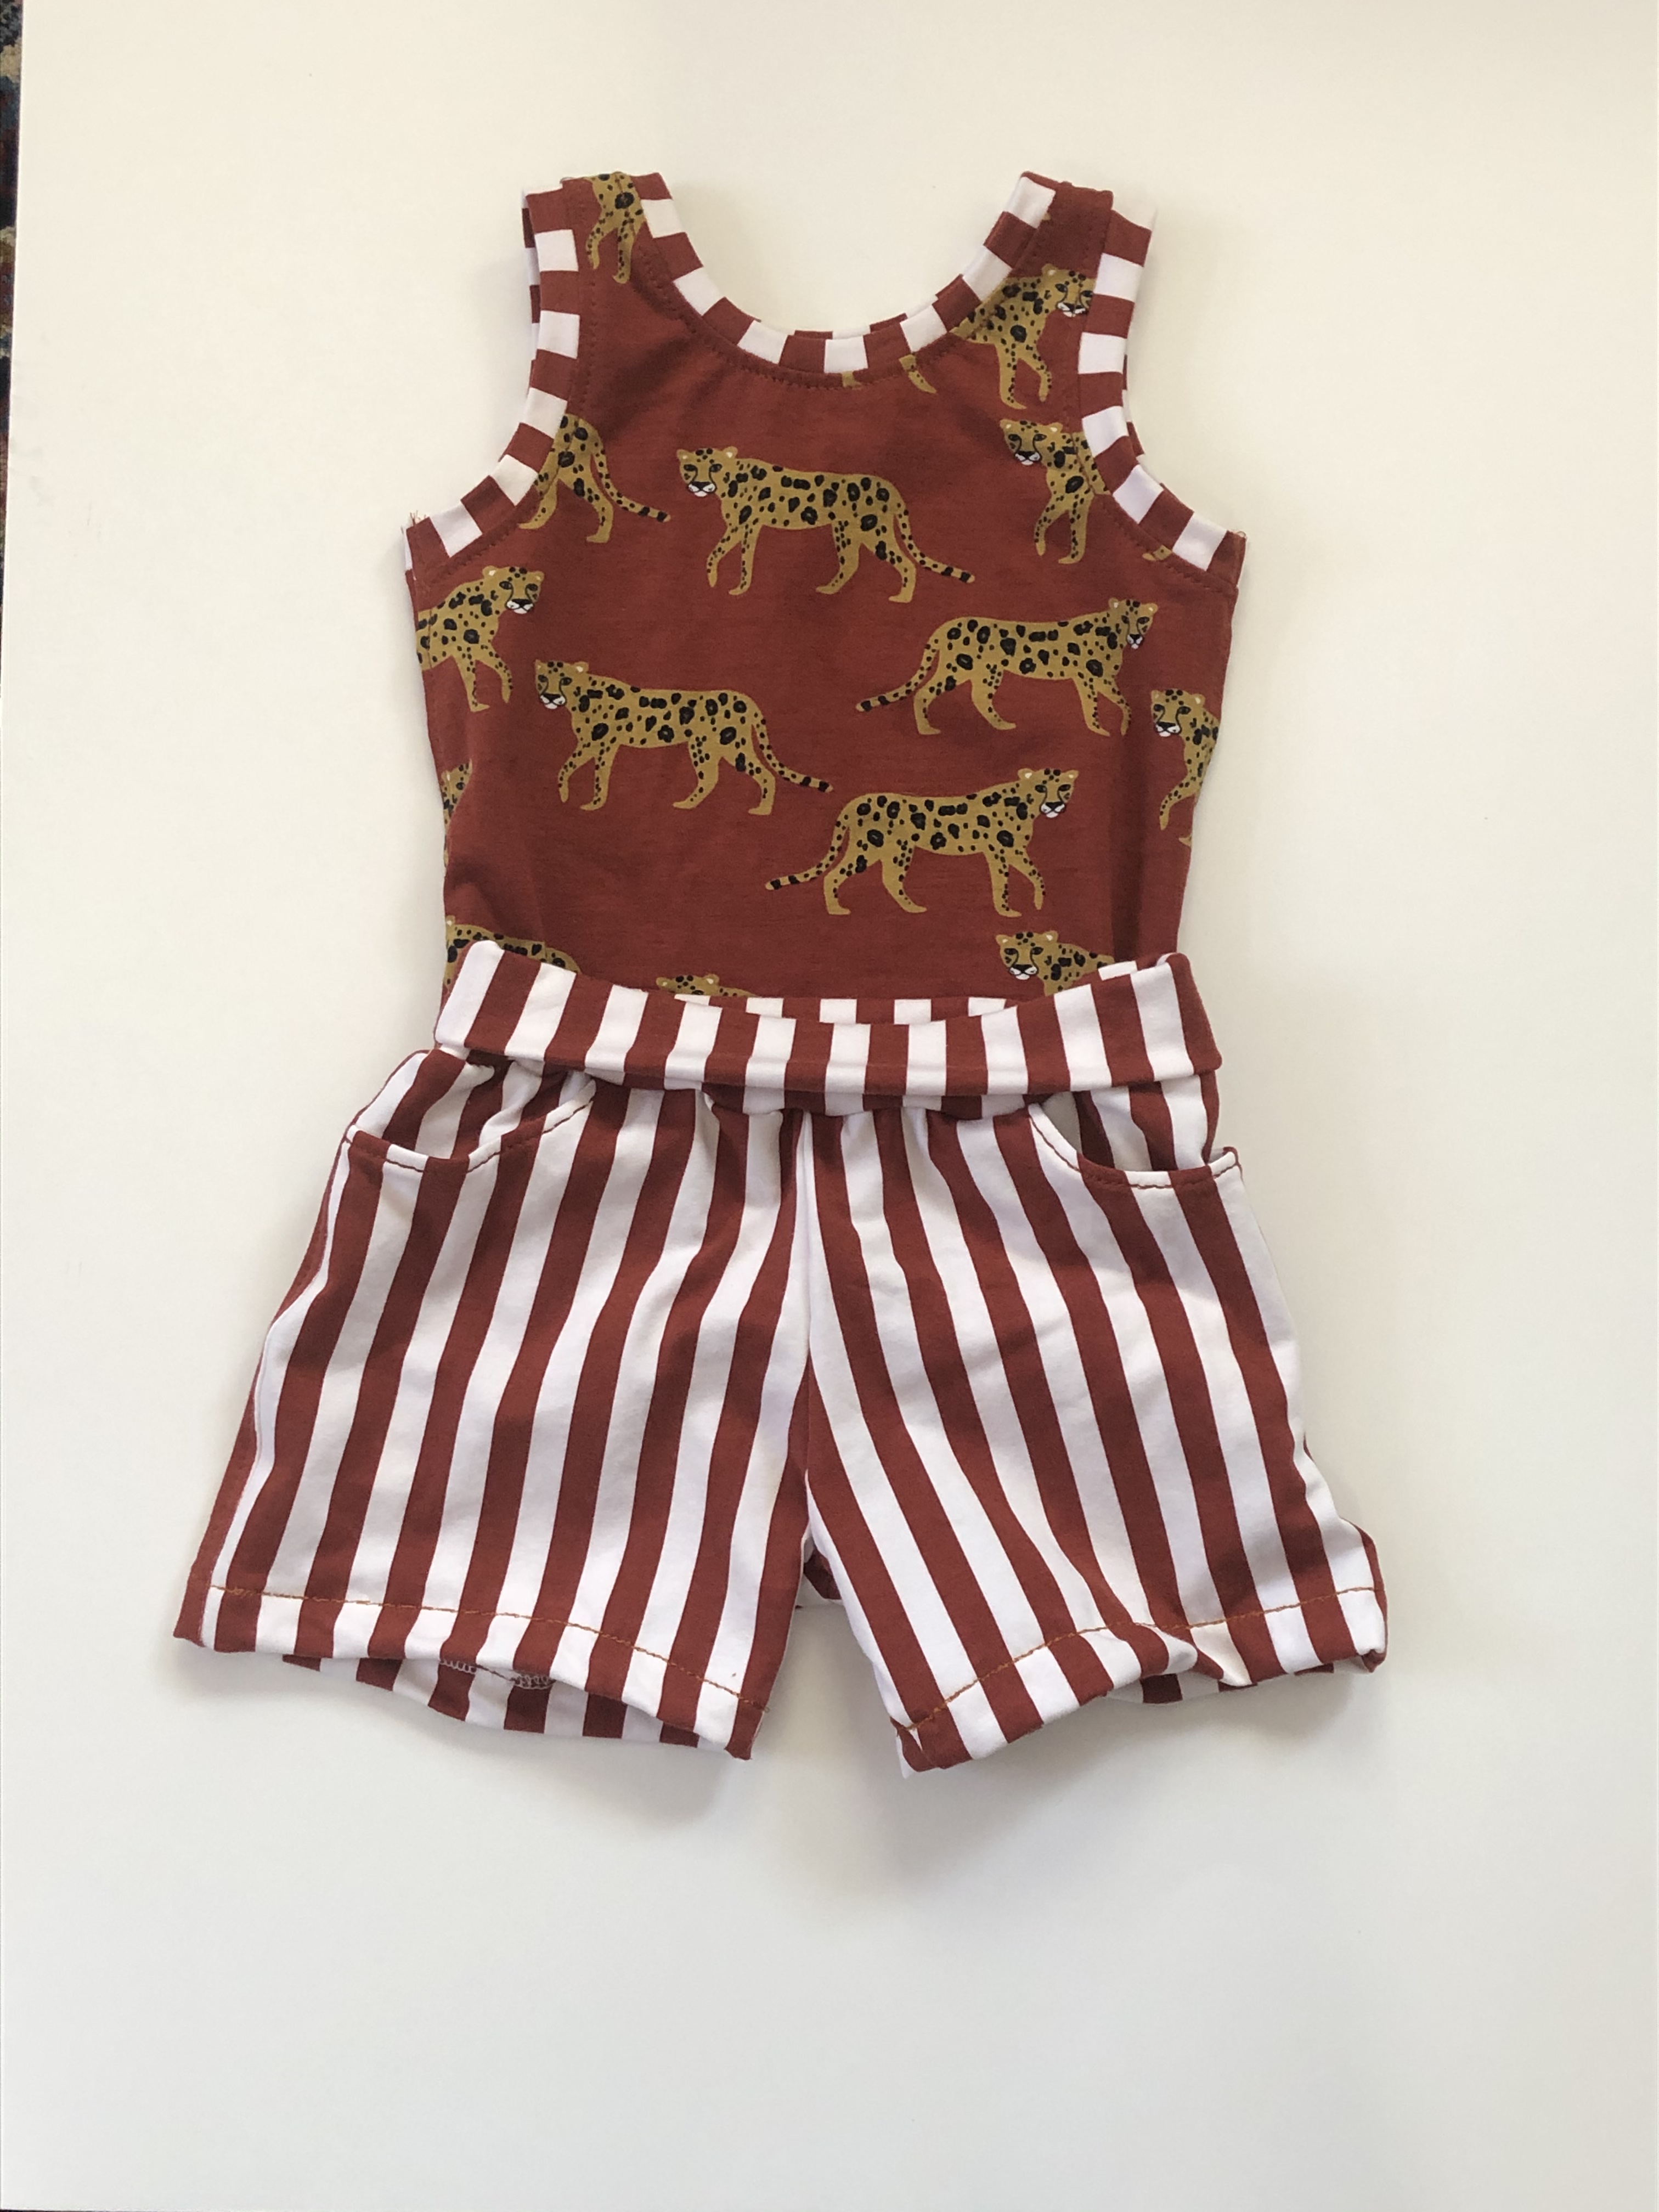
I had a little left of the leopard and stripes, and used it for my second version. It is a European organic cotton I bought for making capsule outfits for this little one. Excited to try it on next time we get together. In the meantime, here is a Flatlay.
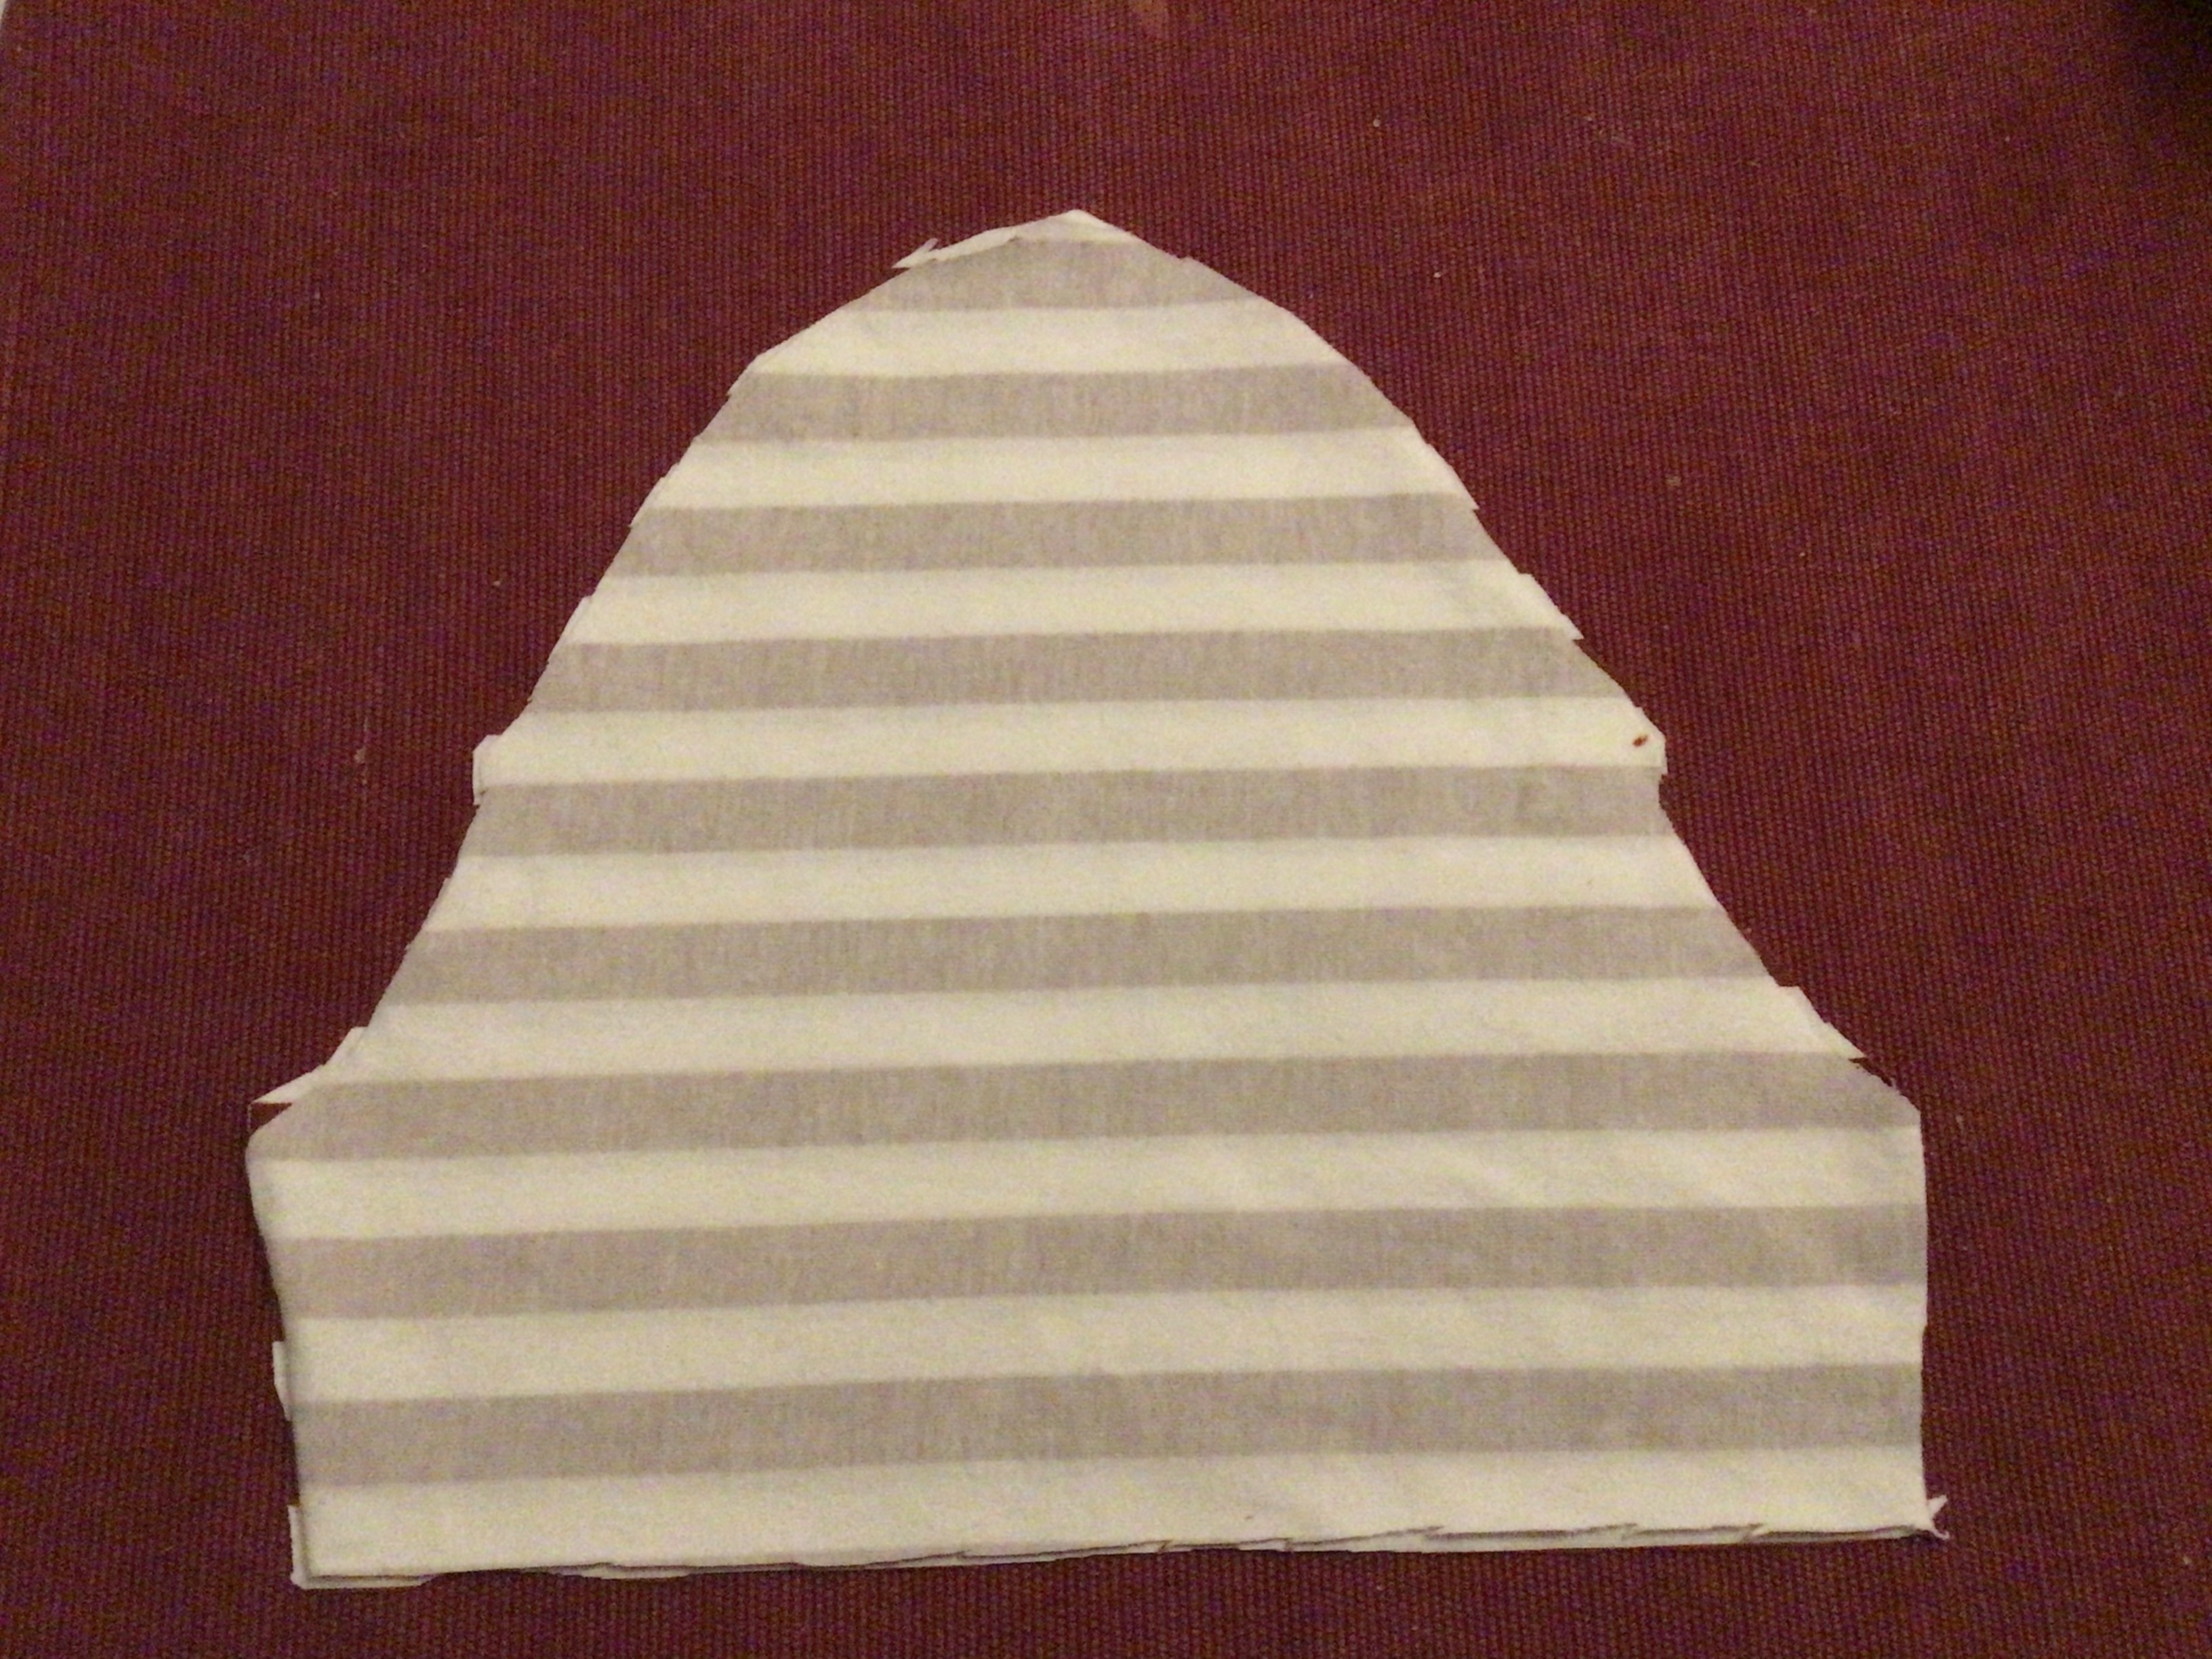
First the sleeve. I was over the moon that it had notches. Notches are often an overlooked key in getting a garment put together nicely. There is a front and back notch as well as one at the top of the sleeve. I marked the back notch with a red dot. There are corresponding notches on the bodice front and back.
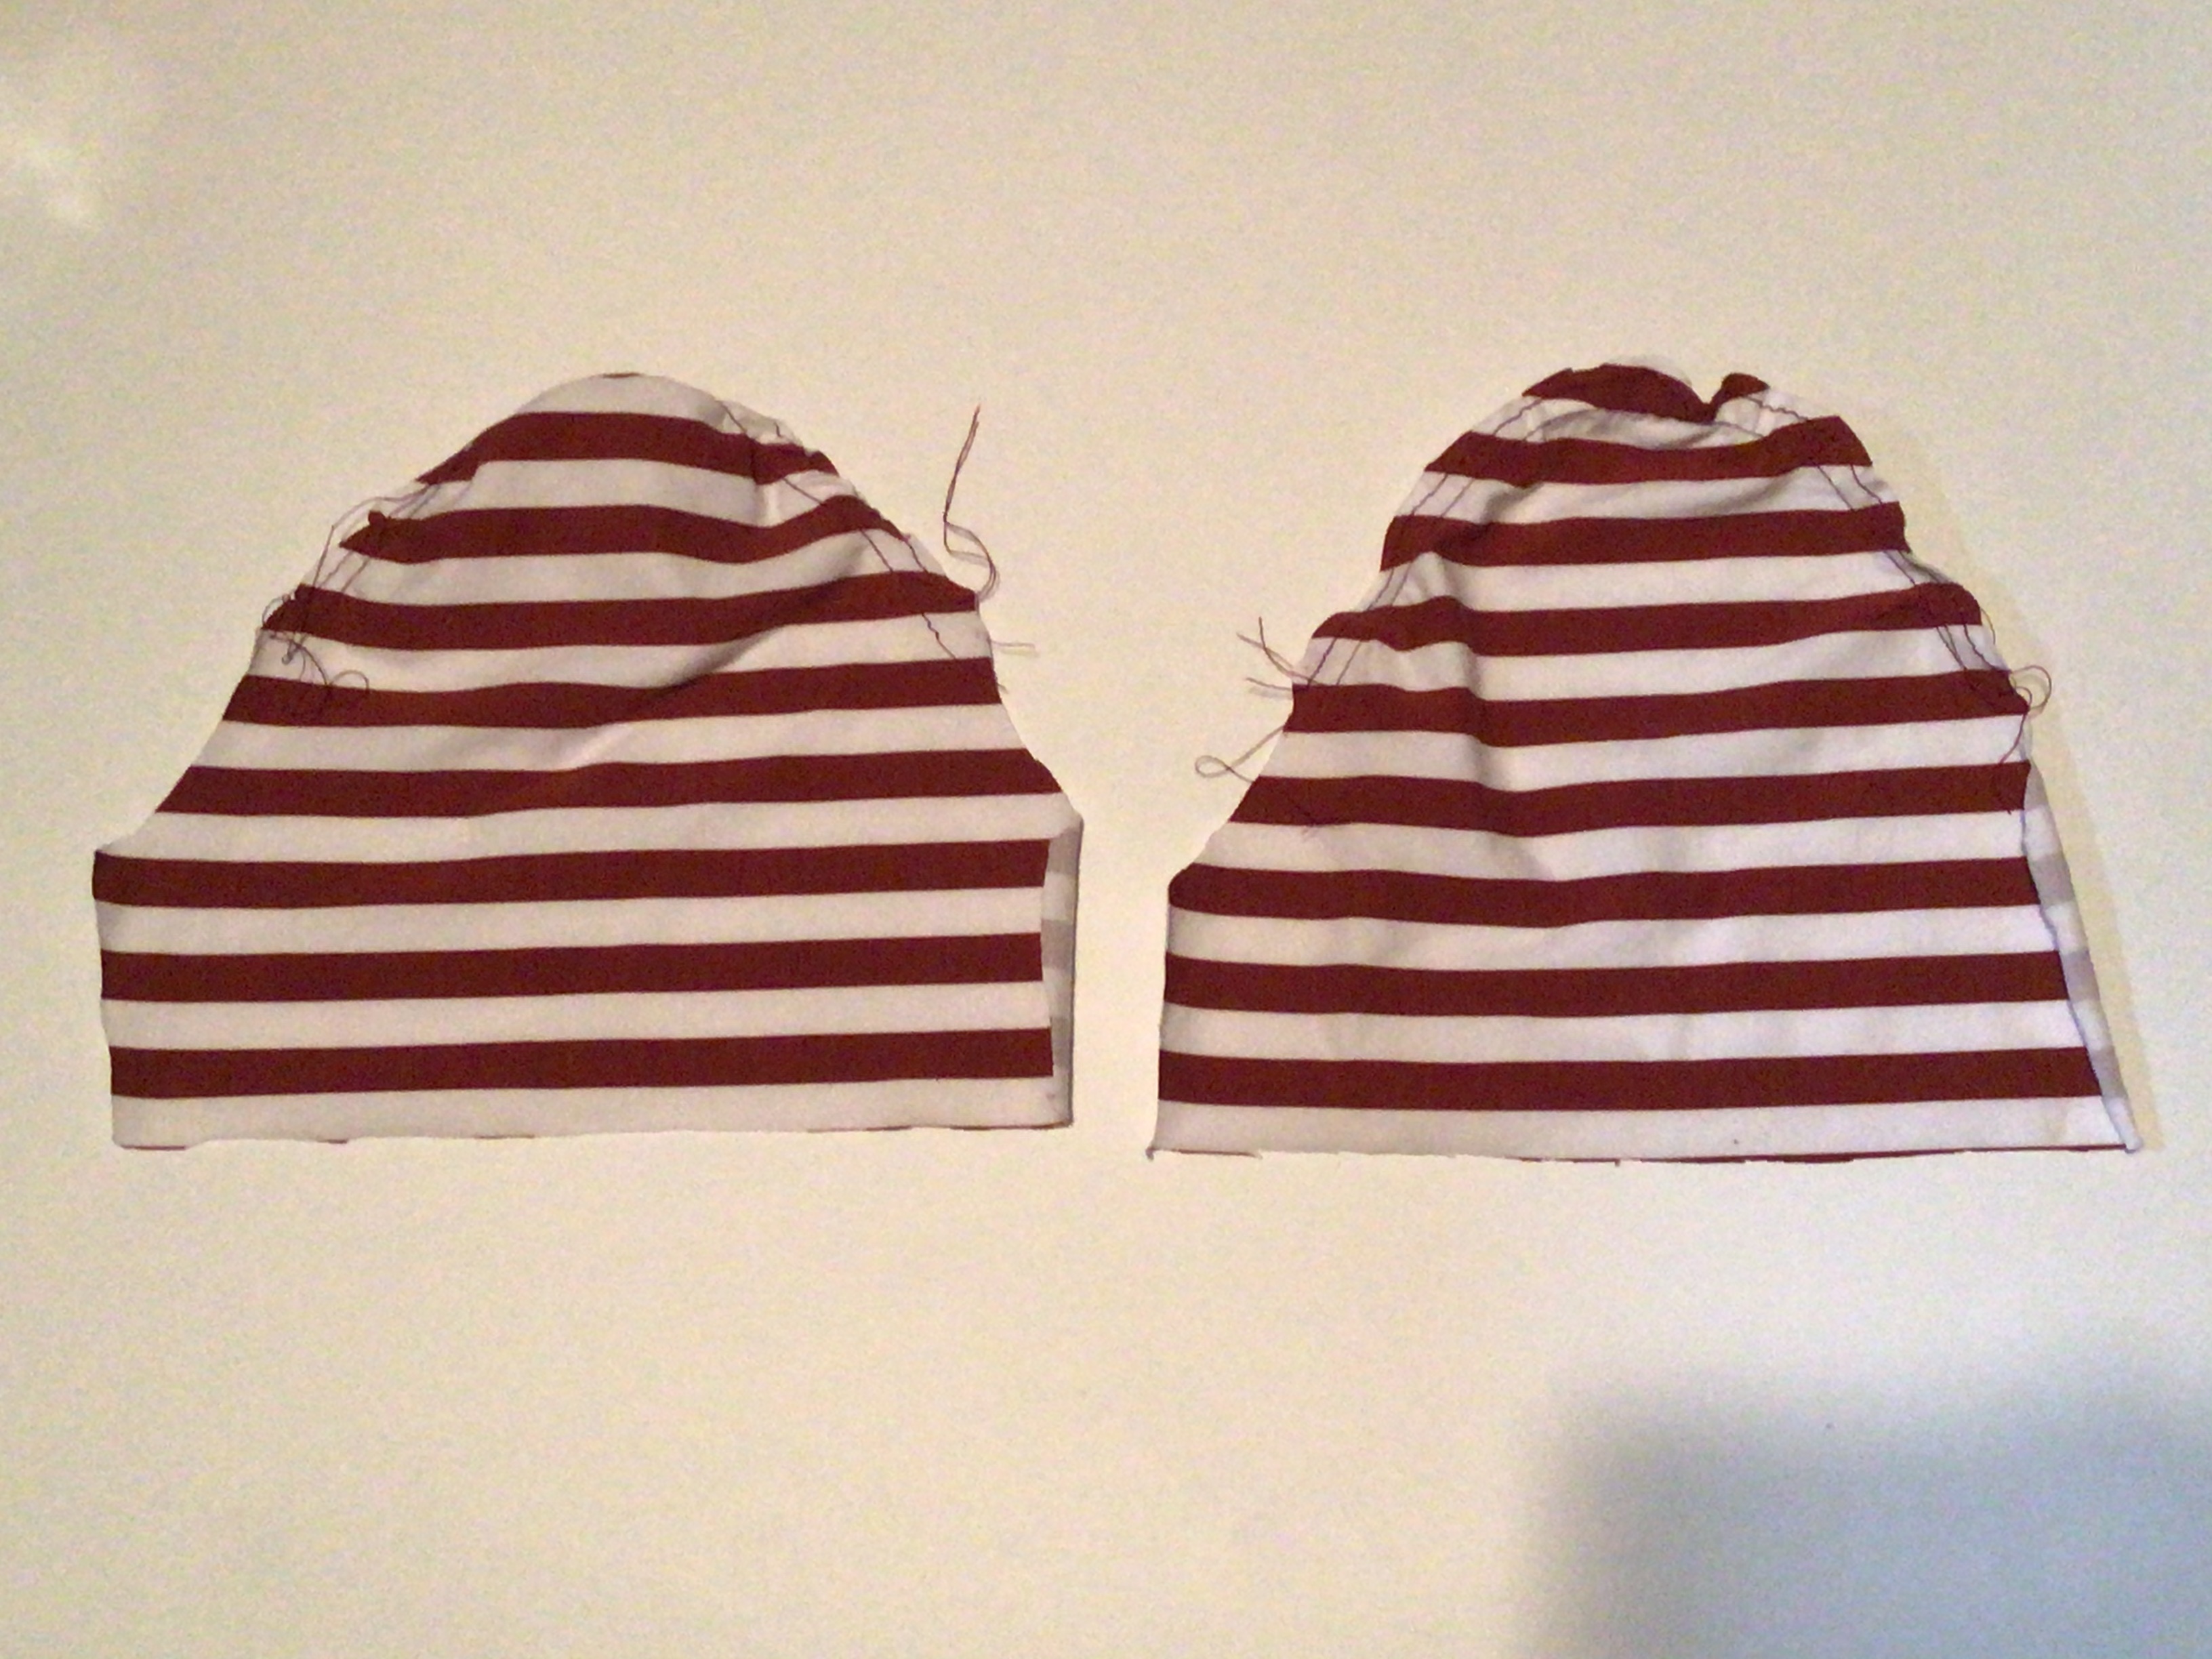
There are many ways to gather. I was taught to sew two parallel lines of stitching (between the notches) on the longest stitch. I started with the deeper basting seam, then had trouble sewing the narrower basting seam. Sleeve on left. Going forward I will sew the more narrow seam first. Sleeve on right.
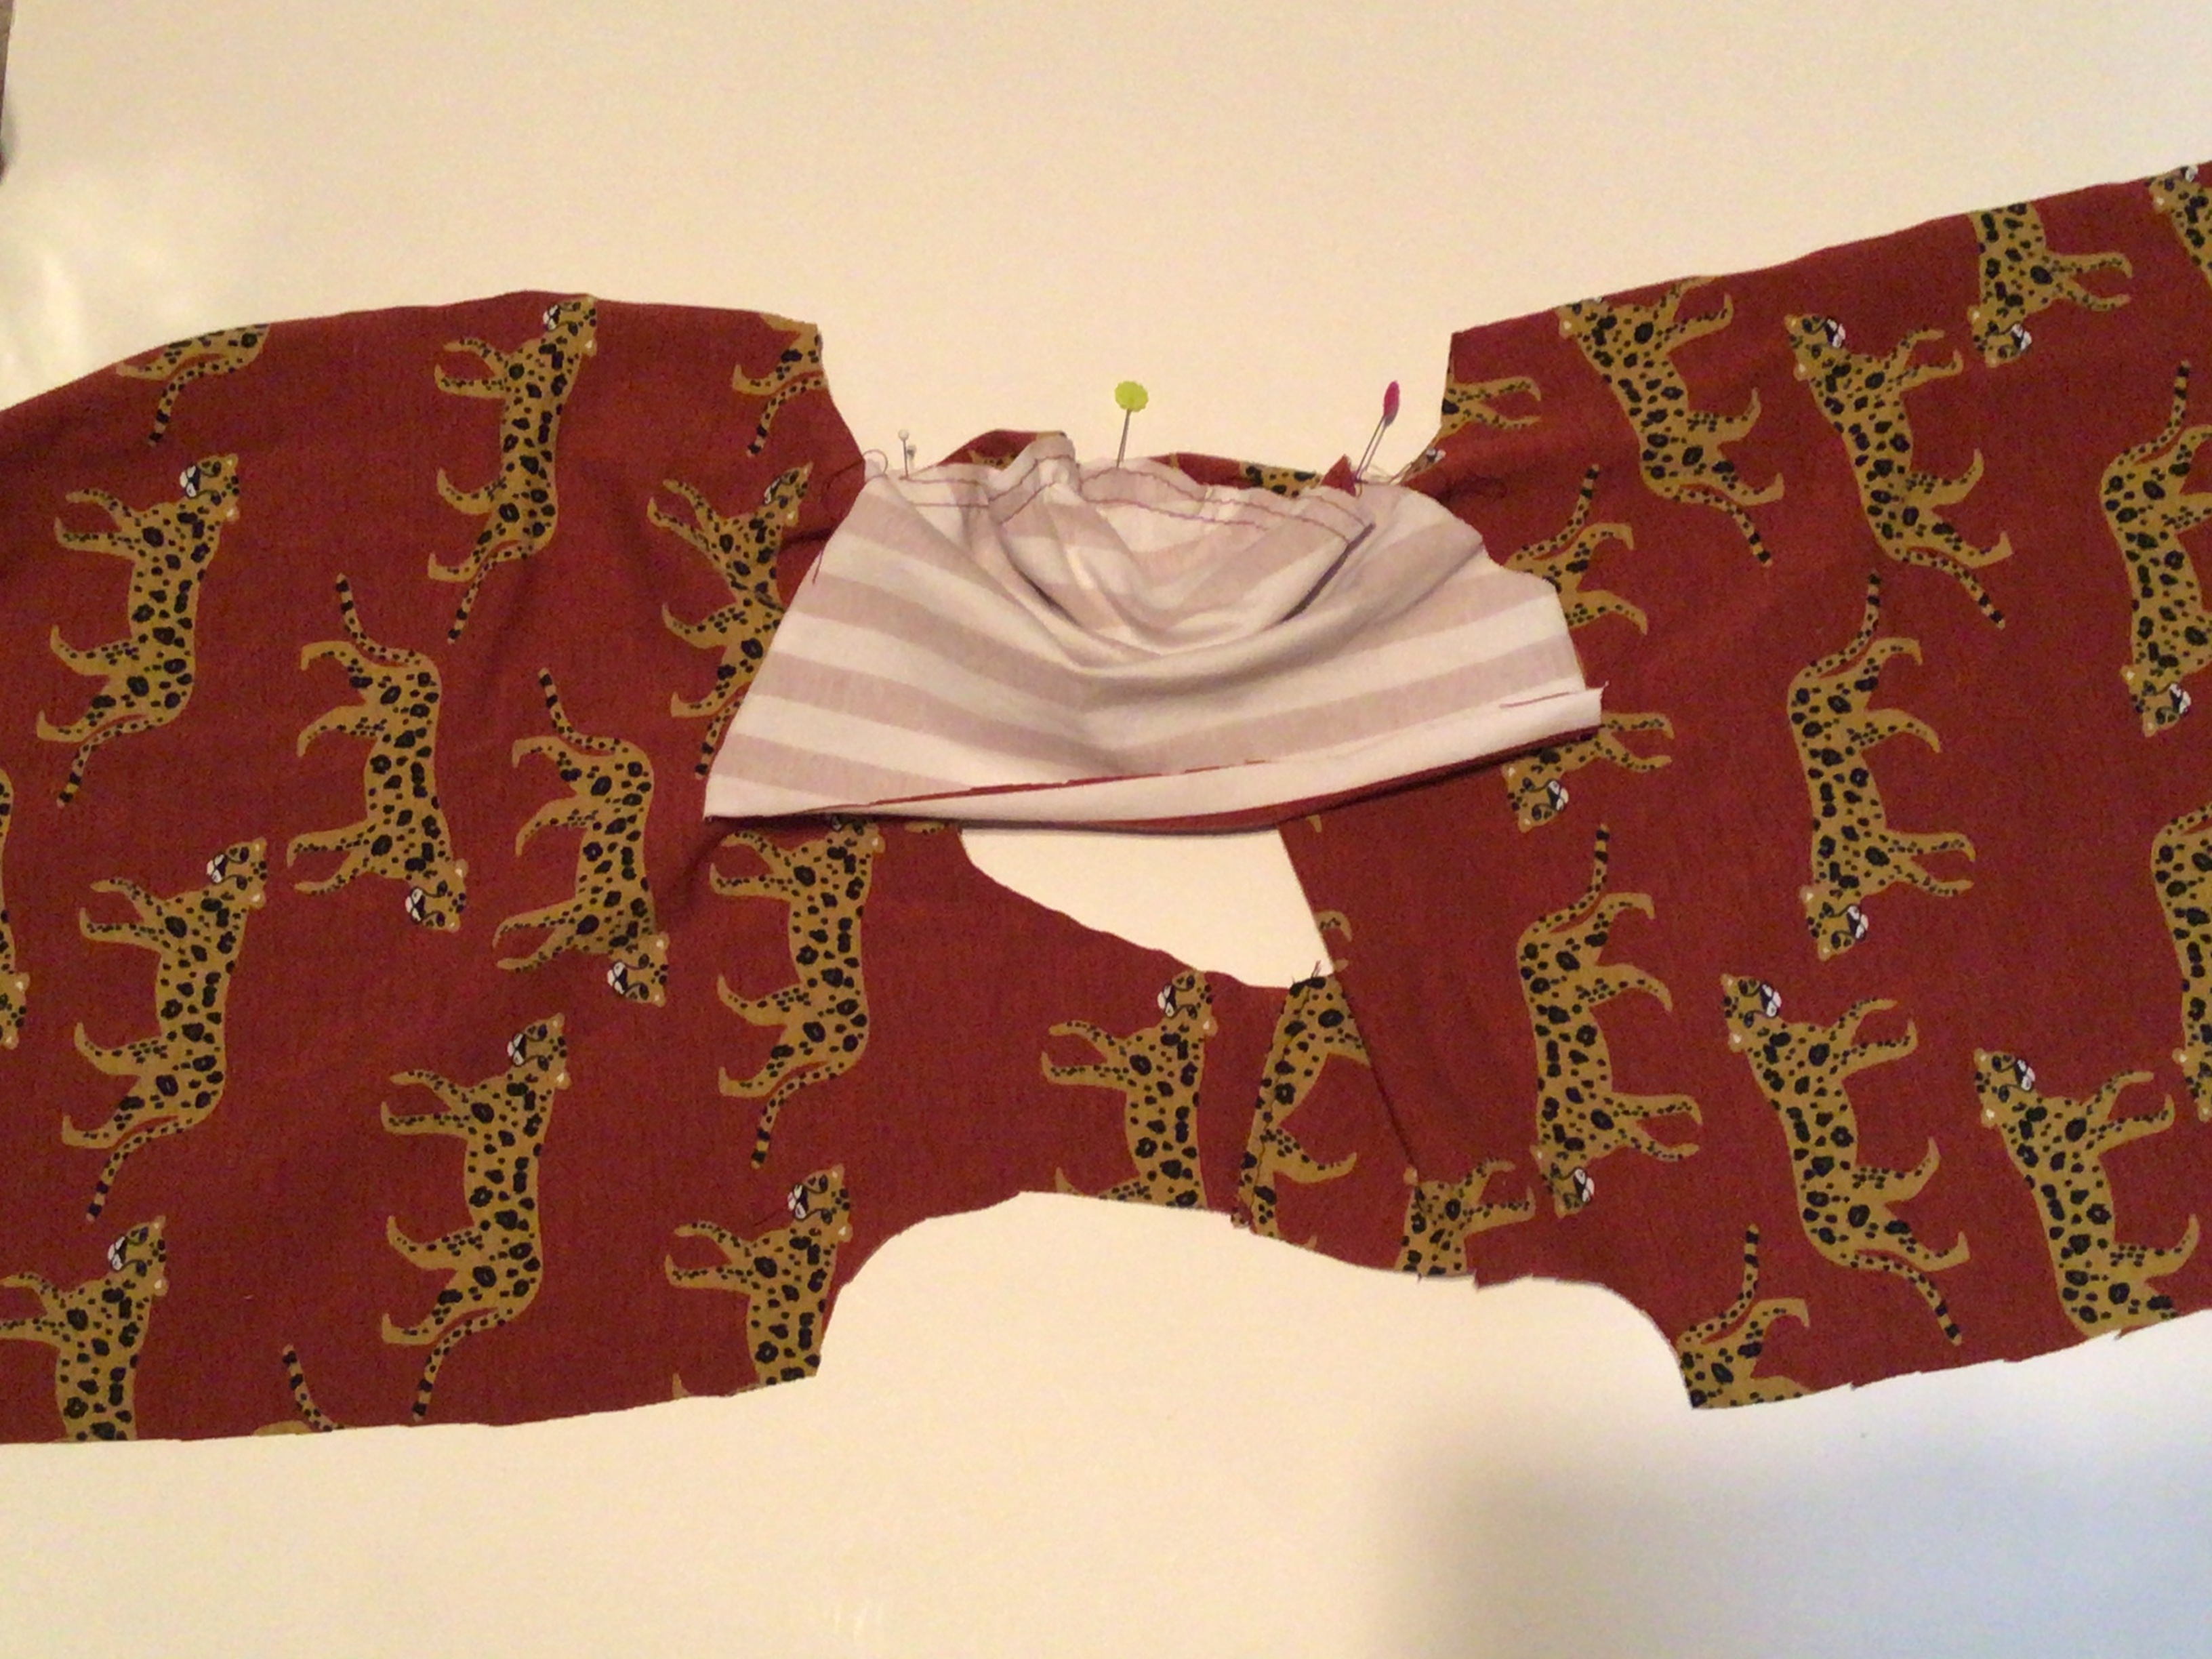

After both sleeves are partially sewn in with a zig zag baste. Clean finish the bottom sleeve and bodice edges. Open up the top and stitch side seams of sleeves and bodice. Photo below, shows the right side seams finished. Be sure to sew both. I snuck the neckband on in this step. More on that below.
Tuck the sleeves inside the body of the garment, pin or clip the underarm seams (facing different directions for less bulk). then serge around the armscye. Since 2/3 of this seam has already been sewn, this part is easy. Pay attention that the two layers of fabric are smooth at the beginning and end of the zig zag baste, so you do not get puckers.

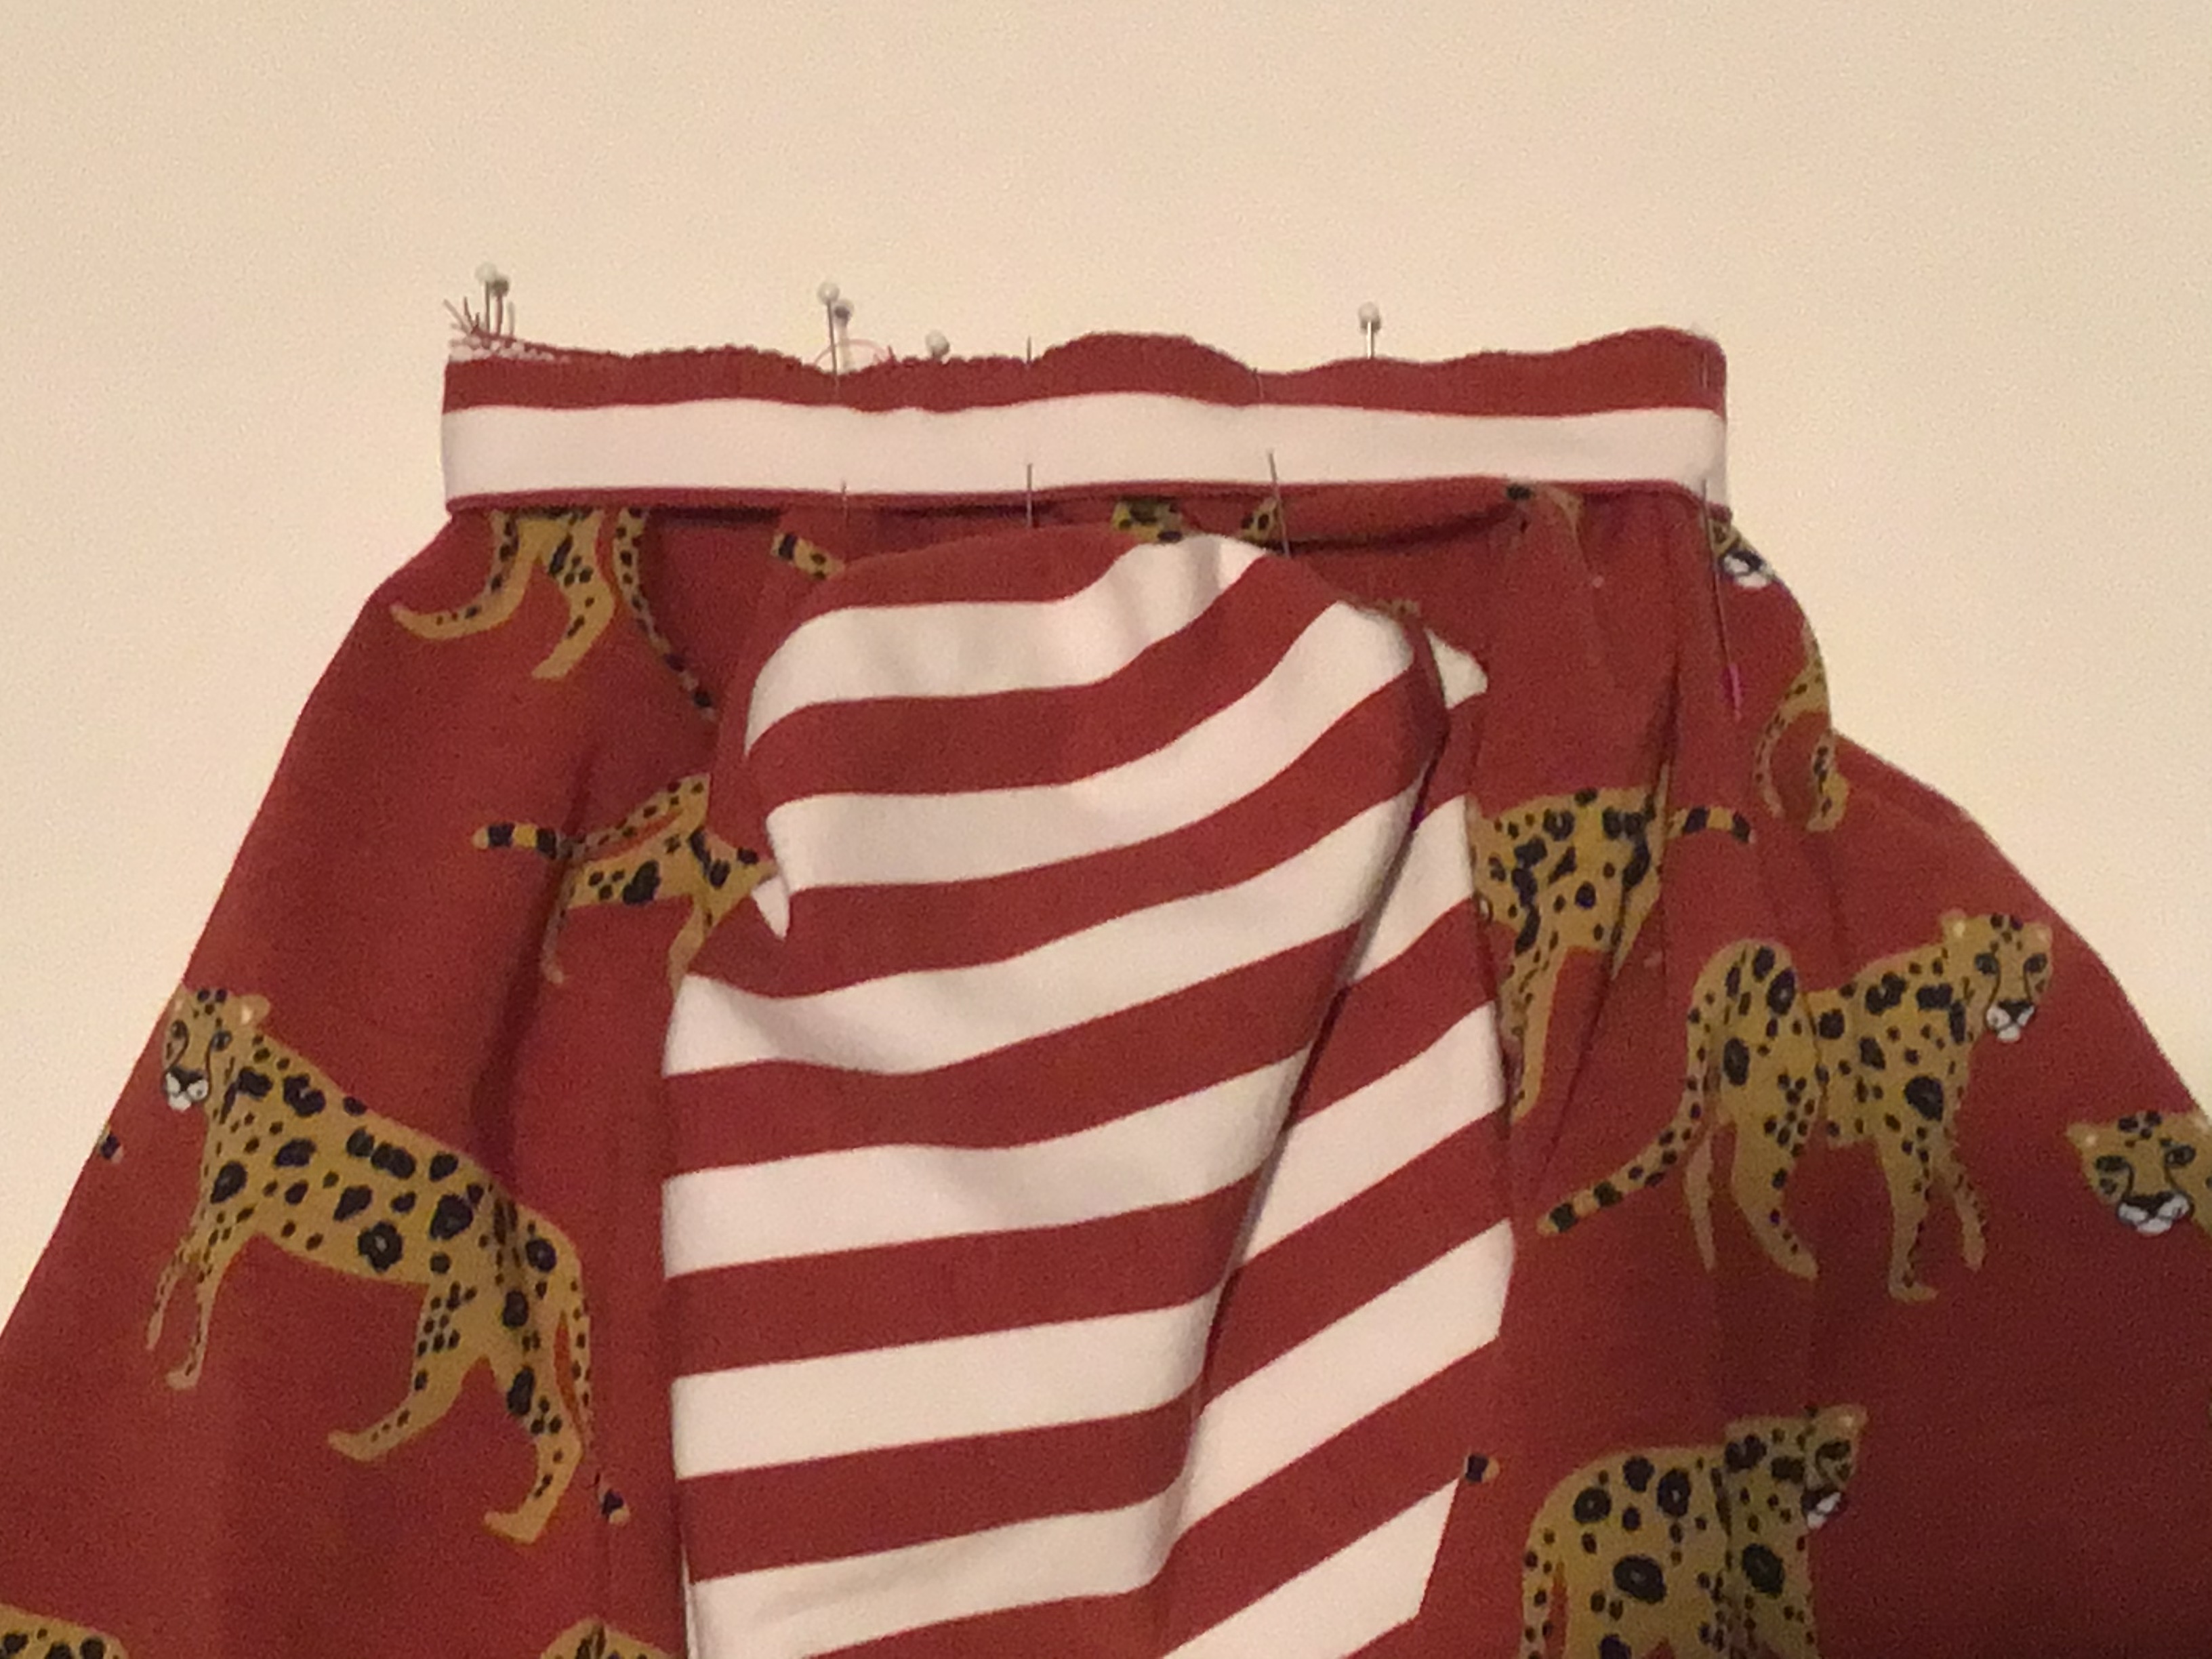
About neckbands. One of my favorite tips is to zig zag baste the raw edges of the seamed neckband together before attaching. If you want less bulk at the seam of the neckband, use your regular machine with a triple stitch to sew it in the round. The neckband is edge basted, and quartered, ready to attach.
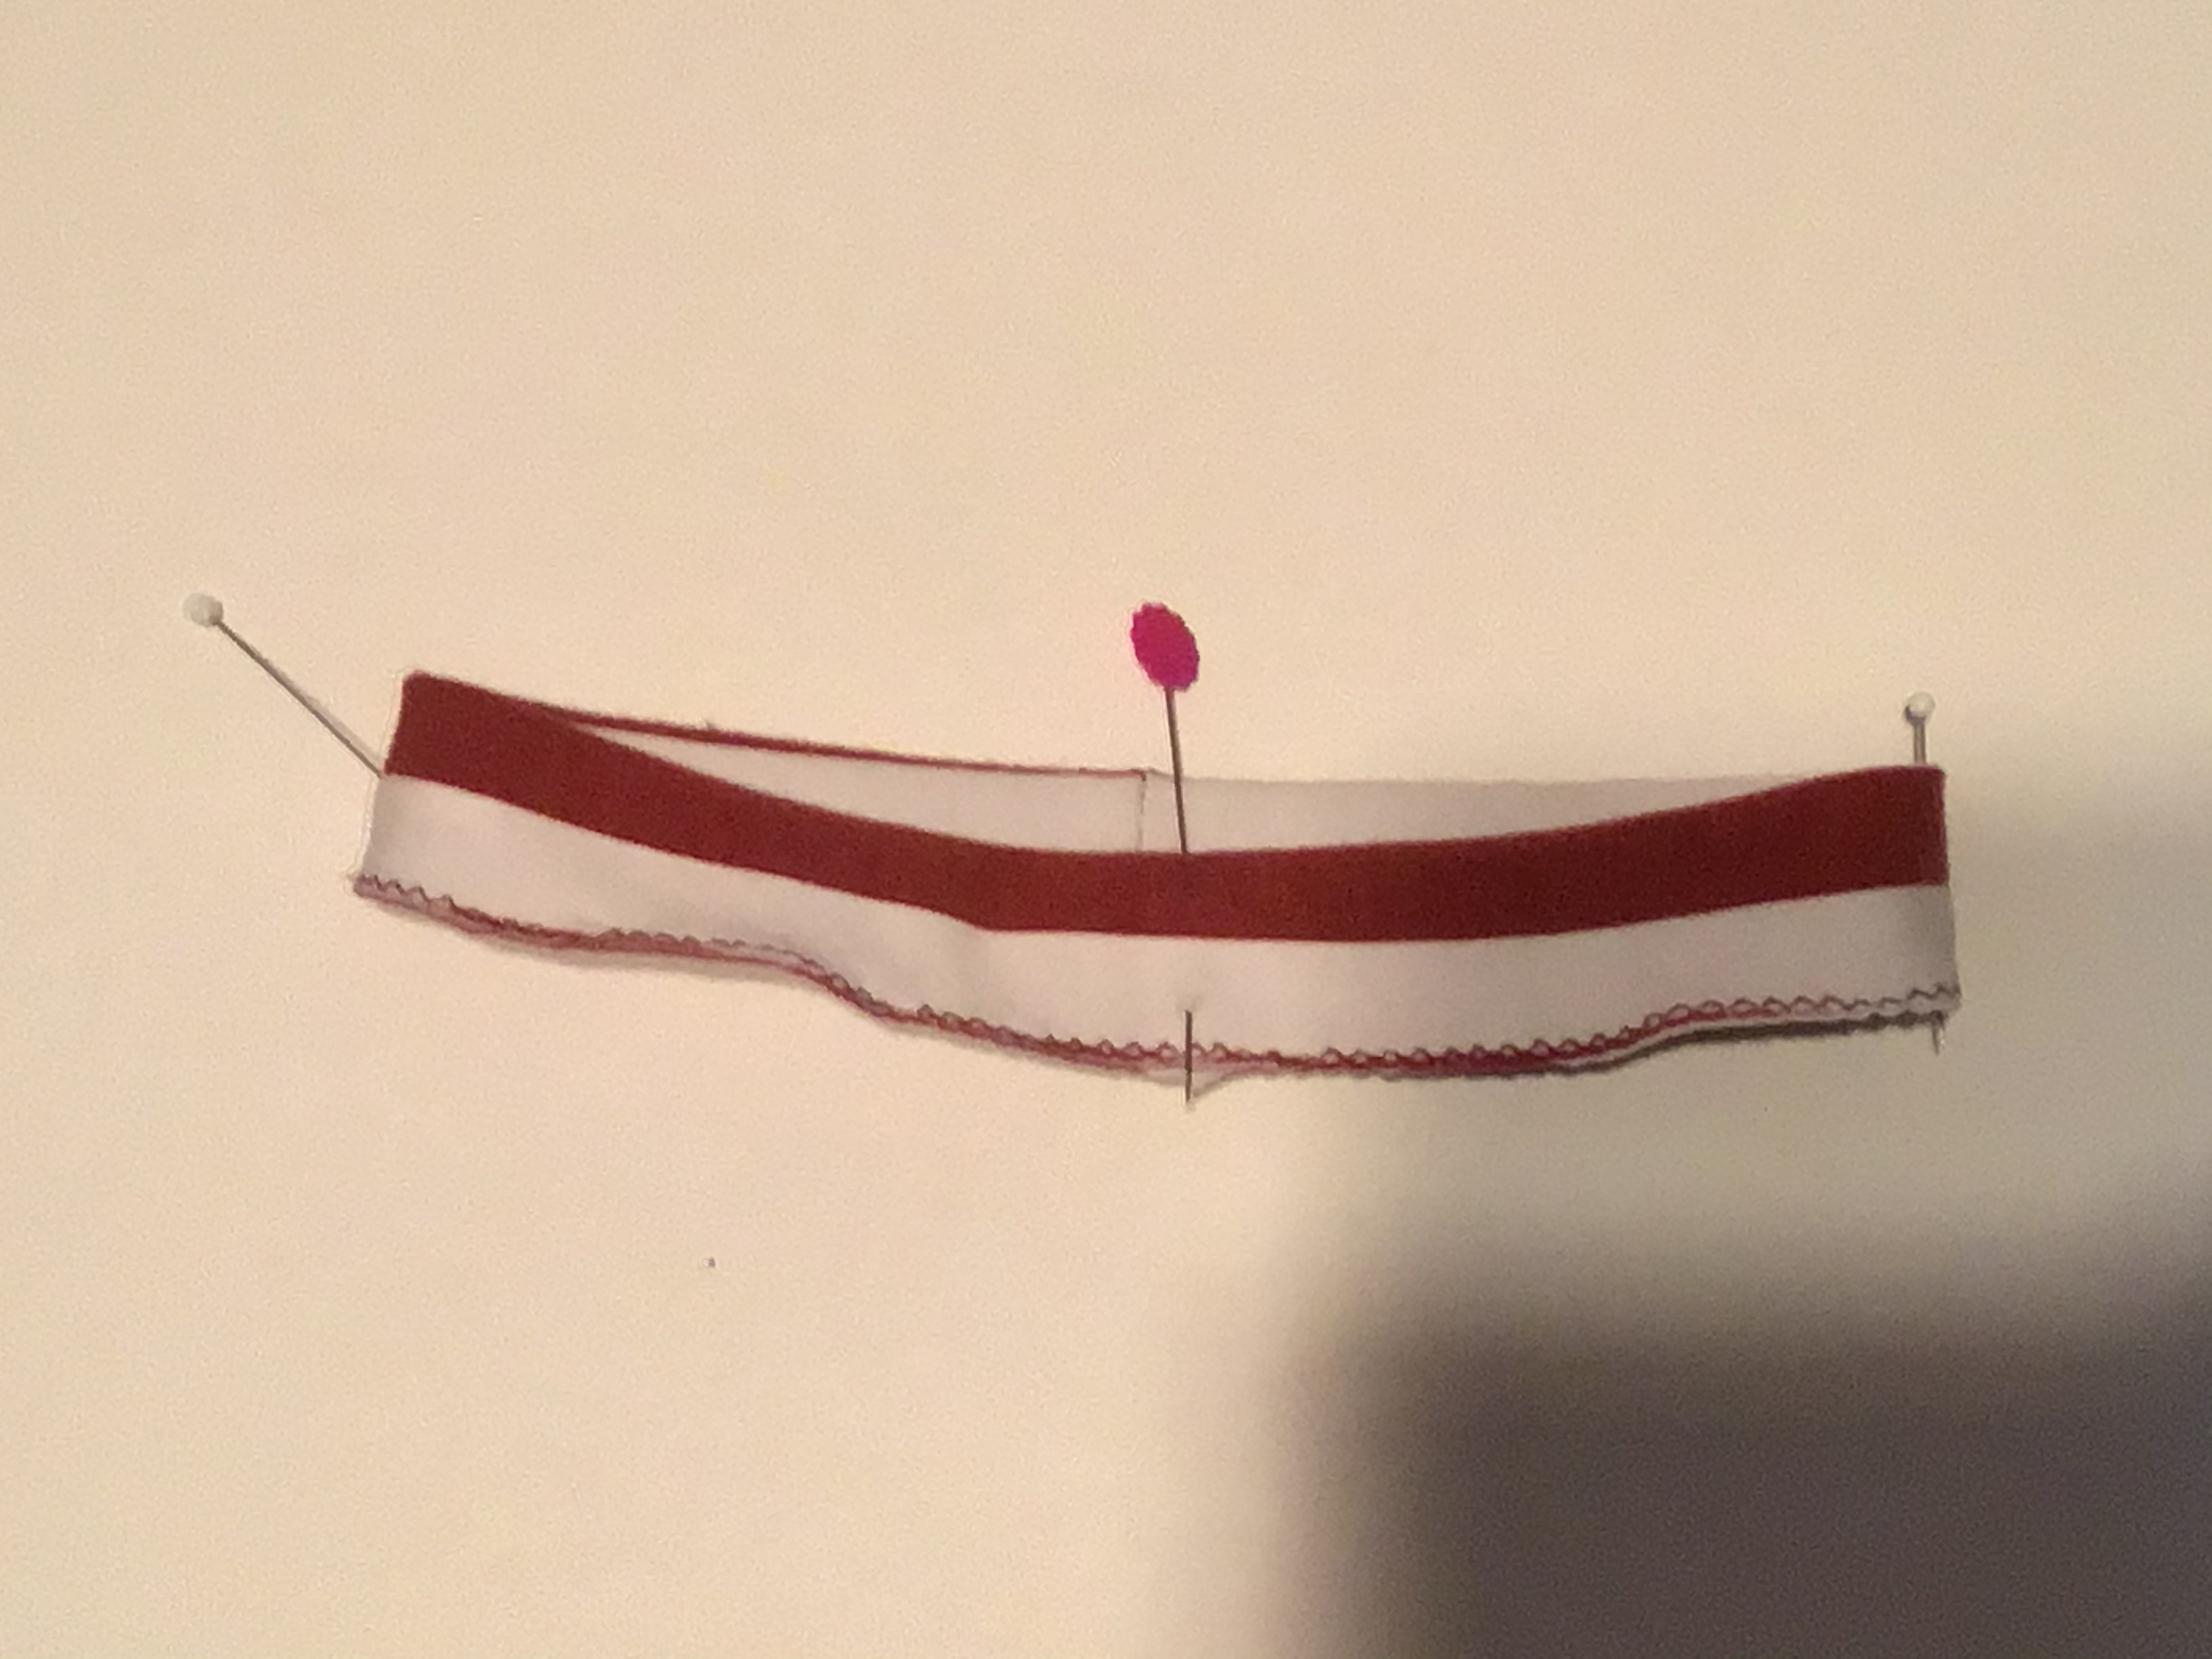
Prepare your bodice the same by marking quarter marks. Wait, you say, there are more than four pins in this neckband! In order to have a smoother neckband, I like to pin about an inch for a child, maybe two for an adult on either side of the side pin. Keep this ratio closer to a one to one ratio, so that there is more neckband stretch at the center front and back curves. It helps to keep the dreaded shoulder puff on a tank or sleeveless top at bay, and helps to curve the center front and back just a little bit more.
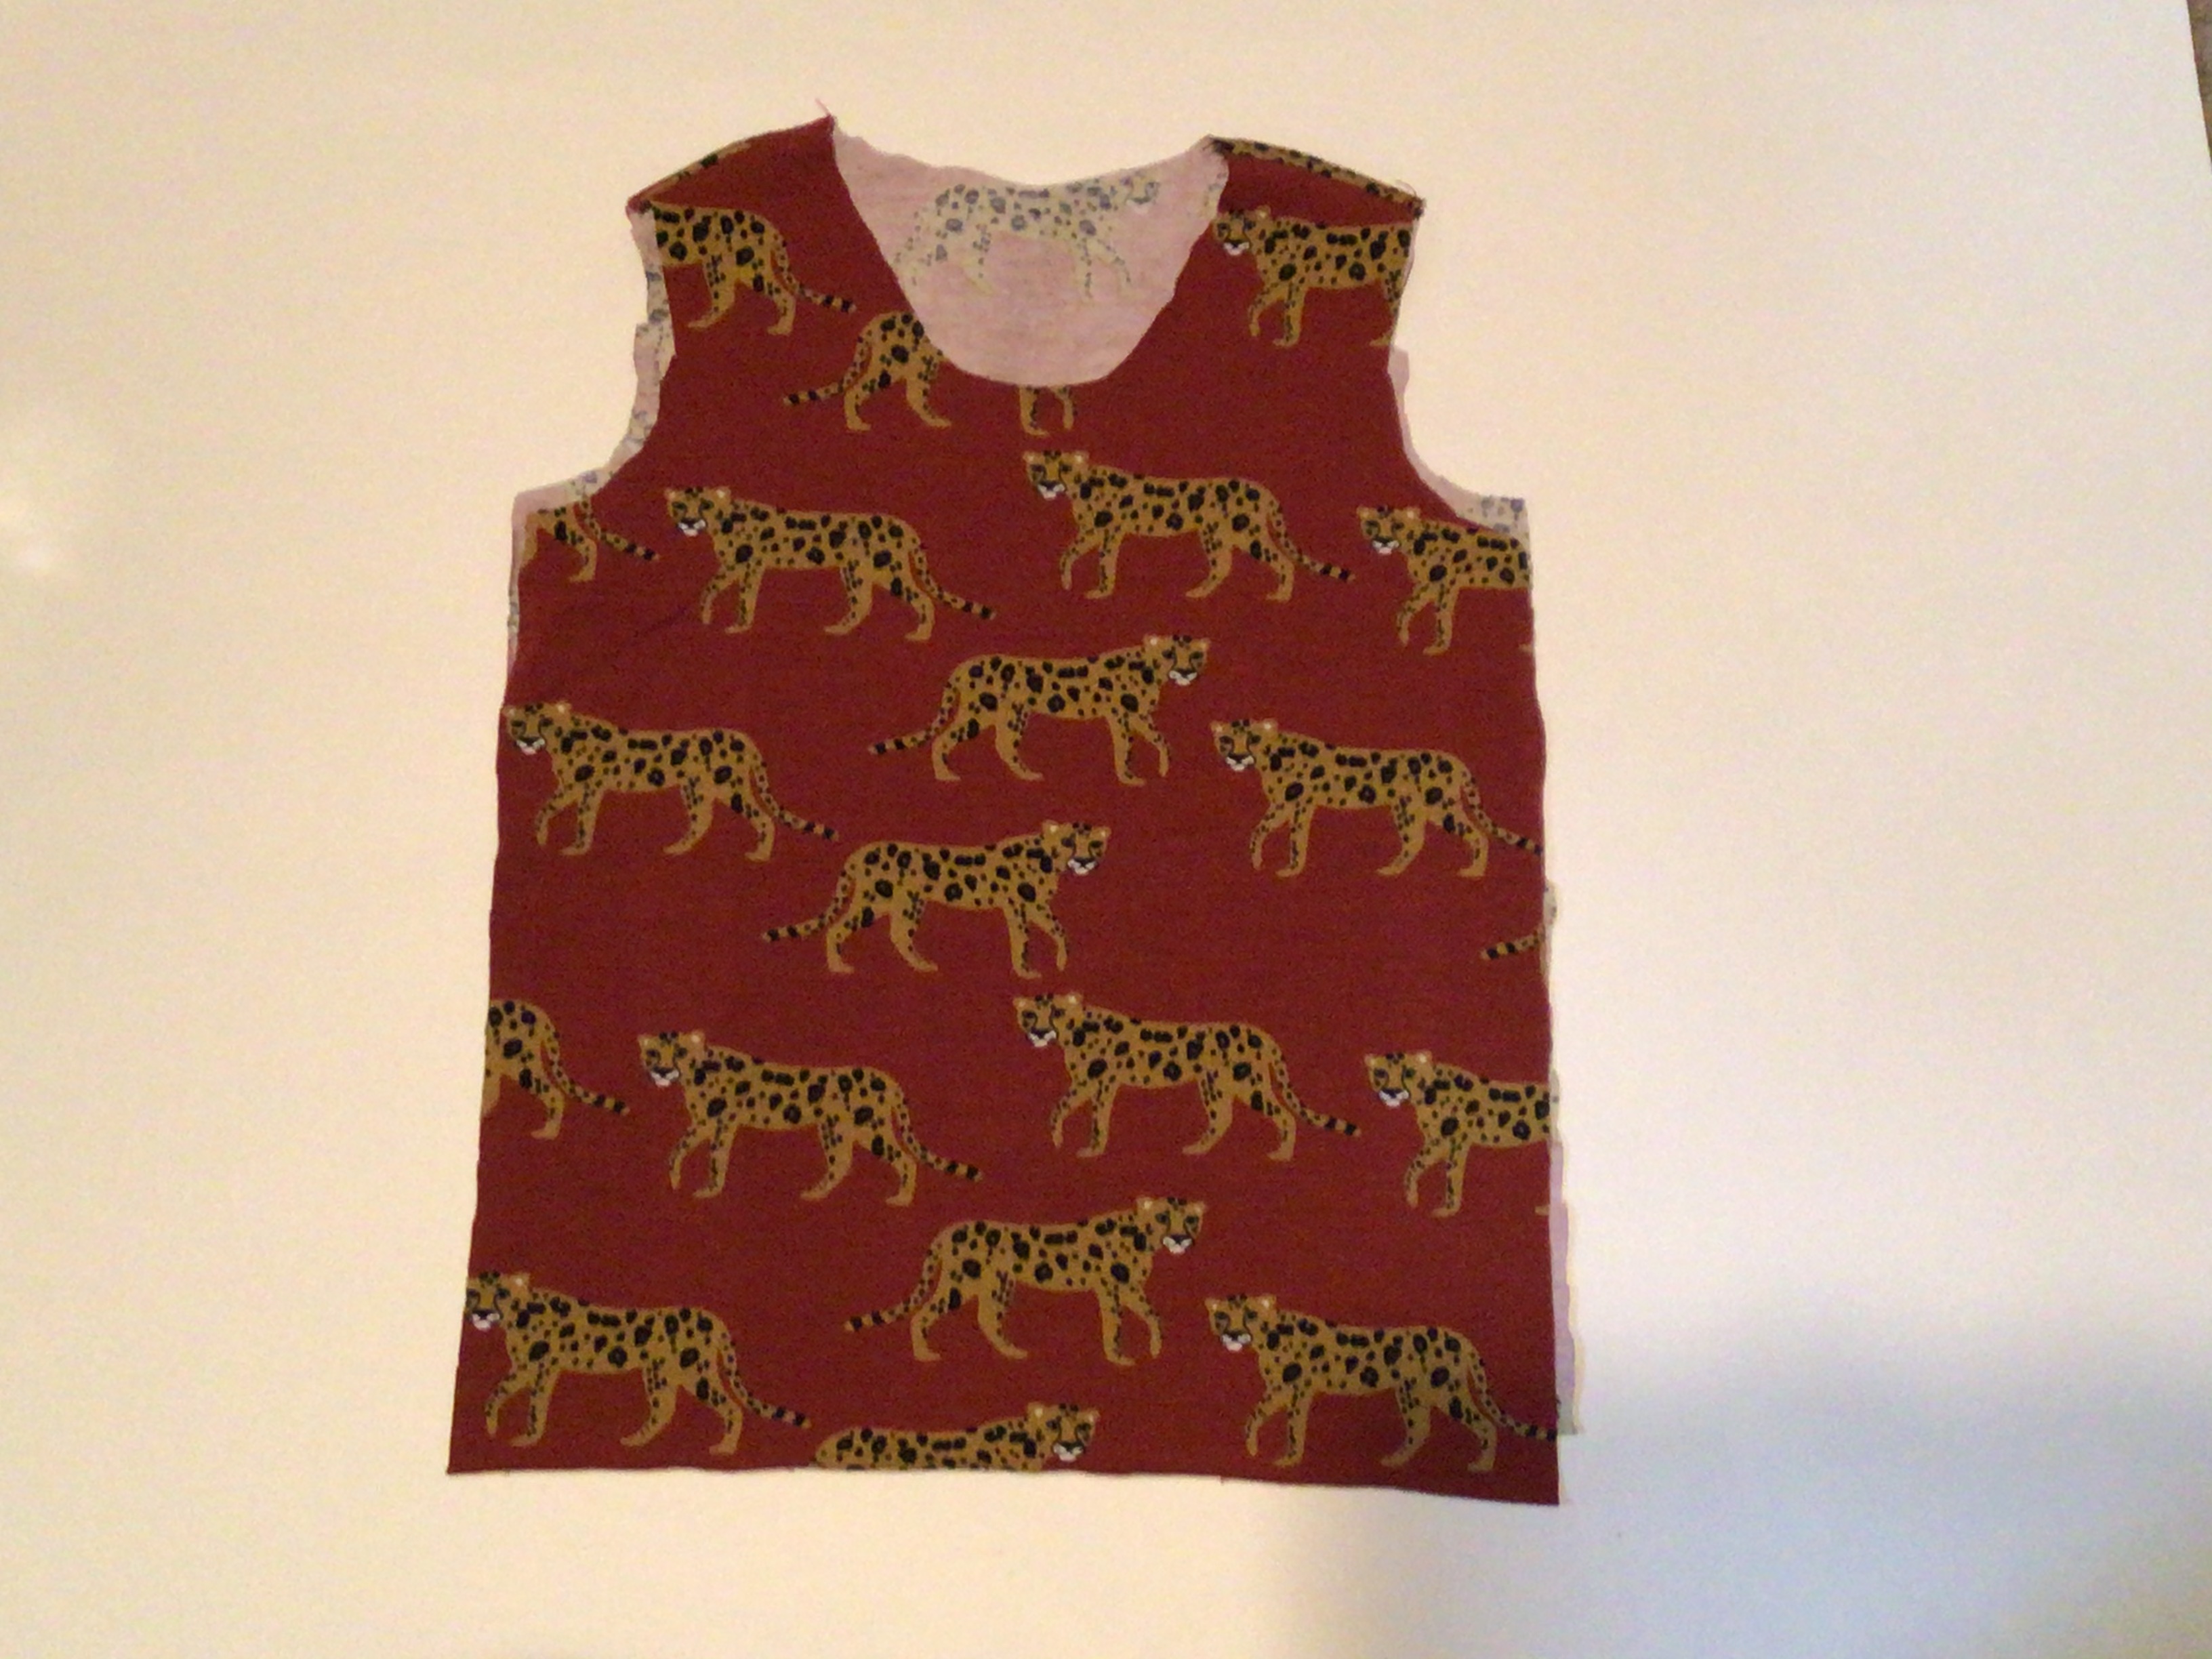
Speaking of tanks. Here is a photo of the Virginia Tank and Stella Shorts that are part of this little capsule. I used the same method around the armscye and neckline to make for a smooth shoulder line, and curved neck and underarm.
My adorable little garden helper in a retro stripe Wanda. Planning more solids, and maybe a dress to go with all the summer outfits.

So many different and fun patterns to make up a great collection of summer play clothes. This post is filled with *affiliate links for favorite versions I have tested and wear in regular rotation. It is quite fulfilling to be able to make my favorite patterns for the newest generation in the family.
*Much appreciation for those that use my affiliate links. It costs you nothing and might generate a small commission from the designer to me. Thanks and Happy sewing!
