Staring at the end of January, wondering when spring will ever arrive, I got the itch to plant some seeds.
Planting by the Moon always conjured images of the witch in Rapunzel and her magic garden. However I am looking at Farmers Almanac Gardening, and found that the last couple days of January this year are good for starting seedbeds! So, on a sunny Saturday, with visions of a magnificent harvest, I pulled the remains of last summer’s garden from a 4×4 raised bed.
The soil seemed to be low, so in one corner, I dug a hole about 18 inches deep, and placed tree limb cuttings my friend and I scavenged from what a neighbor was giving away last October. Why plant wood in your garden? In the spirit of hugelkultur (making raised garden beds filled with rotten wood) I covered that area with the soil from the next hole, added a couple logs and move around the circle till it was complete. The wood behaves like an underground sponge, absorbing excess moisture and then releasing it back to a soil that is somewhat drier. The wood eventually bio degrades completely. Until then, I believe the roots of the plants will figure a way to wind around them. I had two half empty bags of garden soil that topped off the ensemble nicely.
Mr. Mischievous Odin couldn’t stop himself and helped to put holes in the soil. He makes great company in the garden!
There is a basket in the middle that collects compost that feeds the soil below, keyhole style.
Did a quick inventory on my seed stash, and found several varieties that do well in cooler temperatures. Mostly some form of brassica and mache, sometimes known as corn salad. Some will germinate, some will not, but in a week or two some little green thing will poke it’s head out of the soil and make me happy. All of these greens can go in a nice salad, and give me something to do while waiting to plant melons and squash in April.
After these were scattered in the bed, I looked for the sugar snap peas I wanted to plant around the edges, so they could climb up the barrier I installed to keep my furry friend from getting in again! I like to buy them by the pound, so that they can be planted several times in a season.
The PVC idea came from a too-short hose. Holes drilled every 6-8 inches allow for more even water distribution. One of the corners is a 3 way elbow that my hose end fits in snugly. Turn on the faucet and tend to something else for a bit.
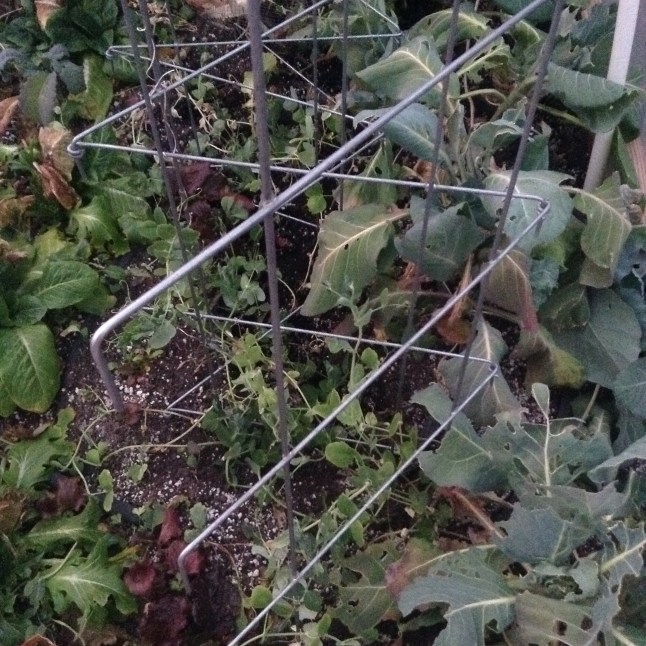
The garden trellis keeps my friend from planting his toys in the soft soil, and does double duty to hold up the reemay and plastic layers that cloche the little plants from the elements. It is a hopeful gamble. More sewing in the garden. I cut squares of reemay off the corners of the big fleece blanket and sewed them together like four darts so it fits snugly over this garden bed like a loosely fitted sheet. Sew reemay before it goes outside, just take my word on this!
Last fall I planted cabbage, lettuce and peas under cover, and they are doing nicely! The uncovered peas produced a few pods then succumbed to the first frosts. No peas yet from the covered plants below, but I am hopeful they will jump into action once the weather warms, and give me something to munch on when I am putting out tomatoes in March. They are covered in plastic and get water when I remember it about every three weeks.
Eliot Coleman, I hope you are right with your four season gardening advice and the double cover method of growing in winter.
