 Just yesterday was my youngest’s birthday. On the phone they lamented that their last good solid tee had seen better days, and that they would be glad of a replacement or two for their birthday, but Christmas would be good too. They specified that they like the shirts with the 3/4 sleeves that are a different color. I remember picking some of these up years ago, and they were favorites forever.
A good raglan shirt is also my favorite to make. However, I am becoming more of a perfectionist in getting that v neck just so. Do you cross the neckband over, or sew the band together in a v shape then attach it?
It occurred to me that the issue I have when attaching the band to a v neck is that what I see when sewing is the underside of the band, not the band that actually is attached to the shirt front. Any slippage there, and the v does not match up with the seam on the band. Wearable, but disappointingly not perfect.
Light-bulb moment! Instead of basting that inch-either-side-of-the-v with both layers of the band, why not baste A SINGLE LAYER of the band to the front side of the shirt? That way, the needle can pivot exactly at the seam line of the band, instead of a stitch or two off center.


The above two photos are just after sewing the first inch of the basting, and the needle is sunk into the center of the seam line of the band. Next, the presser foot is lifted, and the fabric adjusted so that the second part of the neck band is aligned with the second part of the shirt front, so it looks like the photo below.
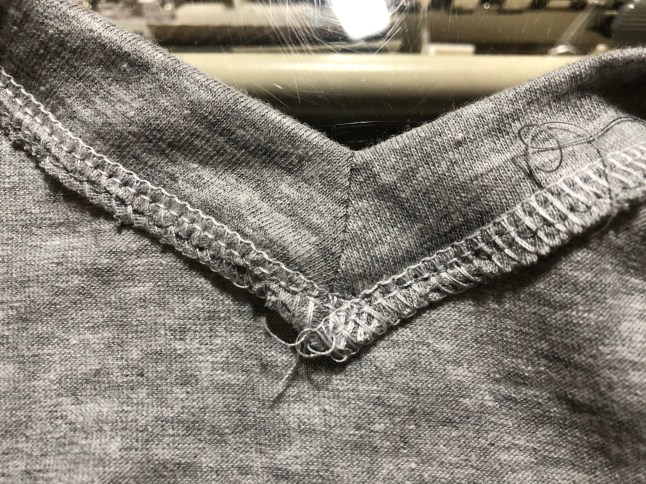
 Here we are with both sides of center front sewn. I used a shorter stitch length (2 on my Bernina). Next step is to flip this assemblage over, and snip into that v on the front of the shirt, just a few threads from your stitching line. After that, fold that band in half so that the center front seams line up. Match up center back of band and shirt, match up quarter marks, and serge around as normal. This is where the underside of the band is caught in the seam!
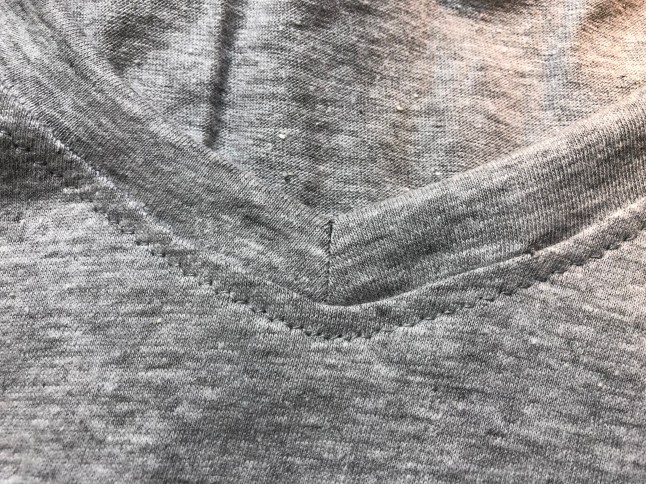
 In this photo, you can see that my snip was not exactly center, but it works to spread out the front, I serge from point, around back to point. I might go back and even out the machine stitching line with the serging line so it looks even on the front.
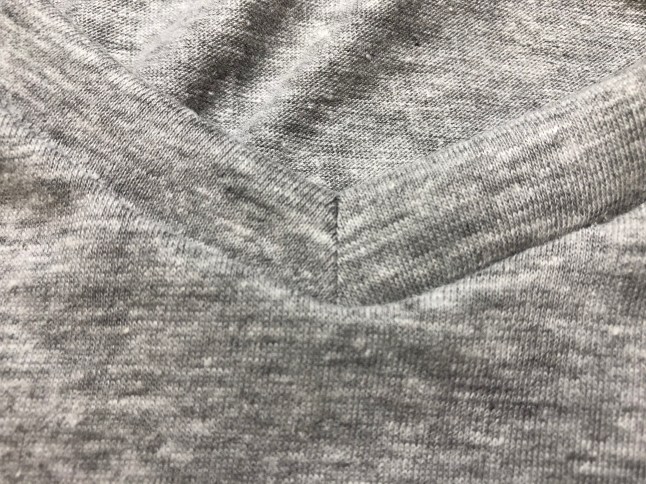 Just a press and a top stitch away from being finished. I love that I can have control over the front side.
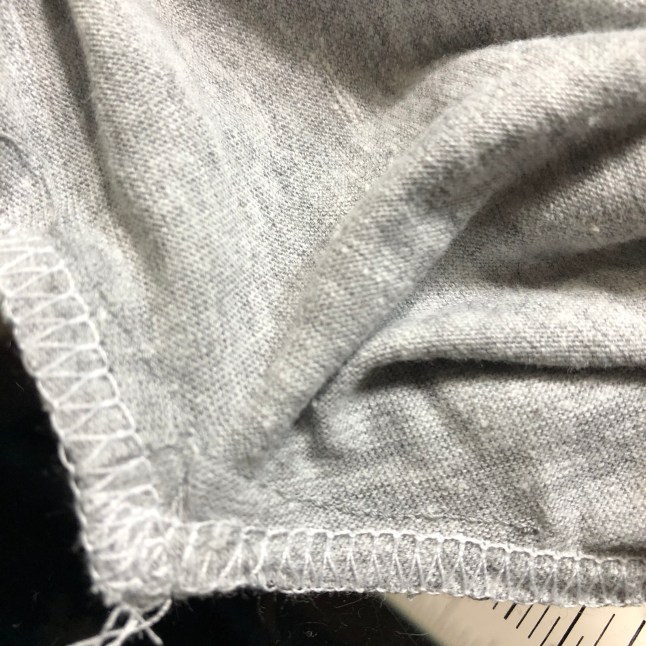
The back side looks like my old way of sewing the front side. Close, but a little off. You can see how the feed dogs pulled the fabric just enough to make it a little off center. My patient kid will not notice or care about this, and will be happy for a v neck raglan! On our way to birthday brunch shortly, and more fabric ordered for Christmas!
 Just a note about the pattern. There are a ton of great raglan patterns out in the PDF world of sewing.
If you happen to live in the 505 or 575 area code, you might be close enough for a class. I am happy to teach in person lessons in the Albuquerque area. Look for me if you are in town!
Thank you for looking! Happy sewing too! Joan

One thought on “Perfecting the V neck”