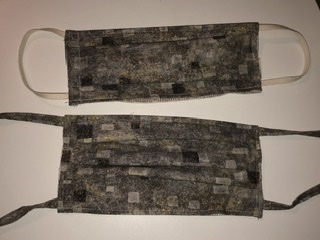
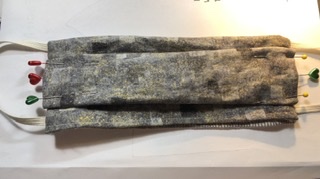
 Scrambling to make masks and keep up with requests I did a little a little pleat experiment. Found some 9×13 inch scraps of a lightweight cotton, whipped up four quick masks Deaconess style, but made a box pleat instead of pleats that all went the same direction. This mask did not have a pocket for additional filtration. Since I do not know who my end user will be, I like to leave the pocket option open.
For the second iteration, I used two different fabric strips that were 7.5 inches wide. Hemmed one long edge of each piece, stitched the two strips together along the other long edge right sides together. Under stitch the seam with the seam allowance towards the lining, 1/8 inch away from the seam on the lining side. If you are using 42 inch wide fabric, this method will net you 4 masks from two 7.5 inch tall strips that are the width of the fabric. If you are not concerned with having a right and wrong side of the mask. (pollen season yard work) then save time with one strip of fabric that is 14 inches or more by the width of the fabric.
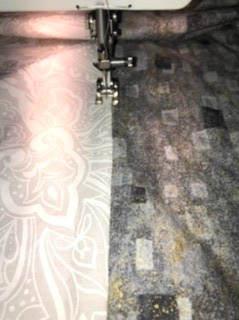
Under stitching
Next I sub cut my strips into 9 inch wide segments.


With the segments cut, I opened the pieces and slipped in the ties (or elastic if you can get it).
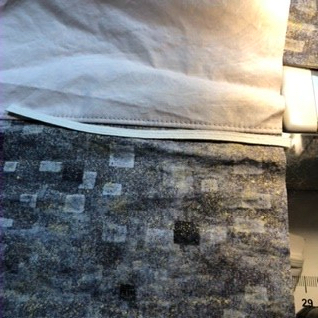
Inserting 7 inch strip of elastic
If you can not find elastic, you can add ties like this. Pin a tie into each of the lining four corners, fold the main fabric over and sew along the right and left sides. Be sure to back stitch over the elastic or tie. If you are sewing elastic, you will need to stitch the top portion of this seam, then stretch the elastic so that the other end of the elastic can be encased at the seam near the bottom of the mask. Repeat for the other side. Leave the hemmed bottom section alone for now. This creates a pocket so that the end user can add additional filtration layers if available/desired.


I like to leave a tiny tail, so my tie does not unravel and work its way loose.

Flip your mask right side out. It will look like this.

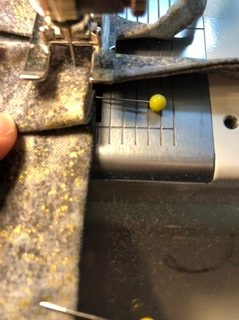
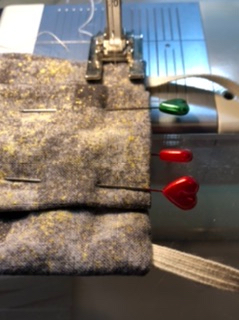
Your job now is to decide how to pleat. Most commercial masks have pleats so that they are angled down, away from the wearer. I put pins in the sides of the mask at the half and quarter marks.
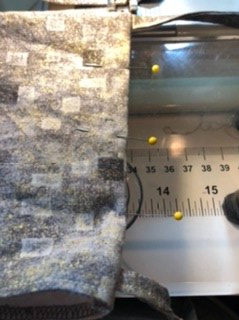
Mask side with pins at the quarter marks
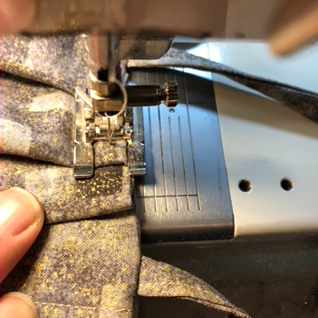
Start your pleating/top stitching at the top (closed) of the mask. Make a few stitches and back stitch. Slip the first pin under as far as it will go.
First pleat.
Sew into this pleat, removing the pin just before it crosses path with the needle.

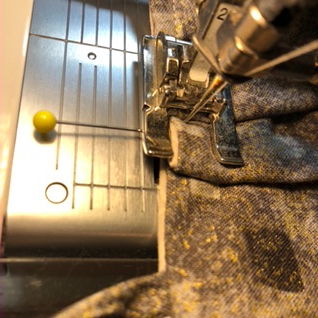
Second pleat
Follow this process of bringing the pin of the next pleat under the mask as you start the current pleat.
Last pleat
When you get to the end of the row of pleats, pivot and top stitch the lining and main mask hems together for about one inch. Then stitch back to the side and either very close to the edge, or 1/4 inch the other side of your previous pleat top stitching, sew back up the row of pleats. Note some machines will be happier sewing on the very edge and others may like sewing on the other side of your first set of stitches. When you get to the top, pivot and edge stitch across the top of the mask, and top stitch the other row of pleats.
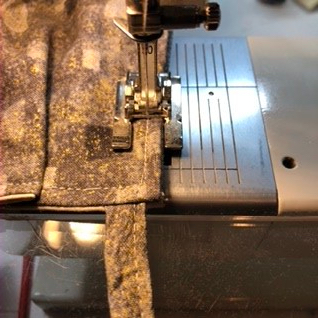
Top stitching about an inch at the corner of the hem.

Stitching back up the first row of pleats
Side 2
Second side pleat tucking under and top stitching.
Top stitch the second side mirror image to the first. Aim to make your pleats symmetrical. The body of your mask will be under the head of the machine. Once you have your pleats stitched down, pivot at the hem and secure about an inch of the hem on this side. Turn around stitch back towards the edge, pivot again, and stitch back up the second set of pleats. Secure your stitches and admire your work!
Option 2 – Box pleat. Depending on your user’s situation, you can make a box pleat. I found this method to be a lot faster. For a person who wants a mask for casual use this may be a good option. Concerns about things being caught in the tiny pocket formed at the top of the pleat are a good reason to use the method above to make a louvered pleat.
Not worried about that, read on…
Take your freshly turned right side out mask and fold the hem to the top of the mask. Find the center spot between the edges and the newly created fold. Place a pin on either side.

Open up the mask, and open up the pleat so that it is spread evenly across the center pin.
In this photo, I added a pin on either side of the pleat. Carefully sew down this side, securing that pleat. Sew down, across the bottom one inch, back to the edge, back up, across the top and repeat the pleat securing process on side two.
Box pleated
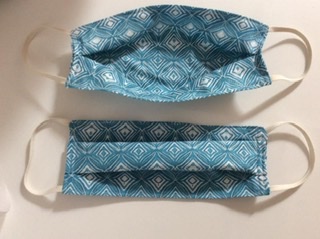
I was able to get a tighter side by making the box pleat than I was with the triple pleat. Even with the same fabric both sides it is simple to tell the inside from the outside with the box pleat. Different people will have different preferences. Go forth and sew and know your work is appreciated.
Disclaimer: I can not test this method for virus protection. Please do your own research, prewash your fabric and stay healthy! Happy sewing – Joan

Joan, you are above and beyond. This is a meticulous tutorial. One lady that said “you should make a tutorial” might not of known the time it takes to do so. Maybe she did and knew you could pull it off. Nevertheless, I appreciate the love, time, and talent that you devote to all of your endeavors!
~This Too Shall Pass~ Laurie
Sent from my iPad
>
LikeLike