I recently tested the Sheila top and dress from 5out of 4 patterns. It is part of their basics line, and has very detailed instructions. A well drafted T shirt dress is a great layering piece, easy to accessorize.
One thing. I need pockets. Life hands you keys or a wallet, or something else that needs a spot to be. Purses are great, but I like to travel light. I sew pockets in everything. This is my new favorite method.


I drafted my own pocket here, but if you have Taylor, that pocket will work just fine.
- Cut 4 pockets. Two sets of two mirrored pieces.
2. On the wrong side of your dress front, mark where you would like the top of your pocket opening. I made this one about 8 inches from the armcye. I think that ended up just a tad high. Somewhere between 9 to 10 inches would be more comfortable. Make your top mark or notch at this point, and the next mark will be 5.5 inches below that.
3. Align one pocket so that the top of the pocket is one inch above that start mark with the right side of the pocket facing the right side of the dress front.
4. Stitch from mark to mark, being sure to secure your stitches at each mark with 3-4 back stitches.
5. Clip into the seam allowance just to the end of the stitches.

The top and bottom of the stitching is marked with a notch.
6. Open out that pocket and under stitch. Understitching helps to roll the pocket to the back so it looks tidy in the next step.
7. Fold the pocket and seam allowances to the right, and stitch parallel to the seam line 1/4 inch away, catching the pocket and seam allowances in your seam. Start and stop your seam parallel to the first seam made in step 4. The pins mark the stop and start spots below.

Pocket seam opened and understitched on pocket side, with seam allowances included. Stitching is 1/4 from the seam.
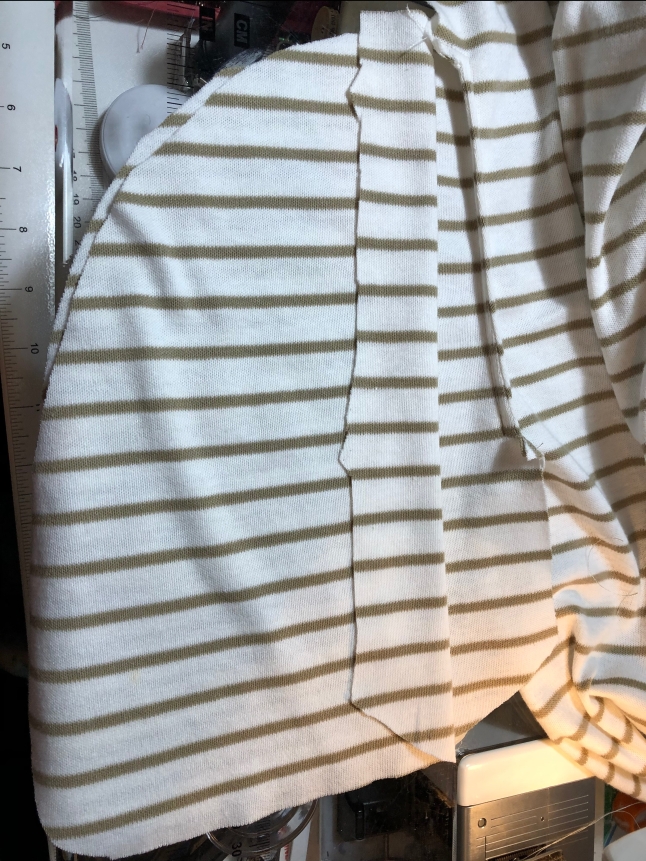
8. Fold the pocket back to the wrong side of the dress front. Pull the seam allowances out at the top and bottom of your pocket opening. You will have a sweet 5.5 inch indentation in the side of your dress front that looks like the photo below. This is your pocket opening!

9. Top stitch that indentation starting at the edge of the fabric sew in about 1/2 inch, and turn, so you are stitching about 1/4 inch from the 5.5 inch opening of the pocket, then turn again and stitch off the edge. Your seam will look like this [.
Top stitching on the pocket opening.
10. Next align the second pocket with the first.
Second pocket placed on top of the previously sewn pocket.
10. Stitch the edges of the two pockets together around the bottom around the side and over to the top.
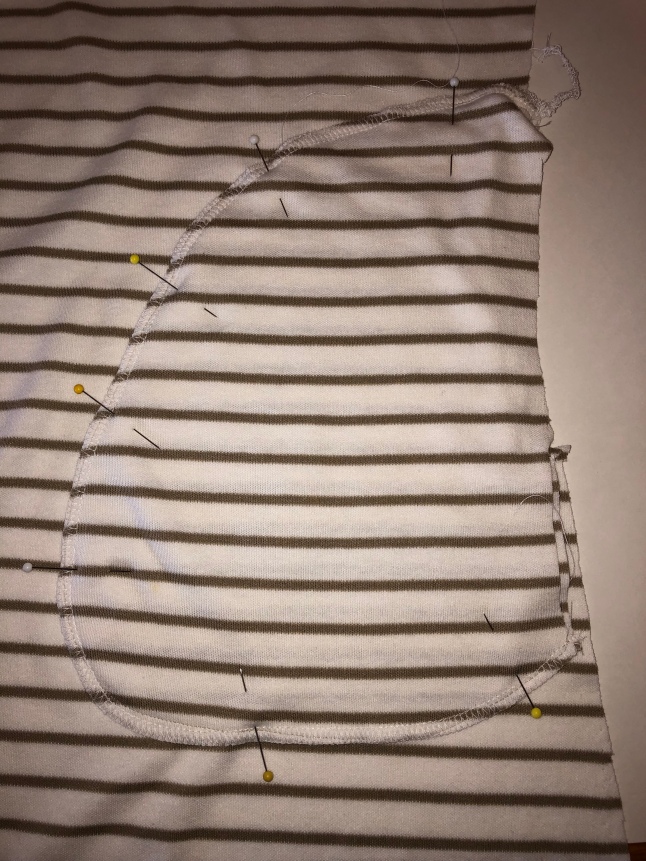
Serged edges of pocket ready to be top stitched.
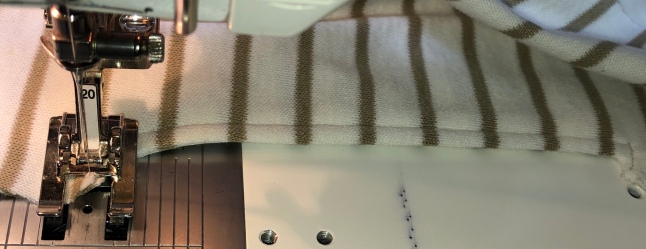
11. Pin or use wonder tape to adhere the pocket to the front of the dress and top stitch around the edge of the pocket where the serging is in the above photo. Use a stretch stitch, consider a double row of stitches!

The open toe embroidery foot works great for maintaining an even edge.
12. Baste along the side seam, so that the edges of the top and bottom of the pocket are secured, and the opening is still open.
13. Make the other pocket. Tip: lay your dress flat to be sure pockets are even and symmetrical before top stitching the second one.

Finished pocket secured into side seam and front of garment.
14. When you are ready, stitch your side seams as you normally would, making sure to sew right up to the opening without closing it.
Enjoy wearing your garment with stitched down pockets. Want to continue sewing fancy? Try out a blind hem.
This post may contain affiliate links.
